TP-Link Archer AX11000 User Manual
Mu-mimo tri-band gaming router
Hide thumbs
Also See for Archer AX11000:
- Installation manual ,
- User manual (130 pages) ,
- Quick installation manual (2 pages)

Related Manuals for TP-Link Archer AX11000


Summary of Contents for TP-Link Archer AX11000
- Page 1 User Guide AX11000 MU-MIMO Tri-Band Gaming Router Archer AX11000 REV1.0.0 1910012505...
-
Page 2: Table Of Contents
5. 4. Manage the Router via the TP-Link Tether App ......24 Chapter 6 Guest Network 6. - Page 3 7. 1. 1. Access the USB Device Locally ........29 7.
- Page 4 12. 8. 3. Connect via the Client’s PIN ......... 72 12.
-
Page 5: About This Guide
About This Guide This guide is a complement of Quick Installation Guide. The Quick Installation Guide instructs you on quick internet setup, and this guide provides details of each function and shows you the way to configure these functions appropriate to your needs. When using this guide, please notice that features of the router may vary slightly depending on the model and software version you have, and on your location, language, and internet service provider. - Page 6 The Quick Installation Guide can be found where you find this guide or inside the package of the router. Specifications can be found on the product page at http://www.tp-link.com. A Technical Support Forum is provided for you to discuss our products at http://forum.tp-link.com.
-
Page 7: Chapter 1 Get To Know About Your Router
Chapter Get to Know About Your Router This chapter introduces what the router can do and shows its appearance. It contains the following sections: • Product Overview • Panel Layout... -
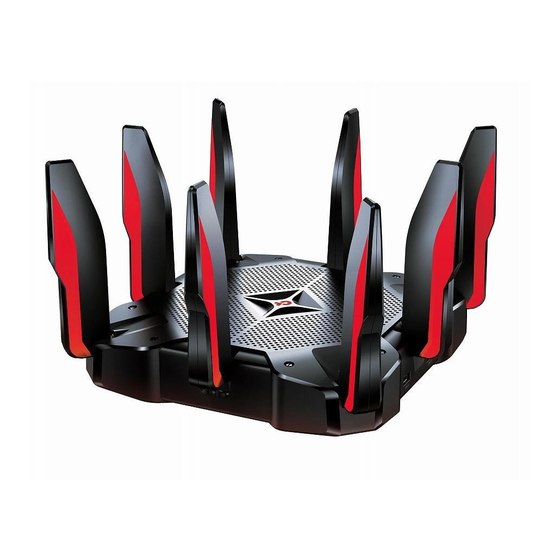
Page 8: Product Overview
Ethernet ports supply high-speed connection to your wired devices. Moreover, it is simple and convenient to set up and use the TP-Link router due to its intuitive web interface and the powerful Tether app. -
Page 9: The Side And Back Panel
Chapter 1 Get to Know About Your Router LED Explanation Name Status Indication Pulsing The system is starting up orange Solid white The router is working normally. No internet connection. Orange The router is connected to the internet, but the Wi-Fi is off. The firmware is being upgraded, WPS connection is being Pulsing established or the router is being reset. - Page 10 Chapter 1 Get to Know About Your Router The following parts (view from left to right) are located on the rear panel. Item Description USB 3.0 Ports For connecting your USB storage device or USB printer to the router. Use a pin to press and hold this button until the LED blinks to reset the router Reset Button to its factory default settings.
-
Page 11: Chapter 2 Connect The Hardware
Chapter Connect the Hardware This chapter contains the following sections: • Position Your Router • Connect Your Router... -
Page 12: Position Your Router
Chapter 2 Connect the Hardware Position Your Router • The router should not be located in a place where it will be exposed to moisture or excessive heat. • Place the router in a location where it can be connected to multiple devices as well as to a power source. - Page 13 Chapter 2 Connect the Hardware 1. Connect the modem to your router’s Internet port with an Ethernet cable. 2. Turn on the modem, and then wait about 2 minutes for it to restart. 3. Connect the power adapter to the router and turn on the router. 4.
- Page 14 Chapter 2 Connect the Hardware WLAN TP-Link_2017 TP-Link_Home My Home My Network close to Home Network TP-Link_Network TP-Link_Test...
-
Page 15: Chapter 3 Log In To Your Router
Chapter Log In to Your Router... - Page 16 • If the login window does not appear, please refer to the Section. • If you have registered a TP-Link ID and bound your cloud router to it, the login password you created here will be invalid. Please log in to the cloud router using your TP-Link ID.
-
Page 17: Chapter 4 Set Up Internet Connection
Furthermore, you can also set up an IPv6 connection if your ISP provides IPv6 service. It contains the following sections: • Use Quick Setup Wizard • Quick Setup via Bluetooth with TP-Link Tether App • Manually Set Up Your Internet Connection • Set Up the Router as an Access Point •... -
Page 18: Use Quick Setup Wizard
• To learn more about the TP-Link Cloud service, please refer to the TP-Link Cloud Service section. • If you do not want to register a TP-Link ID now, you may click Log In Later to proceed. • If you have changed the preset wireless network name (SSID) and wireless password during the Quick Setup process, all your wireless devices must use the new SSID and password to connect to the router. -
Page 19: Manually Set Up Your Internet Connection
ISP. Follow the steps below to check or modify your internet connection settings. 1. Visit http://tplinkwifi.net, and log in with your TP-Link ID or the password you set for the router. - Page 20 Chapter 4 Set Up Internet Connection 2 ) If you choose Static IP, enter the information provided by your ISP in the corresponding fields. 3 ) If you choose PPPoE, enter the Username Password provided by your ISP. PPPoE users usually have DSL cable modems. 4 ) If you choose L2TP, enter the Username Password...
- Page 21 Chapter 4 Set Up Internet Connection parameters are needed according to the secondary connection you have chosen. 5 ) If you choose PPTP, enter the Username and Password, and choose the secondary connection (Dynamic IP or Static IP) provided by your ISP. Different parameters are needed according to the secondary connection you have chosen.
-
Page 22: Set Up The Router As An Access Point
Set Up the Router as an Access Point The router can work as an access point, transforming your existing wired network to a wireless one. 1. Visit http://tplinkwifi.net, and log in with your TP-Link ID or the password you set for the router. 2. Go to Advanced >... - Page 23 Chapter 4 Set Up Internet Connection 1. Visit http://tplinkwifi.net, and log in with your TP-Link ID or the password you set for the router. 2. Go to Advanced > IPv6. 3. Enable IPv6 and select the internet connection type provided by your ISP.
- Page 24 Chapter 4 Set Up Internet Connection PPPoE: By default, the router uses the IPv4 account to connect to the IPv6 server. Click Advanced Settings to input further information if your ISP requires. Click SAVE and then click CONNECT. Note: If your ISP provides two separate accounts for the IPv4 and IPv6 connections, please untick the PPPoE same session with IPv4 connection checkbox and manually enter the username and password for the IPv6...
- Page 25 Chapter 4 Set Up Internet Connection 5. Configure LAN ports. Windows users are recommended to choose from the first two types. Fill in Address Prefix provided by your ISP, and click SAVE. 6. Click Status to check whether you have successfully set up an IPv6 connection. Tips: Visit the section if there is no internet connection.
-
Page 26: Chapter 5 Tp-Link Cloud Service
TP-Link Cloud service provides a better way to manage your cloud devices. Log in to your router with a TP-Link ID, and you can easily monitor and manage your home network when you are out and about via the Tether app. To ensure that your router stays new and gets better over time, the TP-Link Cloud will notify you when an important firmware upgrade is avaliable. -
Page 27: Register A Tp-Link Id
IDs. • Once the router is bound to your TP-Link ID, you need to log in to the router with the TP-Link ID. • Once you have registered a TP-Link ID on the web management page, you can only register another TP-Link ID via the Tether APP. -
Page 28: Add Tp-Link Id To Manage The Router
3. Click , enter another TP-Link ID as needed and click Save. Note: If you need another TP-Link ID, please register a new one via the Tether app. Refer to Manage the Router via the TP-Link Tether App to install the app and register a new TP-Link ID. -
Page 29: Chapter 6 Guest Network
Chapter Guest Network This function allows you to provide Wi-Fi access for guests without disclosing your main network. When you have guests in your house, apartment, or workplace, you can create a guest network for them. In addition, you can customize guest network options to ensure network security and privacy. -
Page 30: Create A Network For Guests
Chapter 6 Guest Network Create a Network for Guests 1. Visit http://tplinkwifi.net, and log in with your TP-Link ID or the password you set for the router. 2. Go to Advanced > Wireless > Guest Network. 3. Create a guest network as needed. - Page 31 Chapter 6 Guest Network • Allow guests to see each other Tick this checkbox if you want to allow the wireless clients on your guest network to communicate with each other via methods such as network neighbors and Ping. • Allow guests to access my local network Tick this checkbox if you want to allow the wireless clients on your guest network to communicate with the devices connected to your router’s LAN ports or main...
-
Page 32: Chapter 7 Usb Settings
Chapter USB Settings This chapter describes how to use the USB ports to share files, media and a printer from the USB storage devices over your home network locally, or remotely through the internet. The router supports USB external flash drives, hard drives and USB printers. It contains the following sections: •... -
Page 33: Access The Usb Storage Device
Chapter 7 USB Settings Access the USB Storage Device Insert your USB storage device into the router’s USB port and then access files stored there locally or remotely. Tips: • If you use USB hubs, make sure no more than 4 devices are connected to the router. •... -
Page 34: Access The Usb Device Remotely
Chapter 7 USB Settings Open the Windows Explorer (or go to Computer) and type the server address \\tplinkwifi.net ftp://tplinkwifi.net in the address bar, then press Enter. Windows computer 1 ) Select > Connect to Server. 2 ) Type the server address smb://tplinkwifi.net. 3 ) Click Connect. - Page 35 Note: If your ISP assigns a private WAN IP address (such as 192.168.x.x or 10.x.x.x), you cannot use this feature because private addresses are not routed on the Internet. Follow the steps below to configure remote access settings. Visit http://tplinkwifi.net, and log in with your TP-Link ID or the password you set for the router. Go to Advanced >...
-
Page 36: Customize The Access Settings
Visit http://tplinkwifi.net, and log in with your TP-Link ID or the password you set for the router. - Page 37 Chapter 7 USB Settings Now you can access the USB disk by visiting \\MyShare (for Windows) or smb:// MyShare (for Mac). ¾ To only share specific content: Focus on the Secure Sharing section. Click the button to specify sharing folders and click SAVE.
-
Page 38: Media Sharing
Time Machine Time Machine backs up all files on your Mac computer to a USB storage device connected to your router. Visit http://tplinkwifi.net, and log in with your TP-Link ID or the password you set for the router. Go to Advanced >... - Page 39 Chapter 7 USB Settings Tick the checkbox to enable Time Machine. Click Select to select a location for Time Machine backups. Set the Size Limit for Backups. Note: 0 means no limit for the space. Click SAVE.
-
Page 40: Chapter 8 Homecare - Parental Controls, Qos, Antivirus
Chapter HomeCare – Parental Controls, QoS, Antivirus TP-Link HomeCare powered by Trend Micro provides a kit of features to help you create a personalized network that caters for the whole family. You can ensure appropriate internet access for everyone with Parental Controls, save bandwidth for the things that matter with QoS and keep your network secure with built-in Antivirus. -
Page 41: Parental Controls
2 hours every day and block internet access during bed time (10 PM to 7 AM) on weekdays. How can I 1 Visit http://tplinkwifi.net, and log in with your TP-Link ID or do that? the password you set for the router. - Page 42 Chapter 8 HomeCare – Parental Controls, QoS, Antivirus 1 ) Select a filter level based on the age of the family member this profile belongs to. Blocked content will then be displayed in the Category Filter list. 2 ) If needed, you can edit the blocked content by selecting the categories in the Category Filter list.
-
Page 43: Scenario 2: Monitoring Internet Usage
Chapter 8 HomeCare – Parental Controls, QoS, Antivirus 1 ) Enable Time Limits on Monday to Friday and Saturday & Sunday then set the allowed online time to 2 hours each day. 2 ) Enable Bed Time on Monday to Friday and use the up/ down arrows or enter times in the fields. -
Page 44: Qos
Chapter 8 HomeCare – Parental Controls, QoS, Antivirus How can I 1 Visit http://tplinkwifi.net, and log in with your TP-Link ID or do that? the password you set for the router. 2 Go to Basic > HomeCare > Parental Controls Advanced >... -
Page 45: Antivirus
Prevents infected devices from sending your sensitive information to clients outside your network or spreading security threats. ¾ To access your router’s Antivirus settings: 1. Visit http://tplinkwifi.net, and log in with your TP-Link ID or the password you set for the router. 2. Go to Basic >... - Page 46 Chapter 8 HomeCare – Parental Controls, QoS, Antivirus 3. Choose the protection types you want to enable. It is recommended to keep them all enabled to ensure the best protection for your network. 4. Click to view threats that have been detected and resolved.
-
Page 47: Chapter 9 Network Security
Chapter Network Security This chapter guides you on how to protect your home network from cyber attacks and unauthorized users by implementing these three network security functions. You can protect your home network against DoS (Denial of Service) attacks from flooding your network with server requests using DoS Protection, block or allow specific client devices to access your network using Access Control, or you can prevent ARP spoofing and ARP attacks using IP &... -
Page 48: Protect The Network From Cyber Attacks
The SPI (Stateful Packet Inspection) Firewall protects the router from cyber attacks and validate the traffic that is passing through the router based on the protocol. This function is enabled by default. Visit http://tplinkwifi.net, and log in with your TP-Link ID or the password you set for the router. Go to Advanced >... -
Page 49: Ip & Mac Binding
Chapter 9 Network Security 3 ) Select devices in the Online Devices list. The selected devices will be added to Devices in Blacklist automatically. To allow specific device(s): 1 ) Select Whitelist and click Save. 2 ) Click in the Devices in Whitelist section. - Page 50 Chapter 9 Network Security I want to: Prevent ARP spoofing and ARP attacks. How can I 1 Visit http://tplinkwifi.net, and log in with your TP-Link ID or do that? the password you set for the router. 2 Go to Advanced >...
-
Page 51: Chapter 10 Nat Forwarding
The TP-Link router supports four forwarding rules. If two or more rules are set, the priority of implementation from high to low is Virtual Servers, Port Triggering, UPNP and DMZ. -
Page 52: Share Local Resources On The Internet By Virtual Servers
How can I 1 Assign a static IP address to your PC, for example do that? 192.168.0.100. 2 Visit http://tplinkwifi.net, and log in with your TP-Link ID or the password you set for the router. 3 Go to Advanced >... -
Page 53: Open Ports Dynamically By Port Triggering
VoIPs, video players and common applications including MSN Gaming Zone, Dialpad and Quick Time 4 players, etc. Follow the steps below to configure the Port Triggering rules: 1. Visit http://tplinkwifi.net, and log in with your TP-Link ID or the password you set for the router. 2. Go to Advanced >... -
Page 54: Make Applications Free From Port Restriction By Dmz
Chapter 10 NAT Forwarding 3. Click View Existing Applications, and select the desired application. The Triggering Port, External Port Protocol will be automatically filled in. The following picture takes application MSN Gaming Zone as an example. 4. Click OK. Tips: •... -
Page 55: Make Xbox Online Games Run Smoothly By Upnp
How can I 1 Assign a static IP address to your PC, for example do that? 192.168.0.100. 2 Visit http://tplinkwifi.net, and log in with your TP-Link ID or the password you set for the router. 3 Go to Advanced >... - Page 56 Therefore, you can play Xbox online games without a hitch. Internet XBOX Router If necessary, you can follow the steps to change the status of UPnP. 1. Visit http://tplinkwifi.net, and log in with your TP-Link ID or the password you set for the router. 2. Go to Advanced >...
-
Page 57: Chapter 11 Vpn Server
Chapter VPN Server The VPN (Virtual Private Networking) Server allows you to access your home network in a secured way through internet when you are out of home. The router offers two ways to setup VPN connection: OpenVPN and PPTP (Point to Point Tunneling Protocol) VPN. OpenVPN is somewhat complex but with greater security and more stable. -
Page 58: Use Openvpn To Access Your Home Network
VPN client software on the remote device. Please follow the steps below to set up an OpenVPN connection. Step1 Set up OpenVPN Server on Your Router 1. Visit http://tplinkwifi.net, and log in with your TP-Link ID or the password you set for the router. 2. Go to Advanced >... -
Page 59: Use Pptp Vpn To Access Your Home Network
Chapter 11 VPN Server 6. Select your Client Access type. Select Home Network Only if you only want the remote device to access your home network; select Internet and Home Network you also want the remote device to access internet through the VPN Server. 7. - Page 60 Chapter 11 VPN Server 1. Visit http://tplinkwifi.net, and log in with your TP-Link ID or the password you set for the router. 2. Go to Advanced > VPN Server > PPTP VPN, and select Enable VPN Server. Note: Before you enable Server, we recommend you configure Dynamic DNS Service (recommended) or assign a static IP address for router’s WAN port and synchronize your...
- Page 61 Chapter 11 VPN Server 3 ) Click OK. Step 2. Configure PPTP VPN Connection on Your Remote Device The remote device can use the Windows built-in PPTP software or a third-party PPTP software to connect to PPTP Server. Here we use the Windows built-in PPTP software as an example.
- Page 62 Chapter 11 VPN Server 4. Select Use my Internet connection (VPN). 5. Enter the internet IP address of the router (for example: 218.18.1.73) in the Internet address field. Click Next.
- Page 63 Chapter 11 VPN Server 6. Enter the User name Password you have set for the PPTP VPN server on your router, and click Connect. 7. The PPTP VPN connection is created and ready to use.
- Page 64 Chapter 11 VPN Server...
-
Page 65: Chapter 12 Customize Your Network Settings
Chapter Customize Your Network Settings This chapter guides you on how to configure advanced network features. It contains the following sections: • Change the LAN Settings • Set Up Link Aggregation • Configure to Support IPTV Service • Specify DHCP Server Settings •... -
Page 66: Change The Lan Settings
If the IP address conflicts with another device on your local network or your network requires a specific IP subnet, you can change it. 1. Visit http://tplinkwifi.net, and log in with your TP-Link ID or the password you set for the router. 2. Go to Advanced >... -
Page 67: Configure To Support Iptv Service
Configure IPTV setup to enable Internet/IPTV/Phone service provided by my internet service provider (ISP). How can 1 Visit http://tplinkwifi.net, and log in with your TP-Link ID or I do that? the password you set for the router. 2 Go to Advanced >... -
Page 68: Specify Dhcp Server Settings
IP Address Pool. You can change the settings of the DHCP Server if necessary, and you can reserve LAN IP addresses for specified client devices. 1. Visit http://tplinkwifi.net, and log in with your TP-Link ID or the password you set for the router. -
Page 69: Set Up A Dynamic Dns Service Account
Chapter 12 Customize Your Network Settings ¾ To specify the IP address that the router assigns: 1. Tick the Enable checkbox. 2. Enter the starting and ending IP addresses in the IP Address Pool. 3. Enter other parameters if the ISP offers. The Default Gateway is automatically filled in and is the same as the LAN IP address of the router. - Page 70 NO-IP or DynDNS. If you don’t have a DDNS account, you have to register first by clicking Register Now. Note: To enjoy TP-Link’s DDNS service, you have to log in with a TP-Link ID. If you have not logged in with one, click 4. Click Register in the...
-
Page 71: Create Static Routes
Chapter 12 Customize Your Network Settings If you have selected NO-IP or DynDNS, enter the username, password and domain name of your account. 5. Click SAVE. Tips: If you want to use a new DDNS account, please click Logout first, and then log in with a new account. 12 6 Create Static Routes Static routing is a form of routing that is configured manually by a network administrator... - Page 72 1 Change the routers’ LAN IP addresses to two different IP I do that? addresses on the same subnet. Disable Router B’s DHCP function. 2 Visit http://tplinkwifi.net, and log in with your TP-Link ID or the password you set for Router A. 3 Go to Advanced >...
-
Page 73: Specify Wireless Settings
The preset SSID and password can be found on the label of the router. You can customize the wireless settings according to your needs. Visit http://tplinkwifi.net, and log in with your TP-Link ID or the password you set for the router. - Page 74 Chapter 12 Customize Your Network Settings 2. Create a new SSID in Network Name (SSID) and customize the password for the network in Password. The value is case-sensitive. Note: If you change the wireless settings with a wireless device, you will be disconnected when the settings are effective.
-
Page 75: Use Wps For Wireless Connection
Wi-Fi Protected Setup (WPS) provides an easier approach to set up a security-protected Wi-Fi connection. 1. Visit http://tplinkwifi.net, and log in with your TP-Link ID or the password you set for the router. 2. Make sure the Wi-Fi of your router is on and go to Advanced >... - Page 76 The wireless network can be automatically off at a specific time when you do not need the wireless connection. 1. Visit http://tplinkwifi.net, and log in with your TP-Link ID or the password you set for the router. 2. Go to Advanced >...
- Page 77 Chapter 12 Customize Your Network Settings Note: • The Effective Time Schedule is based on the time of the router. You can go to Advanced > System Tools > Time Settings to modify the time. • The wireless network will be automatically turned on after the time period you set.
- Page 78 Q2 What should I do if I forget my web management password? • If you are using a TP-Link ID to log in, or you have enabled the Password Recovery feature of the router, click...
- Page 79 4 ) Click LAN settings and deselect the following three options and click OK. 5 ) Go to Advanced > Restore advanced settings, click to save the settings.
- Page 80 • Use another web browser or computer to log in again. • Reset the router to factory default settings and try again. If login still fails, please contact the technical support. Note: You’ll need to reconfigure the router to surf the internet once the router is reset. Q4 What should I do if the router can’t be found via Bluetooth in Tether (how to reset the router)? The router’s Bluetooth will be enabled for 30 minutes following a reset to factory...
- Page 81 WDS bridging function can be enabled either in 2.4GHz frequency or 5GHz frequency for a dual-band router. We use the WDS bridging function in 2.4GHz frequency as example. 1. Visit http://tplinkwifi.net, and log in with your TP-Link ID or the password you set for the router.
- Page 82 • Modify the LAN IP address of the router. Note: Most TP-Link routers use 192.168.0.1/192.168.1.1 as their default LAN IP address, which may conflict with the IP range of your existing ADSL modem/router. If so, the router is not able to communicate with your modem and you can’t access the internet.
- Page 83 • Double check the internet connection type. 1 ) Confirm your internet connection type, which can be learned from the ISP. 2 ) Visit http://tplinkwifi.net, and log in with your TP-Link ID or the password you set for the router.
- Page 84 2 ) Exit the wireless configuration tool (the TP-Link Utility, for example). 3 ) Select and right click on...
- Page 85 3 ) If it continues to show note of Network Security Key Mismatch, it is suggested to confirm the wireless password of your wireless router. Note: Wireless Password/Network Security Key is case sensitive. • Windows unable to connect to XXXX / Can not join this network / Taking longer than usual to connect to this network: •...
- Page 86 Specifications are subject to change without notice. is a registered trademark of TP-Link Technologies Co., Ltd. Other brands and product names are trademarks or registered trademarks of their respective holders. No part of the specifications may be reproduced in any form or by any means or used to make any derivative such as translation, transformation, or adaptation without permission from TP-Link Technologies Co., Ltd.
- Page 87 Component Name Model HKA06012050-7G I.T.E. Power Responsible party: TP-Link USA Corporation, d/b/a TP-Link North America, Inc Address: 145 South State College Blvd. Suite 400, Brea, CA 92821 Website: http://www.tp-link.com/us/ Tel: +1 626 333 0234 Fax: +1 909 527 6803 E-mail: sales.usa@tp-link.com This equipment has been tested and found to comply with the limits for a Class B digital device, pursuant to part 15 of the FCC Rules.
- Page 88 We, TP-Link USA Corporation, has determined that the equipment shown as above has been shown to comply with the applicable technical standards, FCC part 15. There is no unauthorized change is made in the equipment and the equipment is properly maintained and operated.
- Page 89 Any changes or modifications not expressly approved by the party responsible for compliance could void the user’s authority to operate the equipment. We, TP-Link USA Corporation, has determined that the equipment shown as above has been shown to comply with the applicable technical standards, FCC part 15.
- Page 90 5250 MHz -5330 MHz (23dBm) 5490 MHz -5710 MHz (30dBm) EU declaration of conformity TP-Link hereby declares that the device is in compliance with the essential requirements and other relevant provisions of directives 2014/53/EU, 2009/125/ EC and 2011/65/EU. The original EU declaration of conformity may be found at http://www.tp-link.
- Page 91 2. l’utilisateur de l’appareil doit accepter tout brouillage radioélectrique subi, meme si le brouillage est susceptible d’en compromettre le fonctionnement This radio transmitter (IC: 8853A-AX11000/Model: Archer AX11000) has been approved by Industry Canada to operate with the antenna types listed below with the maximum permissible gain indicated.
- Page 92 2. Le gain maximal d’antenne permis pour les dispositifs avec antenne(s) amovible(s) utilisant les bandes 5250-5350 MHz et 5470-5725 MHz doit se conformer à la limitation P.I.R.E.; 3. Le gain maximal d’antenne permis pour les dispositifs avec antenne(s) amovible(s) utilisant la bande 5725-5850 MHz doit se conformer à la limitation P.I.R.E spécifiée pour l’exploitation point à...
- Page 93 4.7.9.1應避免影響附近雷達系統之操作。 4.7.9.2高增益指向性天線只得應用於固定式點對點系統。 安全諮詢及注意事項 • 請使用原裝電源供應器或只能按照本產品注明的電源類型使用本產品。 • 清潔本產品之前請先拔掉電源線。請勿使用液體、噴霧清潔劑或濕布進行 清潔。 • 注意防潮,請勿將水或其他液體潑灑到本產品上。 • 插槽與開口供通風使用,以確保本產品的操作可靠並防止過熱,請勿堵塞 或覆蓋開口。 • 請勿將本產品置放於靠近熱源的地方。除非有正常的通風,否則不可放在 密閉位置中。 • 請不要私自打開機殼,不要嘗試自行維修本產品,請由授權的專業人士進 行此項工作。 限用物質含有情況標示聲明書 限用物質及其化學符號 鉛 鎘 汞 六價鉻 多溴聯苯 多溴二苯醚 產 品 元 件 名 稱 CrVI PBDE ○ ○ ○ ○ ○ ○...
- Page 94 • Do not use any other chargers than those recommended • Do not use the device where wireless devices are not allowed. • Adapter shall be installed near the equipment and shall be easily accessible. • Place the device with its bottom surface downward. •...
Need help?
Do you have a question about the Archer AX11000 and is the answer not in the manual?
Questions and answers