
Related Manuals for TP-Link Archer AXE75


Summary of Contents for TP-Link Archer AXE75
- Page 1 User Guide AXE5400 Tri-Band Wi-Fi 6E Router Archer AXE75 © 2021 TP-Link 1910013121 REV1.0.0...
-
Page 2: Table Of Contents
5. 4. Manage the Router via the TP-Link Tether App ......26 Chapter 6 Wireless Settings 6. - Page 3 6. 3. 2. Connect via the Router’s PIN ......... 32 6.
- Page 4 13. 2. Use PPTP VPN to Access Your Home Network ......70 Chapter 14 Customize Your Network Settings 14.
-
Page 5: About This Guide
The Quick Installation Guide can be found where you find this guide or inside the package of the router. Specifications can be found on the product page at https://www.tp-link.com. TP-Link Community is provided for you to discuss our products and share knowledge at https://community.tp-link.com. Our Technical Support contact information can be found at the... - Page 6 *Maximum wireless signal rates are the physical rates derived from IEEE Standard 802.11 specifications. Actual wireless data throughput and wireless coverage are not guaranteed and will vary as a result of 1) environmental factors, including building materials, physical objects, and obstacles, 2) network conditions, including local interference, volume and density of traffic, product location, network complexity, and network overhead, and 3) client limitations, including rated performance, location, connection, quality, and client condition.
-
Page 7: Chapter 1 Get To Know About Your Router
Chapter Get to Know About Your Router This chapter introduces what the router can do and shows its appearance. It chapter contains the following sections: • Product Overview • Appearance... -
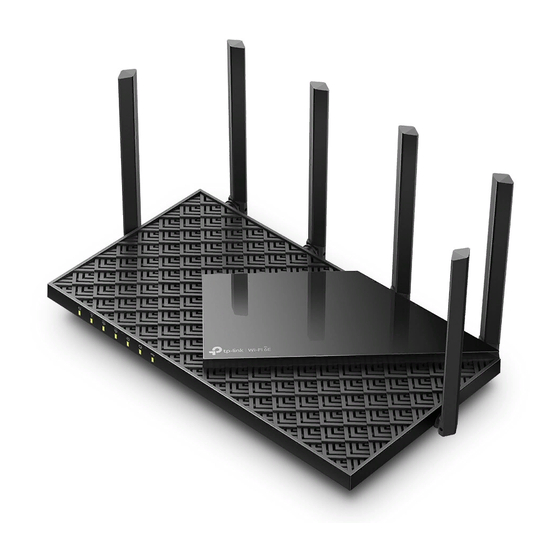
Page 8: Product Overview
AR/VR, 8K streaming and more. Moreover, it is simple and convenient to set up and use the TP-Link router due to its intuitive Tether app and the powerful web interface. -
Page 9: Back Panel
Chapter 1 Get to Know About Your Router Name Status Indication The 2.4 GHz wireless band is enabled. (2.4 GHz Wireless) The 2.4 GHz wireless band is disabled. The 5 GHz wireless band is enabled. (5 GHz Wireless) The 5 GHz wireless band is disabled. The 6 GHz wireless band is enabled. -
Page 10: Side Panel
Chapter 1 Get to Know About Your Router Item Description LED Button Press the button for 1 second to turn on or off the LEDs of your router. Press the button for 1 second, and immediately initiate WPS on your client WPS Button device to start the WPS process. -
Page 11: Chapter 2 Connect The Hardware
Chapter Connect the Hardware This chapter contains the following sections: • Position Your Router • Connect Your Router... -
Page 12: Position Your Router
Chapter 2 Connect the Hardware Position Your Router • The product should not be located in a place where it will be exposed to moisture or excessive heat. • Place the router in a location where it can be connected to multiple devices as well as to a power source. - Page 13 Chapter 2 Connect the Hardware Internet 1. Connect the powered-off modem to the router’s WAN port with an Ethernet cable. 2. Turn on the modem, and then wait about 2 minutes for it to restart. 3. Connect the power adapter to the router and turn on the router. 4.
- Page 14 WPS. 1 ) Tap the WPS icon on the device’s screen. Here we take an Android phone for instance. 2 ) Within two minutes, press the WPS button on your router. WLAN TP-Link MyHome David HomeNetwork TP-Link_Home...
-
Page 15: Chapter 3 Log In To Your Router
Chapter Log In to Your Router... - Page 16 Chapter 3 Log In to Your Router With a web-based utility, it is easy to configure and manage the router. The web-based utility can be used on any Windows, Mac OS or UNIX OS with a Web browser, such as Microsoft Internet Explorer, Mozilla Firefox or Apple Safari.
-
Page 17: Chapter 4 Set Up Internet Connection
Furthermore, you can also set up an IPv6 connection if your ISP provides IPv6 service. It contains the following sections: • Use Quick Setup Wizard • Quick Setup Via TP-Link Tether App • Manually Set Up Your Internet Connection • Set Up the Router as an Access Point •... -
Page 18: Use Quick Setup Wizard
• To learn more about the TP-Link Cloud service, please refer to the TP-Link Cloud Service section. • If you do not want to register a TP-Link ID now, you may click Skip to proceed. • If you have changed the preset wireless network name (SSID) and wireless password during the Quick Setup process, all your wireless devices must use the new SSID and password to connect to the router. -
Page 19: Manually Set Up Your Internet Connection
ISP. Follow the steps below to check or modify your internet connection settings. 1. Visit http://tplinkwifi.net, and log in with your TP-Link ID or the password you set for the router. - Page 20 Chapter 4 Set Up Internet Connection 2 ) If you choose Static IP, enter the information provided by your ISP in the corresponding fields. 3 ) If you choose PPPoE, enter the username password provided by your ISP. PPPoE users usually have DSL cable modems.
- Page 21 Chapter 4 Set Up Internet Connection 4 ) If you choose L2TP, enter the username password and choose the Secondary Connection provided by your ISP. Different parameters are needed according to the Secondary Connection you have chosen. 5 ) If you choose PPTP, enter the username and password, and choose the Secondary Connection...
-
Page 22: Set Up The Router As An Access Point
Set Up the Router as an Access Point The router can work as an access point, transforming your existing wired network to a wireless one. 1. Visit http://tplinkwifi.net, and log in with your TP-Link ID or the password you set for the router. 2. Go to Advanced >... - Page 23 Chapter 4 Set Up Internet Connection 2. Go to Advanced > IPv6. 3. Enable IPv6 and select the internet connection type provided by your ISP. Tips: If you do not know what your internet connection type is, contact your ISP or judge according to the already known information provided by your ISP.
- Page 24 Chapter 4 Set Up Internet Connection Note: If your ISP provides two separate accounts for the IPv4 and IPv6 connections, manually enter the username and password for the IPv6 connection. 6to4 Tunnel: An IPv4 internet connection type is a prerequisite for this connection type (Manually Set Up Your Internet Connection).
- Page 25 Chapter 4 Set Up Internet Connection 5. Configure LAN ports. Windows users are recommended to choose from the first two types. Fill in Address Prefix provided by your ISP, and click SAVE. 6. Click Status to check whether you have successfully set up an IPv6 connection. Tips: Visit the section if there is no internet connection.
-
Page 26: Chapter 5 Tp-Link Cloud Service
TP-Link Cloud service provides a better way to manage your cloud devices. Log in to your router with a TP-Link ID, and you can easily monitor and manage your home network when you are out and about via the Tether app. To ensure that your router stays new and gets better over time, the TP-Link Cloud will notify you when an important firmware upgrade is available. -
Page 27: Register A Tp-Link Id
Manage the User TP-Link IDs. • Once you have registered a TP-Link ID on the web management page, you can only register another TP-Link ID via the Tether APP. Please refer to Manage the Router via the TP-Link Tether App to install the app. -
Page 28: Manage The User Tp-Link Ids
Password. 2. Enter the current password, then a new password twice. And click SAVE. Manage the User TP-Link IDs The TP-Link ID used to log in to the router for the first time will be automatically bound as the Admin... -
Page 29: Add Tp-Link Id To Manage The Router
3. Click , enter another TP-Link ID as needed and click SAVE. Note: If you need another TP-Link ID, please register a new one via the Tether app. Refer to Manage the Router via the TP-Link Tether App to install the app and register a new TP-Link ID. -
Page 30: Manage The Router Via The Tp-Link Tether App
5. Manage your router as needed. Note: If you need to remotely access your router from your smart devices, you need to: • Log in with your TP-Link ID. If you don’t have one, refer to Register a TP-Link • Make sure your smartphone or tablet can access the internet with cellular data or a Wi-Fi network. -
Page 31: Chapter 6 Wireless Settings
Chapter Wireless Settings This chapter guides you on how to configure the wireless settings. It contains the following sections: • Specify Wireless Settings • Schedule Your Wireless Function • Use WPS for Wireless Connection • Advanced Wireless Settings... -
Page 32: Specify Wireless Settings
The preset SSID and password can be found on the label of the router. You can customize the wireless settings according to your needs. 1. Visit http://tplinkwifi.net, and log in with your TP-Link ID or the password you set for the router. - Page 33 Chapter 6 Wireless Settings 1. Go to Advanced > Wireless > Wireless Settings. 2. Enable Smart Connect. 3. Keep the default values or set a new SSID and password, and click SAVE. This SSID and password will be applied for the 2.4GHz and 5GHz wireless networks. If you want to configure the wireless settings separately for each band, untick the checkbox to disable this feature.
-
Page 34: Schedule Your Wireless Function
The wireless network can be automatically off at a specific time when you do not need the wireless connection. 1. Visit http://tplinkwifi.net, and log in with your TP-Link ID or the password you set for the router. 2. Go to Advanced >... -
Page 35: Use Wps For Wireless Connection
Chapter 6 Wireless Settings 1. Visit http://tplinkwifi.net, and log in with your TP-Link ID or the password you set for the router. 2. Make sure the Wi-Fi of your router is on and go to Advanced > Wireless > WPS. -
Page 36: Advanced Wireless Settings
Chapter 6 Wireless Settings Advanced Wireless Settings Check advanced wireless settings for your device. 1. Visit http://tplinkwifi.net, and log in with your TP-Link ID or the password you set for the router. 2. Go to Advanced > Wireless > Additional Settings. - Page 37 Chapter 6 Wireless Settings • AP Isolation - This function isolates all connected wireless stations so that wireless stations cannot access each other through WLAN. • Airtime Fairness - This function can improve the overall network performance by sacrificing a little bit of network time on your slow devices. •...
-
Page 38: Chapter 7 Guest Network
Chapter Guest Network This function allows you to provide Wi-Fi access for guests without disclosing your main network. When you have guests in your house, apartment, or workplace, you can create a guest network for them. In addition, you can customize guest network options to ensure network security and privacy. -
Page 39: Create A Network For Guests
Chapter 7 Guest Network Create a Network for Guests 1. Visit http://tplinkwifi.net, and log in with your TP-Link ID or the password you set for the router. 2. Go to Advanced > Wireless > Guest Network or click Wireless on the top page. Locate Guest Network section. -
Page 40: Customize Guest Network Options
Chapter 7 Guest Network Customize Guest Network Options 1. Visit http://tplinkwifi.net, and log in with your TP-Link ID or the password you set for the router. 2. Go to Advanced > Wireless >Guest Network. Locate the Guest Permissions section. 3. Customize guest network options according to your needs. -
Page 41: Chapter 8 Usb Settings
Chapter USB Settings This chapter describes how to use the USB ports to share files and media from the USB storage devices over your home network locally, or remotely through the internet. The router supports USB external flash drives and hard drives. It contains the following sections: •... -
Page 42: Access The Usb Storage Device
Chapter 8 USB Settings Access the USB Storage Device Insert your USB storage device into the router’s USB port and then access files stored there locally or remotely. Tips: • If you use USB hubs, make sure no more than 4 devices are connected to the router. •... -
Page 43: Access The Usb Device Remotely
Chapter 8 USB Settings • Method 2: Open the Windows Explorer (or go to Computer) and type the server address \\tplinkwifi.net ftp://tplinkwifi.net in the address bar, then press Enter. Windows computer 1 ) Select > Connect to Server. 2 ) Type the server address smb://tplinkwifi.net. 3 ) Click Connect. - Page 44 If your ISP assigns a private WAN IP address (such as 192.168.x.x or 10.x.x.x), you cannot use this feature because private addresses are not routed on the internet. Follow the steps below to configure remote access settings. Visit http://tplinkwifi.net, and log in with your TP-Link ID or the password you set for the router. Go to Advanced >...
-
Page 45: Customize The Access Settings
Visit http://tplinkwifi.net, and log in with your TP-Link ID or the password you set for the router. - Page 46 Chapter 8 USB Settings Now you can access the USB storage device by visiting \\MyShare (for Windows) or smb://MyShare (for Mac). • To Only Share Specific Content Focus on the File Sharing section. Specify sharing folders that you want to share and click SAVE.
-
Page 47: Media Sharing
USB storage device directly from DLNA-supported devices, such as your computer, tablet and PS2/3/4. Visit http://tplinkwifi.net, and log in with your TP-Link ID or the password you set for the router. Go to Advanced >...
Need help?
Do you have a question about the Archer AXE75 and is the answer not in the manual?
Questions and answers
How do I turn off the firewall?
To turn off the firewall on the TP-Link AXE75, you may need to enter specific commands in Linux. The firewall cannot be simply switched off with a mouse click like on some systems. If you accessed a LAN machine when its firewall was off, you might need to adjust firewall rules.
This answer is automatically generated