Table of Contents

Subscribe to Our Youtube Channel
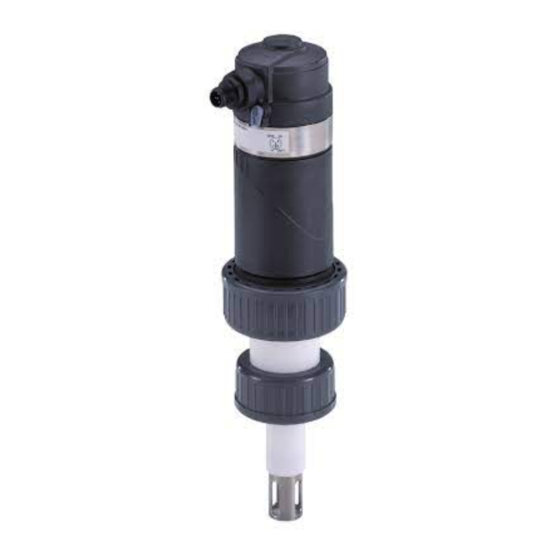
Related Manuals for Burkert ELEMENT neutrino 8202


Summary of Contents for Burkert ELEMENT neutrino 8202
- Page 1 Type 8202 ELEMENT neutrino pH or redox meter pH- oder Redoxpotential-Messgerät pH- ou redox-mètre Operating Instructions (from serial number 3000) Bedienungsanleitung (ab Serien-Nummer 3000) Manuel utilisateur (à partir du numéro de série 3000)
- Page 2 We reserve the right to make technical changes without notice. Technische Änderungen vorbehalten. Sous réserve de modifications techniques. © Bürkert SAS, 2010-2020 Operating Instructions 2009/04_EU-ML 00561658 / Original FR...
-
Page 3: Table Of Contents
Type 8202 ELEMENT neutrino 1. the Operating instructiOns ............5 6.4. Dimensions ..................13 1.1. symbols used ..................5 6.5. fluid data .................... 13 1.2. Definition of the term device ............5 6.6. electrical data ................... 15 1.3. Validity of the Operating instructions ........6 6.7. ph probe, redox probe ..............15 2. intenDeD use ....................6 7. assemBly ..................... 16 7.1. safety instructions ................. 16 3. Basic safety infOrmatiOn ..............6 7.2. unscrewing the cover on the connection box .... - Page 4 Type 8202 ELEMENT neutrino 9. aDjustment anD start-up ............26 13. stOrage ..................... 41 9.1. safety instructions ................. 26 14. DispOsal Of the DeVice ............... 41 9.2. Description of the connection box ........27 9.3. selecting the measurement mode: ph or redox ... 27 9.4. choosing the ph, redox potential or temperature range associated with the 4...20 ma output ..... 28 9.5. calibrating the ph or redox probes ........29 9.5.1.
-
Page 5: The Operating Instructions
Type 8202 ELEMENT neutrino theOperatingInstructions ThE OpEraTiNg Caution iNsTrucTiONs Warns against a possible risk. The Operating Instructions describe the entire life cycle of the device. ▶ Failure to observe this warning can result in substantial or minor Please keep the Operating Instructions in a safe place, accessible to injuries. -
Page 6: Validity Of The Operating Instructions
Type 8202 ELEMENT neutrino Basicsafetyinformation 1.3. Validity of the Operating Basic safETy iNfOrMaTiON instructions This safety information does not take into account any contingencies or occurrences that may arise during installation, use and mainte- The Operating Instructions are valid for the Type 8202 ELEMENT nance of the device. - Page 7 ▶ Do not use fluid that is incompatible with the device materials. EN 61340-5-1 norm. Find the compatibility chart on our homepage: country.burkert. ▶ Do not touch any of the live electrical components. ▶ Do not subject the device to mechanical stress.
-
Page 8: General Information
(in W). The addresses of our international sales offices are available on the • A PD acquisition / conversion module: internet at: country.burkert.com - PD acquisition measured in mV; - Conversion of the measured PD into pH units with temperature 4.2. -
Page 9: Type Label
Type 8202 ELEMENT neutrino Description • The pH probe is a glass membrane with variable selectivity 1. Operating voltage according to the pH. When the pH probe is immersed in a 2. Power consumption solution, a difference in potential is formed, due to the hydrogen 3. -
Page 10: Technical Data
Type 8202 ELEMENT neutrino Technicaldata TEchNicaL DaTa 6.2. conformity to standards and directives 6.1. conditions of use The applied standards, which verify conformity with the EU direc- tives, can be found on the EU-Type examination certificate or the EU Ambient –10...+60 °C, without pH probe or redox declaration of conformity (if applicable). -
Page 11: Ul Certification
Type 8202 ELEMENT neutrino Technicaldata 6.2.2. uL certification type of fluid conditions DN ≤ 200 Devices with variable key PU01 or PU02 are UL-certified devices Fluid group 2, Article 4, Para- and comply also with the following standards: or PS ≤ 10 bar graph 1.c.ii •... -
Page 12: Materials
Type 8202 ELEMENT neutrino Technicaldata 6.3. Materials component material Box / seals stainless steel, PPS / EPDM PA66/EPDM Cover / seal PPS / EPDM EPDM Stainless steel M12 male connector / PA66 / EPDM 316L seal Cable gland / seal PA66 / EPDM PVC (or PVDF on request) Probe holder / seal... -
Page 13: Dimensions
• Device variant with a PVDF • –20...130 °C The fluid temperature may be → Refer to the data sheet of the device, available at: restricted by the probe used and country.burkert.com the fitting used. Refer to the related Operating Instructions. 6.5. fluid data... - Page 14 Type 8202 ELEMENT neutrino Technicaldata P (bar) P (psi) P (bar) P (psi) 217.6 Metal 217.6 PVDF 188.6 188.6 159.6 159.6 130.6 130.6 101.6 PVC + PP PVDF 101.6 72.5 72.5 43.5 43.5 +20 +40 +60 T (°C) +100 +120 +140 Fig. 4: ...
-
Page 15: Electrical Data
Type 8202 ELEMENT neutrino Technicaldata 6.6. Electrical data 6.7. ph probe, redox probe Operating voltage • 12...36 V DC The specifications of Bürkert probes can be found in the • connection to main supply: per- related Operating Instructions. manent through external safety The device must be used with a pH or redox probe that satisfies the extra-low voltage (SELV) and following specifications:... -
Page 16: Assembly
Type 8202 ELEMENT neutrino Assembly assEMBLy 7.2. unscrewing the cover on the connection box 7.1. safety instructions notiCe Danger the tightness of the device is not guaranteed when the cover is removed. risk of injury due to electrical voltage. ▶ Take any precautions necessary to prevent the projection of ▶ If the device is installed either in a wet environment or outdoors, liquid inside the box. -
Page 17: Fitting The Cover To The Connection Box
Type 8202 ELEMENT neutrino Assembly → Position the polar- → Unscrew the cover on ising slots on the the connection box by cover in the axis hand. of the slots on the box: 3 positions are polarising slots possible. slots Fig. 7: ... -
Page 18: Fitting The Probe Into The Holder (Without Fluid)
Type 8202 ELEMENT neutrino Installation 7.4. fitting the probe into the holder iNsTaLLaTiON (without fluid) 8.1. safety instructions → Check that the probe probe head dimension H is between shim Danger 34 and 46 mm. If necessary, use a shim to adjust the risk of injury due to pressure in the installation seal ring height. -
Page 19: Installation On The Pipe
Type 8202 ELEMENT neutrino Installation Warning notiCe the device may be irremediably damaged if it is installed in risk of injury due to non-conforming installation. the pipe without the probe. ▶ The electrical and fluid installation can only be carried out by ▶ Always install the device in the pipe fitted with a probe. qualified and skilled staff with the appropriate tools. ▶... - Page 20 Type 8202 ELEMENT neutrino Installation → Check the presence and the condition of seal B on the fitting. Replace the seal if necessary. → Insert the holder fitted with the probe carefully into the fitting. → Tighten the nut G 1 1/2" on the fitting by hand.
-
Page 21: Fitting The Electronic Module To The Holder
Type 8202 ELEMENT neutrino Installation 8.3. fitting the electronic module to → Apply slight vertical the holder pressure to engage the tightness seal. → Check that the electrical → Fasten the electronic contacts are in good module and the holder condition and clean them together by tightening the with a brush if necessary. -
Page 22: Electrical Wiring
Type 8202 ELEMENT neutrino Installation 8.4. Electrical wiring 8.4.1. Electrical connections Device variant connection type Danger M12 male connector For the mating M12 female connector risk of injury due to electrical voltage. with article number 917116, use a ▶ If the device is installed either in a wet environment or outdoors, shielded cable: all the electrical voltages must be of max. -
Page 23: Wiring A Device Variant With Cable Gland
Type 8202 ELEMENT neutrino Installation 8.4.2. Wiring a device variant with cable → Thread the cable through gland the cable gland nut and the cable gland. • Select a cable that meets the specifications detailed in chapter → Pull the cable into the box "8.4.1. -
Page 24: Assembling And Wiring The Female Connector, Article Number 917116
Type 8202 ELEMENT neutrino Installation 8.4.3. assembling and wiring the female 4...20 mA input at the connector, article number 917116 external instrument See chpt. "11. Spare parts and accessories" → Unscrew the nut [1] from the out 2 out 1 body [4]. -
Page 25: Nector
Type 8202 ELEMENT neutrino Installation 8.4.4. Wiring a device variant with M12 male connector 4...20 mA input at the external instrument Not connected brown V+ (12...36 V DC) green/yellow or grey blue Power supply Not connected 12-36 V DC Fig. 18: Pin assignment of the M12 male connector pin of the m12 female connector colour of the 4...20 mA input at the... -
Page 26: Adjustment And Start-Up
Type 8202 ELEMENT neutrino Adjustmentandstart-up internal wiring of the m12 male connector to the terminal strip aDjusTMENT aND sTarT-up Terminal strip pins Colour of the wire connecting the male con- The following procedure is only valid for the devices with a nector to the terminal strip series number equal or higher than 3000. Please refer to the Type label of the device. -
Page 27: Description Of The Connection Box
Type 8202 ELEMENT neutrino Adjustmentandstart-up 9.2. Description of the connection box Warning The box contains the terminal strip for electrical connection and the risk of injury due to nonconforming adjustment. following elements that are used for adjustment: Nonconforming adjustment could lead to injuries and damage the •... -
Page 28: Choosing The Ph, Redox Potential Or Temperature Range Associated With The 4
Type 8202 ELEMENT neutrino Adjustmentandstart-up 9.4. choosing the ph, redox potential Red mark or temperature range associated with the 4...20 ma output Red LED The selector (Fig. 20) is used to choose the pH, redox potential or tem- Green LED perature range associated with the 4...20 mA output. -
Page 29: Calibrating The Ph Or Redox Probes
Type 8202 ELEMENT neutrino Adjustmentandstart-up selector position 4...20 ma output 4...20 ma output During calibration, the red LED does not flash every 10 s: range in ph mode range in redox mode there is no indication of the selected measurement mode. 7...12 pH 0...+1500 mV 7..14 pH 0...+2000 mV During calibration, the 4...20 mA output indicates the –40...130 °C –40...130 °C measured value. -
Page 30: 1-Point Calibration: Zero Adjustment
Type 8202 ELEMENT neutrino Adjustmentandstart-up 9.5.1. 1-point calibration: zero adjustment The procedure below only concerns the devices with a serial number higher than 3000. See the name plate. Start If the red LED stays on, the calibration has failed because the zero of the →... -
Page 31: Calibration Thresholds Of The Probe
Type 8202 ELEMENT neutrino Adjustmentandstart-up If the red LED stays on, the calibration has failed. The former calibration values are used. Buffer solution pH ≠ 7 or Worsened probe. redox solution ≠ 475 mV → Briefly press the push button: error →... -
Page 32: 2-Point Calibration (Ph Only): Zero And Slope Adjustments
Type 8202 ELEMENT neutrino Adjustmentandstart-up 9.5.3. 2-point calibration (ph only): zero and slope adjustments The procedure below only concerns the devices with a serial number higher than 3000. See the name plate. → Do the zero adjustment procedure (see chpt. 9.5.1, step 1). Red LED flashes 5 times a second or 1 s every 2 s (see chpt. - Page 33 Type 8202 ELEMENT neutrino Adjustmentandstart-up If the red LED stays on: the slope of the probe is in the "error" range (see Table 3, chpt. 9.5.2). • The former slope value is used. • The new zero value is saved. Worsened probe.
-
Page 34: Maintenance And Troubleshooting
Type 8202 ELEMENT neutrino Maintenanceandtroubleshooting MaiNTENaNcE aND Warning TrOuBLEshOOTiNg risk of injury due to non-conforming maintenance. ▶ Maintenance must only be carried out by qualified and skilled 10.1. safety instructions staff with the appropriate tools. ▶ Ensure that the restart of the installation is controlled after any Danger interventions. -
Page 35: 10.3. Replacing The Probe
Type 8202 ELEMENT neutrino Maintenanceandtroubleshooting 10.3. replacing the probe → Unscrew the probe using a suitable wrench. → Unscrew the nut on the → Remove it carefully from electronic module. the holder. → Clean any fluid projections on the electrical contacts on the holder. -
Page 36: Replacing The Seal In The Probe Holder
Type 8202 ELEMENT neutrino Maintenanceandtroubleshooting 10.4. replacing the seal in the probe → Remove the worn seal "A" from the holder. holder → Place the new seal "A" in the groove in the holder. The seal can be replaced without removing the holder from the pipe. →... -
Page 37: Replacing The Cover Seal On The Connection Box
Type 8202 ELEMENT neutrino Maintenanceandtroubleshooting 10.5. replacing the cover seal on the → On a device variant connection box with cable gland, locate the colours of → Using a screwdriver the wires connected with a suitable head, to the terminal strip. turn the latch to →... - Page 38 Type 8202 ELEMENT neutrino Maintenanceandtroubleshooting → Put the cover in place. → Fully tighten the cover by hand to guarantee tightness. → Using a screwdriver with a suitable head, turn the latch to the lock position to lock the cover. Fig. 23: ...
-
Page 39: 10.6. In Case Of Problems, Excluding Calibration
Type 8202 ELEMENT neutrino Maintenanceandtroubleshooting 10.6. in case of problems, excluding calibration red leD status 4...20 ma meaning resolution (excluding output calibration) status → Check the fluid temperature. flashing (once a 4...20 mA Fluid temperature outside second) the operating range → Return the fluid temperature to within the operating range (–20...130 °C). (–20...130 °C). -
Page 40: Spare Parts And Accessories
Type 8202 ELEMENT neutrino Sparepartsandaccessories sparE parTs aND accessories article number accEssOriEs Redox probe, –2000...+2000 mV, 0...+80 °C, 561027 0...6 bar, FLATRODE Redox 120 mm Caution Redox probe, –2000...+2000 mV, 560379 –10...+50 °C, risk of injury and damage caused by the use of unsuitable parts. 0...6 bar, LOGOTRODE Redox 120 mm Incorrect accessories and unsuitable replacement parts may Redox probe, –2000...+2000 mV, 0...+130 °C, 560378 cause injuries and damage the device and the surrounding area. -
Page 41: Storage
Type 8202 ELEMENT neutrino Packaging,Transport DispOsaL Of ThE DEVicE packagiNg, TraNspOrT → Dispose of the device and its packaging in an environmentally- notiCe friendly way. Damage due to transport notiCe Transport may damage an insufficiently protected device. Damage to the environment caused by parts contaminated by ▶ Transport the device in shock-resistant packaging and away fluids. - Page 42 Type 8202 ELEMENT neutrino english...
- Page 44 www.burkert.com...
Need help?
Do you have a question about the ELEMENT neutrino 8202 and is the answer not in the manual?
Questions and answers