
Subscribe to Our Youtube Channel
Related Manuals for Burkert ELEMENT 8228


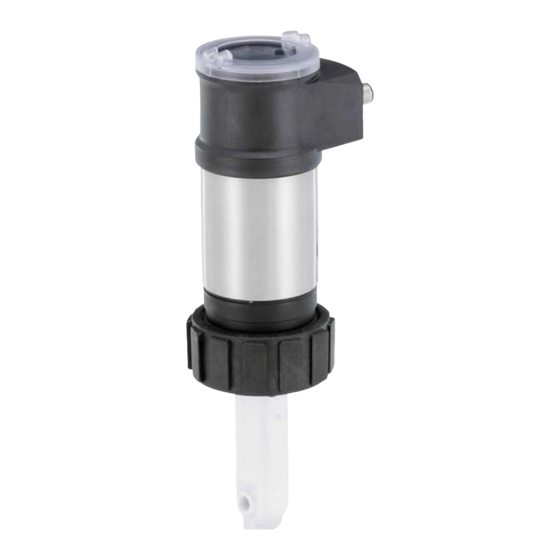
Summary of Contents for Burkert ELEMENT 8228
- Page 1 Type 8228 Inductive conductivity meter Induktives Leitfähigkeitsmessgerät Conductimètre inductif Quickstart English Deutsch Français...
- Page 2 We reserve the right to make technical changes without notice. Technische Änderungen vorbehalten. Sous réserve de modifications techniques. © Bürkert SAS, 2014 – 2022 Quickstart 2211/01_EU-ML 00572159 / ORIGINAL_EN...
-
Page 3: Table Of Contents
Type 8228 ELEMENT Table of contents 1 THE QUICKSTART..............4 8 INSTALLATION ..............14 1.1 Definition of the term device ..........4 8.1 Safety instructions ............14 1.2 Validity of the quickstart ............ 4 8.2 Install a device variant with G2" nut in a pipe ....15 1.3 Symbols used .............. -
Page 4: The Quickstart
Operating Instructions. Warns against a possible risk. The Operating Instructions for the device can be found on ▶ Failure to observe this warning can result in substantial or the Internet at: country.burkert.com. minor injuries. NOTICE Definition of the term device Warns against material damage. -
Page 5: Intended Use
Type 8228 ELEMENT Intended use INTENDED USE Advice or important recommendations. Use of the device that does not comply with the instructions could present risks to people, nearby installations and the environment. Refers to information contained in this quickstart or in The Type 8228 ELEMENT conductivity meter is intended for other documents. -
Page 6: Basic Safety Information
Risk of injury due to pressure in the installation. als. Find the compatibility chart on our homepage: ▶ Before any intervention in the installation, stop the circulation country.burkert.com of fluid, cut off the pressure and drain the pipe. ▶ Do not subject the device to mechanical stress. ▶ Before any intervention in the installation, make sure there is ▶... -
Page 7: General Information
Information on the Internet ▶ To minimise or even avoid any damage caused by an You can find the Operating Instructions and technical data sheets electrostatic discharge, take all the precautions that are for the Type 8228 at country.burkert.com. described in the EN 61340-5-1 norm. ▶ Do not touch any of the live electrical components. english... -
Page 8: Type Label
Type 8228 ELEMENT Type label TYPE LABEL 11. Warning: Before using the device, take into account the technical specifications described in the Operating Instructions. 12. Serial number 8228 Inductive Conductivity Meter Supply: 12-36V 40W max. 13. Certification, conformity marking Output: 1x 4-20mA 1xTrans 700mA max. 14. IP-Code Cell: PEEK Range 100 µS/cm - 2 S/cm Process: Temp -15 to 130°C 15. -
Page 9: Technical Data
Type 8228 ELEMENT Technical data TECHNICAL DATA Standards and directives The device complies with the relevant EU harmonisation leg- Conditions of use islation. In addition, the device also complies with the require- Ambient temperature –10...+60 °C ments of the laws of the United Kingdom. Air humidity < 85 %, without condensation The harmonised standards that have been applied for the con-... -
Page 10: Fluid Data
Type 8228 ELEMENT Technical data • Device used on a pipe (PS = maximum admissible pressure; Identification on the device Certification Variable key DN = nominal diameter of the pipe) UL recognized PU01 Type of fluid Conditions Fluid group 1, Article 4, Paragraph 1.c.i DN ≤ 25 Measuring DN ≤ 32 Equipment UL listed PU02 Fluid group 2, Article 4, Paragraph 1.c.i ® EXXXXXX or PSxDN ≤ 1000 bar DN ≤ 25 Fluid group 1, Article 4, Paragraph 1.c.ii or PSxDN ≤ 2000 bar 6.2.3 FDA approval DN ≤ 200 The following device variants have an FDA approval: device Fluid group 2, Article 4, Paragraph 1.c.ii... -
Page 11: Materials
Type 8228 ELEMENT Technical data The fluid pressure may be Fluid pressure P (bar) restricted by the fluid tem- PEEK perature, the material of the conductivity-sensor holder and the material of the Type S020 PVDF fitting used. Refer to Fig. 2. • device variant with conduc- • PN6 tivity-sensor holder in PVDF not evaluated by UL •... -
Page 12: Electrical Data
Type 8228 ELEMENT Technical data Electrical data Part Material M12 male connector, M12 female connector Operating voltage • 12...36 V DC • Device variant with G2" nut • nickel-plated brass • connection to main supply: per- • stainless steel, on request manent through external safety extra-low voltage (SELV) and •... -
Page 13: Assembly
Type 8228 ELEMENT Assembly ASSEMBLY Transistor output polarized • type • NPN (/sink) or PNP(/source). Safety instructions Through wiring and through WARNING software setting • NPN output • 1...36 V DC, 700 mA max. (or Risk of injury due to non-conforming assembly. 500 mA max. if 2 transistor ▶ The device must only be assembled by qualified and skilled outputs are wired) staff with the appropriate tools. •... -
Page 14: Installation
Type 8228 ELEMENT Installation INSTALLATION → Remove the housing 20° lid. Safety instructions → Set the display module DANGER at an angle of about 20° in relation to the Risk of injury due to electrical voltage. desired position. ▶ Before carrying out work on the system or the device, discon- The display module can nect the electrical power for all the conductors and isolate it. -
Page 15: Install A Device Variant With G2" Nut In A Pipe
Type 8228 ELEMENT Installation DANGER WARNING Risk of burns due to high fluid temperatures. Risk of injury if the dependency between the fluid pressure and the fluid temperature is not respected. ▶ Use safety gloves to handle the device. ▶ Observe the dependency between the fluid temperature and ▶... - Page 16 Type 8228 ELEMENT Installation → Make sure the seal (mark 2) is on the conductivity sensor. → Make sure the material of the seal is compatible with the fluid to be measured. → Put the nut (mark 5) on the Tank without mixing Tank with mixing fitting. equipment equipment → Put the snap ring (mark 3) into Fig. 5: Positions for the mounting on a tank the groove (mark 4). → Engage the device (mark 1) into → Fit the display module. Refer to chapter 7.2. The display the fitting.
-
Page 17: Install A Device Variant With 2" Clamp In A Pipe
Type 8228 ELEMENT Installation Install a device variant with 2" clamp → Install the device in the fitting as shown in Fig. 7. in a pipe → Select a seal (mark 4) that is com- patible with the 2" clamp con- DANGER nection of the device and with the fluid. Risk of injury if the stainless steel adapter of the device is loose. -
Page 18: Wiring
Type 8228 ELEMENT Installation Wiring 8.4.1 Mating connector with article number 917116 DANGER To wire the product, you can use mating connectors from Bürkert. For example, you can use the 5-pin M12 female con- Risk of injury due to electrical voltage. nector with article number 917116. - Page 19 Type 8228 ELEMENT Installation → If the device is installed on plastic pipes, earth together the metallic equipment such as pumps or valves, that is as close as possible to the device. 12-36 V DC Power supply 12-36 V DC Power supply Equipment such as valves, pumps, ...
- Page 20 Type 8228 ELEMENT Installation 8.4.3 Device variant with 1 connector Load Transistor output (TR1) white 0 V V+ (12...36 V DC) blue brown Current output (AC1) Fig. 10: Pin assignment grey or green/yellow black Pin of the M12 female cable available as Colour of the wire an accessory (article number 438680) brown white blue...
- Page 21 Type 8228 ELEMENT Installation 8.4.4 Device variant with 2 connectors Male connector Load Transistor output 1 (TR1) white 0 V V+ (12...36 V DC) brown Current output 1 (AC1) blue Female connector grey or green/yellow black Transistor output 2 (TR2) 0 V V+ (12...36 V DC) Current output 2 (AC2) 12-36 V DC 4...20 mA input at Power supply Fig. 13: Pin assignment external instrument Fig. 12: Transistor output, PNP wiring, and current output, wiring in sourcing mode, device variant with 1 connector (parameter setting "PNP/source")
- Page 22 Type 8228 ELEMENT Installation Connect the power supply for the device to the male Load 1 Load 2 connector; the supply is then transferred internally to pins 1 and 3 of the female connector in order to ease wiring of the load to the female connector. white white Pin of the female or male M12 cables available Colour of as accessories (article number 438680 respec- the wire tively 559177)
-
Page 23: Adjustment And Start-Up
Type 8228 ELEMENT Adjustment and start-up ADJUSTMENT AND START-UP Load 1 Load 2 • The settings can only be done on a device with a display module. • Do not remove the display module while making the white settings on the device. Safety instructions white WARNING... -
Page 24: Navigation Button
Type 8228 ELEMENT Adjustment and start-up Navigation button WARNING Danger due to non-conforming start-up. Non-conforming start-up could lead to injuries and damage the Symbolised by Symbolised by in this in this quickstart device and its surroundings. quickstart ▶ Before start-up the device, calibrate the conductivity sensor. Refer to chapter 9.7. - Page 25 Type 8228 ELEMENT Adjustment and start-up You want to... Press... You want to... Press..browse in the Process ...browse in the dynamic • next function: level functions bar (MEAS, BACK, • next screen: ABORT, OK, YES, NO) • previous function: ...confirm the highlighted • previous screen: dynamic function •...
-
Page 26: Dynamic Functions
Type 8228 ELEMENT Adjustment and start-up Dynamic functions You want to... Choose..go back to the Process level, dynamic function "MEAS" Yellow LED: shows that Green LED: shows that without confirming the modifica- transistor 1 is switched the device is energized tions made ...validate the input dynamic function "OK"... -
Page 27: Operating Levels
Type 8228 ELEMENT Adjustment and start-up Operating levels Icon Meaning and alternatives The device has 2 operating levels: the Process level and the Sensor in good condition, fluid conductivity and fluid Configuration level. temperature within the set ranges. When the device is energized or the display module is mounted If the monitoring of the conductivity and/or the fluid on an energized device, the display indicates the display temperature and/or the fluid conductivity has been... -
Page 28: Calibrate The Zero Point Of Conductivity
Type 8228 ELEMENT Adjustment and start-up Calibrate the zero point of conductivity Enter the correction factor of the fitting used The correction factor depends on the shape, the material and the Calib Sensor Probe Zero Calib. diameter of the fitting used. The following table gives the cor- rection factors of the Type S020 fittings. Calibrate Zero Point? Calib Sensor... - Page 29 Type 8228 ELEMENT Adjustment and start-up Table 2: Correction factors of the Type S020 fittings, depending on the shape, the material and the DN of the fittings Fittings with true union connec- Fittings with internal or external Measurement tions or fittings with weld ends thread connections or fittings with chamber Welding sockets or fusion spigots weld end connections PVDF Brass Stainless steel Stainless steel...
-
Page 30: Maintenance And Troubleshooting
▶ Before any intervention in the installation, stop the circulation of fluid, cut off the pressure and drain the pipe. → If there is a problem, refer to the Operating Instructions at: ▶ Before any intervention in the installation, make sure there is country.burkert.com. no pressure in the pipe. ▶ Observe the dependency between the fluid temperature and the fluid pressure. -
Page 31: Packaging, Transport
▶ Transport the device in shock-resistant packaging and away rately and dispose of them as special waste. from humidity and dirt. Further information: country.burkert.com. ▶ Do not expose the device to temperatures that may exceed the admissible storage temperature range. - Page 32 Type 8228 ELEMENT Packaging, Transport english...
- Page 34 www.burkert.com...
Need help?
Do you have a question about the ELEMENT 8228 and is the answer not in the manual?
Questions and answers