
Subscribe to Our Youtube Channel
Related Manuals for AXIOMTEK MPC240


Summary of Contents for AXIOMTEK MPC240
- Page 1 MPC240 24” FHD Medical Grade Panel ® Computer with Intel Core i7/i5 Processors User’s Manual...
-
Page 2: Disclaimers
Axiomtek does not make any commitment to update the information in this manual. Axiomtek reserves the right to change or revise this document and/or product at any time without notice. No part of this document may be reproduced, stored in a retrieval system, or transmitted, in any form or by any means, electronic, mechanical, photocopying, recording, or otherwise, without the prior written permission of Axiomtek Co., Ltd. -
Page 3: Symbol Index
EC REP address Refer to instruction 4 manual / booklet Serial Number Direct current Alternating current AXIOMTEK Co., Ltd. 8F., No.4, Lane 235, Baoqiao Road, Xindian District, New Taipei City 231, Taiwan (R.O.C.) http://www.axiomtek.com.tw Made in Taiwan MEDNET GmbH, Borkstrasse 10, 48163 Muenster, Germany... -
Page 4: Safety Precautions
Turn OFF the system power before cleaning. Clean the system using a cloth only. Do not spray any liquid cleaner directly onto the screen. The MPC240 Series may come with or w/o a touchscreen. Although the touchscreen is chemical resistant, it is recommended that you spray the liquid cleaner on a cloth first before wiping the screen. -
Page 5: Important Safety Instructions
Important Safety Instructions Read before operating equipment. This product was designed and manufactured to meet strict quality and safety standards. There are, however, some installation and operation precautions which you should be particularly aware of. Read these instructions. Keep these instructions. Heed all warnings. -
Page 6: Classification
Classification Degree of production against electric shock: Not classified. Equipment not suitable for use in the presence of a flammable anesthetic mixture with air or with oxygen or nitrous oxide. Mode of operation: Continuous. Type of protection against electric shock: Class I equipment. General Cleaning Tips You may need the following precautions before you begin to clean the computer. -
Page 7: Cleaning Tools
Cleaning Tools Although many companies have created products to help improve the process of cleaning your computer and peripherals, users can also use household items to clean their computers and peripherals. Below is a listing of items you may need or want to use while cleaning your computer or computer peripherals. -
Page 8: Scrap Computer Recycling
If the computer equipments need the maintenance or are beyond repair, we strongly recommend that you should inform your Axiomtek distributor as soon as possible for the suitable solution. For the computers that are no longer useful or no longer working well, please contact your Axiomtek distributor for recycling and we will make the proper arrangement. -
Page 9: Table Of Contents
Features ....................1 Specifications ..................2 Dimensions ..................5 I/O Outlets .................... 6 Package Checklist ................10 Chapter 2 Starting MPC240 ........11 Turning On Your Device ..............12 Turning Off Your Device ..............13 Operating Your All-in-One PC ............14 2.3.1 Basic Operations .................. - Page 10 Chapter 4 BIOS Setup Utility ......... 35 BIOS Setup Menu ................35 Navigating and Entering Information in BIOS ........ 36 Main Menu ..................37 Advanced Menu ................. 38 Boot Menu ..................39 Security Menu ..................40 Save & Exit Menu ................41 Appendix A Note ............
-
Page 11: Chapter 1 Introduction
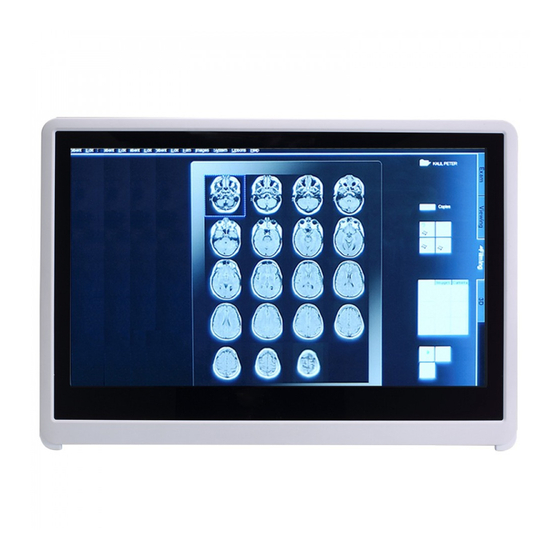
Chapter 1 Introduction The MPC240 is an ultra slim panel computer equipped with 24-inch 250nits brightness FHD WSXGA+ LCD display and supports superior 4th Generation Intel 4th Generation Core i CPU M-series & CELERON & Pentium processors and up to 16G of dual-channel DDR3L system memory. -
Page 12: Specifications
MPC240 Series User’s Manual Specifications Item Category Specifications Intel 4th Generation Core i CPU M-series & CELERON & Type & Speed Pentium Power Consumption 37W Level2 Cache 3~4MB Major Chipset Chipset Intel HM86 (Reserved the design for QM87) Capacity Two 204-pin DDR3L SODIMM sockets each for 4/8GB... - Page 13 MPC240 Series User’s Manual Item Category Specifications A proximity sensor is used to detect the presence of a user. If a user is away from the device >100~110 cm, then the display will turn off and resume when the user is approaching the device <80~90 cm again.
- Page 14 MPC240 Series User’s Manual Item Category Specifications Optional internal UPS battery backup the system for 40 minutes. (The UPS battery life is tested ONLY including External keyboard and mouse connected to the system) Note: The test condition of UPS battery life is idle 70% and UPS battery burn-in 30%.
-
Page 15: Dimensions
MPC240 Series User’s Manual Dimensions The following diagram shows dimensions and outlines of the MPC240. Introduction... -
Page 16: I/O Outlets
MPC240 Series User’s Manual I/O Outlets The following figures show locations of the MPC240 I/O outlets. Item Description Web camera Use for video conference. Display screen Display the screen output. Allow users to use the Projective Capacity Multi-Touch (Touch Panel type). - Page 17 MPC240 Series User’s Manual Item Description Optical disc drive Play or record DVD or CD discs. Cable tie slot Use to attach the cable tie. DC-in jack Connect the power adapter. USB 2.0 ports (x4) Connect USB 2.0 peripheral devices.
- Page 18 MPC240 Series User’s Manual Item Description Power button Press to turn your All-in-One PC on or off. Earphone jack Connect headphones or external speakers. Microphone jack Connect an external microphone. Card reader Use to insert memory cards to transfer pictures, music, and data between your All-in-One PC and flash compatible devices.
- Page 19 MPC240 Series User’s Manual Status Indicators The status indicators in the bottom and the left side of the All-in-One PC light up when a particular function of the All-in-One PC is active. Item Description Power The LED always lights on (blue) when the system is running.
-
Page 20: Package Checklist
MPC240 unit x1 AC Medical Adapter x 1 Driver/utility disc x1 containing driver and user’s manual Cable tie x 1 NOTE: If you can not find this package or any items are missing, please contact Axiomtek distributors immediately. Introduction... -
Page 21: Chapter 2 Starting Mpc240
MPC240 Series User’s Manual Chapter 2 Starting MPC240 Connecting the Power he AC adapter powers up your All-in-One PC and charges the UPS battery. 1. Connect the AC adapter to the DC-in jack of your All-in-One PC. 2. Connect the AC adapter to the power cord. -
Page 22: Turning On Your Device
MPC240 Series User’s Manual Turning On Your Device Plug the wired keyboard and USB mouse into the USB ports. See “Connecting USB Devices” on page 19. NOTE: For Touch Panel type, simply tap on the screen to operate the device. -
Page 23: Turning Off Your Device
MPC240 Series User’s Manual Turning Off Your Device It is important to properly shut down your All-in-One PC to avoid the loss of unsaved data. To shut down your All-in-One PC, do the following: Click Start ( ) > Shut down. -
Page 24: Operating Your All-In-One Pc
MPC240 Series User’s Manual Operating Your All-in-One PC This chapter will guide you on how to use your All-in-One PC. 2.3.1 Basic Operations Adjusting the LCD Display Brightness To adjust the brightness of the screen to match the lighting condition in the room, do the... - Page 25 MPC240 Series User’s Manual Adjusting the LCD Display Resolution To ensure the clarity of the on-screen images, you can manually change the screen resolution setting for the best result. Click Start ( ) > Control Panel > Appearance and Personalization > Display >...
- Page 26 MPC240 Series User’s Manual Adjusting the Volume Level The device is equipped with built-in speakers. When playing any media file, click the icon on the system tray, and then drag the volume bar to adjust the volume level according to your preference.
-
Page 27: Using The Optical Disk Drive
MPC240 Series User’s Manual 2.3.2 Using the Optical Disk Drive You can use the optical disk drive (ODD) to play or record DVD or CD disc. Placing a Disc 1. Press the Eject button to eject the tray. 2. Place the disc on the tray. -
Page 28: Making Connections
MPC240 Series User’s Manual 2.3.3 Making Connections This chapter will guide you on installing peripheral devices to maximize the use of your All-in-One PC. Connecting USB Devices You can connect your All-in-One PC to other USB devices, such as a mouse, keyboard, digital camera, printer, or an external hard disk drive. - Page 29 MPC240 Series User’s Manual Connecting HDMI Devices You can connect your All-in-One PC to other digital devices, such as a TV, projector, set top box, and more. 1. Connect one end of the HDMI cable to the HDMI output port of your device.
- Page 30 MPC240 Series User’s Manual Connecting Audio Components Your All-in-One PC is equipped with earphone and microphone jacks which enable you to use the headset and microphone independently. To connect to a headset, plug the stereo headphone cable into the earphone jack of your device.
-
Page 31: Using The Card Reader
MPC240 Series User’s Manual 2.3.4 Using the Card Reader Your All-in-One PC supports different types of memory cards to provide faster data transfer. Supported types are as follows: SD card SDHC card SDXC card Mini-SD card (with adapter) ... -
Page 32: Using The Cable Tie
MPC240 Series User’s Manual 2.3.5 Using the Cable Tie Using the cable tie, it helps you to organize by grouping cables of the connected devices together. To use the cable tie, do the following: Peel off the protective sheet from the back of cable tie. (A) With the adhesive sticker side facing down, press the cable tie firmly to attach it onto its slot. -
Page 33: Connecting To Bluetooth Devices
MPC240 Series User’s Manual 2.3.6 Connecting to Bluetooth Devices Your All-in-One PC can connect and communicate with other Bluetooth-enabled devices. To add a device, follow the steps below: 1. Click the Bluetooth icon ( ) on the system tray. 2. Click Add a Device. The system starts scanning for Bluetooth devices and displays the available devices. - Page 34 MPC240 Series User’s Manual 4. Click Close to complete the pairing connection. NOTE : 1. Most Bluetooth-enabled devices need to be paired with your All-in-One PC. The PIN you enter on the All-in-One PC must be the same PIN to be entered on the other Bluetooth device.
-
Page 35: Connecting To Internet
MPC240 Series User’s Manual 2.3.7 Connecting to Internet Your All-in-One PC can be connected to the Internet using a wired or wireless network connection. Wired Network To connect to the Internet using a wired network connection, do the following: 1. Plug one end of the network cable to the RJ-45 port of the device. - Page 36 MPC240 Series User’s Manual Wireless Network Your All-in-One PC comes with a WLAN module. A wireless network can be added either when the network is detected or by manually entering the settings information. To connect, follow the steps below: 1. Click the wireless network icon ( ) on the system tray.
- Page 37 MPC240 Series User’s Manual 3. To obtain better Wi-Fi reception, it is important to keep the antenna (as marked in the illustration below) away from any obstructions such as metal objects or electronic devices. Starting MPC240...
- Page 38 MPC240 Series User’s Manual This page is intentionally left blank. Starting MPC240...
-
Page 39: Chapter 3 Hardware Installation
MPC240 Series User’s Manual Chapter 3 Hardware Installation The MPC240 is convenient and easy to maintain for your various hardware configurations, such as CPU (Central Processing Unit) and HDD (Hard Disk Drive). This chapter will show you how to install the hardware. - Page 40 MPC240 Series User’s Manual Step 5 Push down latches on both sides of the SO-DIMM socket. Install the memory module into the socket and push it firmly down until it is fully seated. The socket latches are levered upwards and clipped onto the edges of the SO-DIMM.
- Page 41 MPC240 Series User’s Manual Step 6 To install PCI-Express half size mini card, please follow the steps below. Step 6.1 Insert Mini Card into the socket and push it firmly down until it is fully seated. Step 6.2 Use screws to fasten the Mini Card.
- Page 42 MPC240 Series User’s Manual Step 6.4 Close back cover to the chassis, and fasten securely with all screws. Hardware Installation...
-
Page 43: Installing Hard Disk Drive
MPC240 Series User’s Manual Installing Hard Disk Drive The MPC240 offers a convenient drive bay module for users to install HDD. The system offers users one 2.5” Hard Disk Drive (HDD) for installation. Please follow these steps: Step 1 Turn off the system, and unplug the power cord. -
Page 44: Mounting
MPC240 Series User’s Manual Mounting There are several mounting ways for the MPC240 Series; Wall mount, VESA-Arm and Desktop Stand mountings. Hardware Installation... -
Page 45: Chapter 4 Bios Setup Utility
MPC240 Series User’s Manual Chapter 4 BIOS Setup Utility Your All-in-One PC has a BIOS setup utility which allows you to configure important system settings, including settings for various optional functions of the All-in-One PC. This chapter explains how to use the BIOS setup utility BIOS Setup Menu The BIOS Setup Utility allows you to configure your All-in-One PC basic settings. -
Page 46: Navigating And Entering Information In Bios
MPC240 Series User’s Manual Navigating and Entering Information in BIOS Use the following keys to move between fields and to enter information: Keyboard Description Selects screen. Moves up/down to select items. ↓ ↑ Enter Confirms the selection and enters the selected menu screen. -
Page 47: Main Menu
MPC240 Series User’s Manual Main Menu The Main menu displays the system overview information about the device, including the system date and time. BIOS Information Display the BIOS version detected during boot up. System Information Display the CPU type and speed, total memory, mainboard version, ME FW version, and ME Firmware SKU. -
Page 48: Advanced Menu
MPC240 Series User’s Manual Advanced Menu The Advanced menu allows you to configure specific system settings. SATA Mode Selection Determine how SATA controller(s) operate. Wake on LAN Support Enable/disable the integrated LAN to wake the system. Wake on WLAN Support Enable/disable the integrated WLAN to wake the system. -
Page 49: Boot Menu
MPC240 Series User’s Manual Boot Menu The Boot menu allows you to configure the boot settings and boot sequence. Bootup NumLock State Select the keyboard NumLock state. Option ROM Messages Set the display mode for Option ROM. CSM Support Enable/disable the system to launch an older OS. -
Page 50: Security Menu
MPC240 Series User’s Manual Security Menu The Security menu allows you to set or change the Administrator and User passwords. Administrator Password Create or change the Administrator password. User Password Create or change the User password. BIOS Setup Utility... -
Page 51: Save & Exit Menu
MPC240 Series User’s Manual Save & Exit Menu The Save & Exit menu allows you to save/discard the changes and restore the default values for all setup options before leaving the BIOS Setup Menu. Save Changes and Reset Reset the system after saving the changes. - Page 52 MPC240 Series User’s Manual This page is intentionally left blank. BIOS Setup Utility...
-
Page 53: Appendix A Note
MPC240 Series User’s Manual Appendix A Note This product conforms to the provisions of the EC directive 93/42/EEC (Medical Device Directive). And also complies with following standards (included but not limited): Safety standard: - ANSI/AAMI ES60601-1 (2005)+ A1 (2012)(Medical Electrical Equipment - Part 1: General Requirements for Basic Safety and Essential Performance). - Page 54 MPC240 Series User’s Manual This page is intentionally left blank. Note...
-
Page 55: Appendix B Emc Statement
MPC240 Series User’s Manual Appendix B EMC Statement WARNING: MEDICAL ELECTRICAL EQUIPMENT needs special precautions regarding EMC and needs to be installed and put into service according to the EMC information provided in this manual. Portable and mobile RF communications equipment can affect MEDICAL ELECTRICAL EQUIPMENT. - Page 56 MPC240 Series User’s Manual Guidance and manufacturer’s declaration – electromagnetic immunity The device is intended for use in the electromagnetic environments listed below, and should only be used in such environments: Electromagnetic Environment – Immunity IEC 60601 Test Compliance Level...
- Page 57 MPC240 Series User’s Manual Guidance and manufacturer’s declaration – electromagnetic immunity The device is intended for use in the electromagnetic environments listed below, and should only be used in such environments: Immunity IEC 60601-1-2 Compliance Electromagnetic Environment – Guidance Test Level...
- Page 58 MPC240 Series User’s Manual Recommended separation distances between portable and mobile RF communication equipment and the device. The device is intended for use in an electromagnetic environment where radiated RF disturbances are under control. User can help prevent electromagnetic interference by keeping the device at a minimum distance from portable and mobile RF communications equipment (transmitters).
Need help?
Do you have a question about the MPC240 and is the answer not in the manual?
Questions and answers