Table of Contents
Advertisement
Quick Links
Advertisement
Table of Contents

Related Manuals for KaVo EXTRAmatic 9040


Summary of Contents for KaVo EXTRAmatic 9040
- Page 1 Instructions for use EXTRAmatic 9040 Always be on the safe side.
- Page 2 Manufacturer: Distributed by: Kaltenbach & Voigt GmbH KaVo Dental GmbH Bismarckring 39 Bismarckring 39 D-88400 Biberach D-88400 Biberach www.kavo.com Phone +49 (0) 7351 56-0 Fax +49 (0) 7351 56-1488...
-
Page 3: Table Of Contents
3.5.1 Description of the rating plate....................18 3.5.2 Dust filtration test........................18 3.6 Scope of delivery of EXTRAmatic 9040 dust extraction system............. 18 4 Commissioning............................... 20 4.1 Preparation for commissioning....................... 20 4.2 Lifting and carrying the unit........................20 4.3 Connector............................... 21 4.3.1... - Page 4 Instructions for use EXTRAmatic 9040 Table of contents 5.1 List of utility programs..........................30 5.2 User programs............................30 5.2.1 Level measurement series......................30 5.2.2 Automatic mode......................... 31 5.2.3 Continuous mode........................31 5.2.4 Extraction level preselection...................... 31 5.3 Utility programs............................32 5.3.1...
-
Page 5: User Notes
Instructions for use EXTRAmatic 9040 1 User notes | 1.1 User guidelines 1 User notes 1.1 User guidelines Requirement Read these instructions prior to first use to avoid misuse and prevent damage. Note Before use, all information, instructions and training on how to use the dust extrac‐... -
Page 6: Service
12 months from the date of purchase as confirmed by the salesperson. In case of justified complaints, KaVo will honour its warranty with a free replacement or repair. -
Page 7: Transportation And Storage
(in accordance with the General German Freight Forwarders´ Terms and Conditions, Art. 28) Outside Germany Note KaVo shall not be held liable for damage arising from transportation. The shipment must be checked on arrival. If the packaging is visibly damaged on delivery, please proceed as follows: 1. - Page 8 Instructions for use EXTRAmatic 9040 1 User notes | 1.4 Transportation and storage Note Please keep the packaging in case you need to return the product for servicing or repair. The symbols printed on the outside are for transportation and storage, and have the...
-
Page 9: Safety
It is intended for use in dental laboratories and practices, and within industry (gold‐ smiths, hearing-aid manufacture, glass cutting etc.). The use of this KaVo product is not permitted in areas subject to an explosion hazard. The overarching guidelines and/or national laws, national regulations and the rules of technology applicable to machines for the startup and use of the KaVo product for the intended purpose are to be applied and complied with. -
Page 10: Product-Specific
If you have any questions regarding proper disposal of the KaVo product, please contact the KaVo branch. Disposal of electronic and electrical devices Note According to EC directive 2002/96 concerning used electrical and electronic devi‐... -
Page 11: Safety Instructions
This device contains harmful dust. Only professionals and wearing the appropriate protective equipment may empty and service the device including emptying the dust collector. Only original KaVo filters may be used. The manufacturer or someone trained as a master dental technician must perform a... -
Page 12: Protective Clothing
▶ Repair and servicing work on the electronic part of the unit may be done only by skilled staff or KaVo-trained technicians. ▶ Use original KaVo spare parts only. 2.4 Protective clothing Protective equipment recommended during emptying or maintenance of the dust ex‐... -
Page 13: Product Description
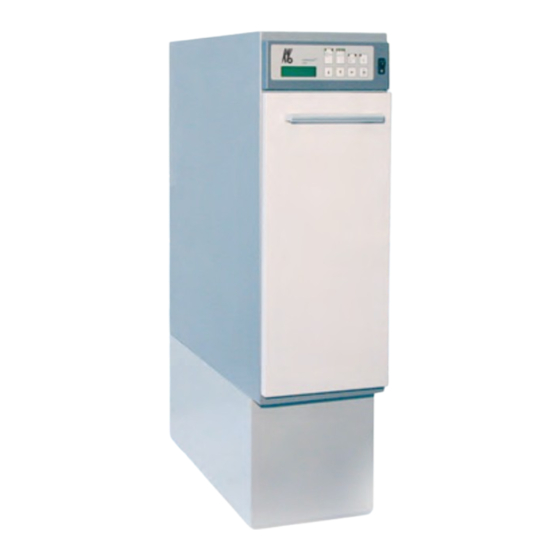
Instructions for use EXTRAmatic 9040 3 Product description | 3.1 EXTRAmatic front panel 3 Product description The KaVo product is for vacuuming and separating hazardous dust (with MAK values) and inert dusts and vapours (primarily methyl methacrylate). 3.1 EXTRAmatic front panel EXTRAmatic front panel ①... -
Page 14: Extramatic Rear Panel
Instructions for use EXTRAmatic 9040 3 Product description | 3.2 EXTRAmatic rear panel 3.2 EXTRAmatic rear panel Rear view of the EXTRAmatic unit ① Control line connection ② Port for connecting lead ③ Compressed air connection ④ External control panel connection ⑤... -
Page 15: Control Panel
Instructions for use EXTRAmatic 9040 3 Product description | 3.3 Control panel 3.3 Control panel 1 2 3 EXTRAmatic ① Button Automatic - continuous opera‐ ② LED display for automatic operation tion ③ LED display for continuous operation ④ LED display for selected suction step ⑤... - Page 16 Instructions for use EXTRAmatic 9040 3 Product description | 3.4 Technical data 8 screen 41 kg 9 screen 42 kg Rated voltage Voltage ranges 100 - 120 V 50/60 Hz, 230 V 50/60 Hz Circuit breaker Permissible voltage fluctuation ±10%...
-
Page 17: Transportation And Storage Conditions
Instructions for use EXTRAmatic 9040 3 Product description | 3.4 Technical data Level IV 128 m Intake connection Dust extractor Ø 50 mm Aspiration hole Ø 42 or 50 mm Hose (internal): Ø 42 or 50 mm Length of intake hose 5000 mm max. -
Page 18: Rating Plate
⑩ Technical Specifications ⑪ CE mark ⑫ Disposal instructions, intended use 3.5.2 Dust filtration test GS/BG certificate no.: 0605011 3.6 Scope of delivery of EXTRAmatic 9040 dust extraction system Name Material number Hose ∅ 50 mm, length 5 m 0.695.1422 2 x Reduction Ø... - Page 19 Instructions for use EXTRAmatic 9040 3 Product description | 3.6 Scope of delivery of EXTRAmatic 9040 dust extraction system Name Material number Instructions for use 1.003.6043 de 1.003.7096 en 1.003.7097 fr 1.003.7098 it 1.003.7099 es 1.006.4281 ru Enclosed in the dust container: Connec‐...
-
Page 20: Commissioning
Instructions for use EXTRAmatic 9040 4 Commissioning | 4.1 Preparation for commissioning 4 Commissioning 4.1 Preparation for commissioning Note Mains connection required. Note Prior to commissioning the unit, make sure that the voltage specified on the rating plate and the enclosed mains cable are consistent with the existing mains connec‐... -
Page 21: Connector
Instructions for use EXTRAmatic 9040 4 Commissioning | 4.3 Connector The unit can be lifted and carried at points ② and ③. 4.3 Connector Note Make sure that the control line with display, extraction hose connection and socket for the item generating dust are positioned and aligned correctly. - Page 22 Instructions for use EXTRAmatic 9040 4 Commissioning | 4.3 Connector At the workplace, push the unit into position; do not screw it to the bench top or adja‐ cent objects. The unit is clamped on to the worktop using levelling screws.
-
Page 23: Connecting At The Dental Laboratory
Use hose clips as required. 4.3.2 Connecting at the dental laboratory If the unit is to be used in a dental laboratory in combination with a KaVo workstation, position the unit beneath or adjacent to the workstation. A B S O R m a t i c R... -
Page 24: Connecting The Extraction Hoses
When fitting hoses for use in KaVo laboratory workstations or at KaVo extractor units or support racks ①, choose those with a diameter of 42 mm. -
Page 25: Levelling
Instructions for use EXTRAmatic 9040 4 Commissioning | 4.3 Connector Do not stretch the hose vertically or allow it to sag. Use hose clips as required. 4.3.4 Levelling ▶ Remove front panel ①. ▶ Flip the locking lever ② downwards. -
Page 26: Connecting Via Control Line
Instructions for use EXTRAmatic 9040 4 Commissioning | 4.3 Connector 4.3.5 Connecting via control line Whenn the equipment is appropriately set up (such as the K-control unit), a control signal can be used to control the EXTRAmatic (a connection line is needed from the equipment to the dust extraction system). -
Page 27: Connection Via Connecting Lead
Instructions for use EXTRAmatic 9040 4 Commissioning | 4.3 Connector 4.3.6 Connection via connecting lead Note It is essential that the electrical connection and extraction hose connection are as‐ signed to each other (see mark). The total connected load must not exceed 1900 Watt, but may be distributed over 3 sockets. -
Page 28: Connecting An External Control Panel
Instructions for use EXTRAmatic 9040 4 Commissioning | 4.3 Connector 4.3.8 Connecting an external control panel ▶ Install the external control panel in its intended location. Note Make sure that all constituent parts are positioned correctly. ▶ Plug the cable from the external control panel into the extractor unit. - Page 29 Instructions for use EXTRAmatic 9040 4 Commissioning | 4.3 Connector Mains connection (100 - 120V) ▶ Plug the mains connection lead ① (100 - 120 Volt for Japan and US) in at the mains (which must be earthed in accordance with regulations).
-
Page 30: Operation
Instructions for use EXTRAmatic 9040 5 Operation | 5.1 List of utility programs 5 Operation Note Safe operation and protection of the unit is guaranteed only if used correctly in ac‐ cordance with the User instructions. 5.1 List of utility programs This diagram gives an overview of all the utility programs on offer. -
Page 31: Automatic Mode
Instructions for use EXTRAmatic 9040 5 Operation | 5.2 User programs Once this is complete, the extractor unit is in automatic mode ('automatic mode' LED is on). The extractor unit automatically detects whether there are one, two or three external control panels connected up to it. -
Page 32: Utility Programs
Instructions for use EXTRAmatic 9040 5 Operation | 5.3 Utility programs 5.3 Utility programs 5.3.1 Utility program key (2000) The extractor unit offers a number of different languages to choose from. The "Numerical language" section allows you to show the operating status on a non-... - Page 33 Instructions for use EXTRAmatic 9040 5 Operation | 5.3 Utility programs Extraction level ▶ Using the up or down button, select the required extraction level (24, 36, 48 or 72 units) and choose ENTER to store the extraction level. Factory setting: 24 units Optimum operating mode ▶...
- Page 34 Instructions for use EXTRAmatic 9040 5 Operation | 5.3 Utility programs ▶ Press the back button. ð This takes you out of the utility program. Examples Example 1: 3 technical workstations Settings for workstation 1 (AP1), workstation 2 (AP2) and workstation 3 (AP3)
-
Page 35: User Survey" Utility Program (2100)
Instructions for use EXTRAmatic 9040 5 Operation | 5.3 Utility programs Current identification If the shape grinder (AP 1) is in operation, the sandblaster (AP 2) and technical work‐ station (AP 3) are locked. Example 3: Extraction channel 1: Shape grinder... -
Page 36: Numerical Language" Utility Program (2150)
Instructions for use EXTRAmatic 9040 5 Operation | 5.3 Utility programs 5.3.4 "Numerical language" utility program (2150) ▶ Using the the up or down button, select the "Language" utility program and choose ENTER. ð This calls up a list of the different language options. -
Page 37: Automatic Sensitivity Adjustment" Utility Program (2300)
Instructions for use EXTRAmatic 9040 5 Operation | 5.3 Utility programs Note Reset = Resets all values to the original factory setting 5.3.7 "Automatic sensitivity adjustment" utility program (2300) ▶ Using the the up or down button, select the "Automatic sensitivity adjustment" util‐... -
Page 38: Display Of The Socket Current" Utility Programm (2400)
Instructions for use EXTRAmatic 9040 5 Operation | 5.3 Utility programs 80 (230 V) 260 (100 V) 200 (120 V) ▶ Press the back button ð This takes you out of the utility program. 5.3.9 "Display of the socket current" utility programm (2400) ▶... -
Page 39: Time Since Carbon Filter Was Changed" Utility Program (2455)
Instructions for use EXTRAmatic 9040 5 Operation | 5.3 Utility programs ▶ Use the "Up" and/or "Down" buttons to set the service life as desired. ▶ Press ENTER. ð This saves the new value that has been set. Factory setting: 800 hours 5.3.12 "Time since carbon filter was changed"... -
Page 40: Memory Time" Utility Program (2650)
Instructions for use EXTRAmatic 9040 5 Operation | 5.3 Utility programs ð This saves the new value that has been set. Factory setting: 3 seconds 5.3.15 "Memory time" utility program (2650) ▶ Using the the up or down button, select the "Memory time" utility program and choose ENTER. -
Page 41: Cleaning And Servicing
Instructions for use EXTRAmatic 9040 6 Cleaning and servicing | 6.1 Cleaning 6 Cleaning and servicing ® KaVo recommends to use original KaVo parts for operation and repair only, since their safety, function, and specific suitability have been tested in extensive tests. 6.1 Cleaning To clean a soiled extractor unit, rub or wipe down its outer casing using a damp cloth. - Page 42 Instructions for use EXTRAmatic 9040 6 Cleaning and servicing | 6.2 Maintenance Installation ▶ Insert new waste bag② (accessories disposal setMat. no. 0.657.0951) in dust container③ and press against container floor and walls. ▶ Insert the overhanging material into the slot around the container's edge and press the refuse bag ②...
-
Page 43: Replacing The Active Carbon Filter
Instructions for use EXTRAmatic 9040 6 Cleaning and servicing | 6.2 Maintenance 6.2.2 Replacing the active carbon filter Disassembly ▶ Remove the dust container ①. Further disassembly. See also: 2 6.2.1.1 Disassembly, Page 41 ▶ Fold up the two quick locks② on the cover ③ above the noise insulation inserts or plug-in units for the active charcoal filter and remove cover. -
Page 44: Replacing The Long-Term Filter
Replace filter ③ if it becomes damaged or following a number of failed attempts to clean it Note Original "KaVo filter cartridges" must be used in order to guarantee full operability and safety of this unit. Suitable protective clothing (mask, gloves etc) must be worn. - Page 45 Instructions for use EXTRAmatic 9040 6 Cleaning and servicing | 6.2 Maintenance In the event of partial filter wear and tear, which is caused by long-term use and can no longer be remedied by frequent cleaning, the filter ③ including strip ⑧ must be re‐...
- Page 46 Instructions for use EXTRAmatic 9040 6 Cleaning and servicing | 6.2 Maintenance ▶ Lift defective or damaged filters③ at front and remove them ▶ Screw off used brush strip⑧ and affix new brush strip Mat. no. 0.229.3005 using three knurled nuts⑦ .
-
Page 47: Leds
Instructions for use EXTRAmatic 9040 6 Cleaning and servicing | 6.2 Maintenance 6.2.4 LEDs "Filter" LED - always on See also: 2 Warning 30., Page 0 If LED ① is constantly lit, this indicates that the filter is full. The next time the extractor motor is switched off, the filter is subjected to an automatic clean for approx. - Page 48 Instructions for use EXTRAmatic 9040 6 Cleaning and servicing | 6.2 Maintenance EXTRAmatic "Dust container" LED - always on If LED ② is constantly lit, this indicates that the dust container is full. The next time operation of the extraction motor is interrupted, the motor will be stop‐...
-
Page 49: Safety Checks In Accordance With Iec 62638 (Vde 0701 / 0702)
▪ the applicable accident prevention regulations. The overarching guidelines and/or national laws, national regulations and the rules of technology applicable to the startup and use of the KaVo product for the intended pur‐ pose are to be applied and complied with. -
Page 50: Troubleshooting
Instructions for use EXTRAmatic 9040 8 Troubleshooting | 6.2 Maintenance 8 Troubleshooting Note With this product, error or info messages are displayed on screen. Malfunction Cause Remedy ▶ Insert filter Error 10 (1200) - filter rota‐ No filter inserted tion. - Page 51 Instructions for use EXTRAmatic 9040 8 Troubleshooting | 6.2 Maintenance Malfunction Cause Remedy ▶ Filter will be cleaned au‐ Warning 30 (1201) - Filter Filter is severely soiled. tomatically the next time cleaning work is interrupted. Indication that filter is due for a clean ▶...
-
Page 52: Accessories
Instructions for use EXTRAmatic 9040 9 Accessories | 6.2 Maintenance 9 Accessories Presentation Material summary Material number Exhaust set 1.004.1578 Dust extraction panel for EXTRA‐ 0.657.0841 matic Dust extraction panel EXTRAmatic 0.657.1531 (904x) Foot switch 1.000.3147 Reduction Ø 50/42 0.224.6597 5 meter hose (Ø... - Page 53 Instructions for use EXTRAmatic 9040 9 Accessories | 6.2 Maintenance Servicing materials and consumables Presentation Material summary Material number Carbon filter 0.657.1152 Disposal set 0.657.0951 ABSORBA long-term filter 0.657.1142 53 / 56...
-
Page 54: Declaration Of Conformity
Instructions for use EXTRAmatic 9040 10 Declaration of conformity | 6.2 Maintenance 10 Declaration of conformity 54 / 56...
Need help?
Do you have a question about the EXTRAmatic 9040 and is the answer not in the manual?
Questions and answers