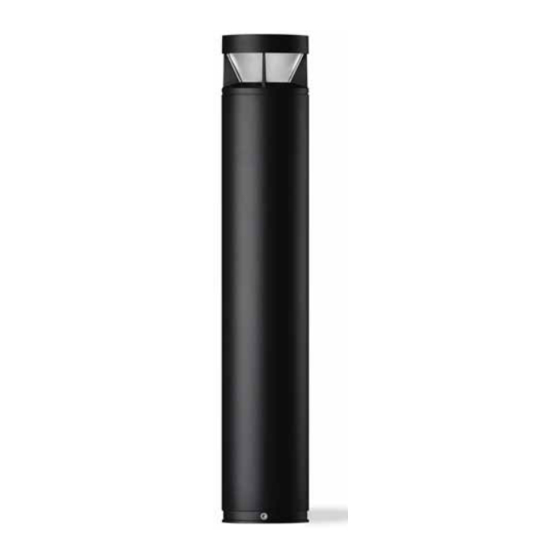
WE-EF KTX234 LED Installation And Maintenance Instructions Manual
Bollard
Hide thumbs
Also See for KTX234 LED:
Advertisement
Quick Links
Do not open during installation
This product is factory-sealed.
Refer to the instructions contained in this
document for details.
Installation tools
Mounting hardware used on this product
includes fasteners with hexalobular socket
heads (ISO 10664). Installation requires the
use of matching tools.
Surge Protection
This product features built-in surge protection circuitry in compliance with
applicable standards.
For comprehensive protection of a luminaire installation against lightning and
electrical surges, it is essential to cover mains supply and data input lines at
the distribution board level, by using respective primary (Type 1) and secondary
(Type 2) surge arrestors in compliance with EN61643-11/IEC61643-1.
Warning
Ensure that all required surge protection measures are in place and activated
prior to luminaire installation. Also, disconnect luminaires before operating
high-power devices such as, for example, electrical arc welders.
WE-EF LEUCHTEN
Installation and Maintenance
Instructions
Bollard
KTX234 LED
KTY234 LED
Advertisement

Subscribe to Our Youtube Channel
Summary of Contents for WE-EF KTX234 LED
- Page 1 WE-EF LEUCHTEN Installation and Maintenance Instructions Bollard KTX234 LED KTY234 LED Do not open during installation Surge Protection This product is factory-sealed. This product features built-in surge protection circuitry in compliance with Refer to the instructions contained in this applicable standards.
- Page 2 Bollard KTX234 KTY234 KTY234 H = 270 mm H = 600 mm H = 1000 mm ø 180 IP66, IK10, Class I, ta = 40°C Weight for KTX234 for KTY234 for KTY234 1000 Accessories: Planted root – Galvanised steel. ESV4 for KTX234/KTY234 300-0461 ESV4...
-
Page 3: Maintenance
Light Source Maintenance Apart from cleaning the product’s exterior surfaces, no special maintenance work is required. Do not use high-pressure cleaners. To remove the head of the luminaire during maintenance, loosen screw J with Torx T-20 tool and rotate it anti-clockwise until it can be lifted up. -
Page 4: Installation
Installation The product must be installed and maintained by a suitably quali ed professional in compliance with latest building/construction and/or electrical regulations and relevant legislation. Warning: Switch off mains electrical supply prior to installing and connecting the luminaire. Notice: If the luminaire is modi ed by anybody other than the original manufacturer, then the warranty will no longer be valid and shall become the full respon- sibility of the modifying person/organisation. -
Page 5: Installation Procedure
KTX [R65] is opposite the set screw J. 6) Connect luminaire cable E to mains supply cable F in watertight terminal connector G (not supplied by WE-EF): a) ON/OFF (L = Phase, N = Neutral, = Earthing) b) 1-10V/DALI (L = Phase, N = Neutral, = Earthing, DA/DA = DALI control line, D-/D+ = 1-10V control line). - Page 6 KTX234...
- Page 7 I. 6) Connect luminaire cable E to mains supply cable F in watertight terminal connector G (not supplied by WE-EF): a) ON/OFF (L = Phase, N = Neutral, = Earthing) b) 1-10V/DALI (L = Phase, N = Neutral, = Earthing, DA/DA = DALI control line, D-/D+ = 1-10V control line).
- Page 8 KTY234...
- Page 9 Torque: set screw Screw Torque max. 2.0 Nm max. 4.0 Nm max. 6.0 Nm max. 15.0 Nm max. 100.0 Nm Direction of Light for [R65] One-sided...
- Page 10 Switzerland United States of America Tel +41 22 752 49 94 Tel +1 724 742 0030 Fax +41 22 752 49 74 Fax +1 724 742 0035 info.switzerland@we-ef.com info.usa@we-ef.com TO9241W0520 © WE-EF 2020 Technical speci cations are subject to change.
- Page 11 WE-EF LEUCHTEN Installation and Maintenance Instructions Planted Root ESV4 ESV2 ESV6...
- Page 12 Planted Root ESV4 300-0461 ESV4 300-0464 Suitability Suitability 1. KTX234 1. CFY259 2. KTY234 2. GRY234 3. ZFY230 3. RRY324 4. GRY224 4. RRZ324 5. Short post 5. XRY324 6. XRZ324 ESV4 300-0586 ESV4 300-0459 Suitability Suitability 1. XRY334 1. QSI254 2.
- Page 13 Planted Root ESV2 300-9115 ESV6 300-0457 Suitability Suitability 1. PSY414/424 1. LTM440 2. LTM444 3. AMW-C 4. AMF-C 5. AMF-S 6. AML-C ESV6 300-0824 Suitability 1. AML-C 2. FLA461...
-
Page 14: Installation Instruction
Installation Instruction 1) Note: It is the responsibility to installer to 2) Please note, ESV4 and ESV6 must be ensure the suitability of the ESV planted root orientated correctly for different products. for any local or national structural requirements In both instances conduit entry can be rotated for installation, and that planted root is suitable to match cable routing. - Page 15 5) For all other product that use ESV6 please orientate planted root as shown (base plate connections/conduit. is parallel to the pathway). For this installation, use 40 mm long M16 bolts supplie. 7) Place the ESV in the form work for concrete 8) Fit the nominated bolts through mounting pad, ensuring orientation, position and levels are correct.
- Page 16 9) Pour concrete to desired level depending on requirement of soil, paver or concrete. Ensure (as per luminaire instructions) onto mounting Concrete Paver Soil...
- Page 17 WE-EF HELVETICA WE-EF LIGHTING Switzerland United States of America Tel +41 22 752 49 94 Tel +1 724 742 0030 Fax +41 22 752 49 74 Fax +1 724 742 0035 info.switzerland@we-ef.com info.usa@we-ef.com TO9257W0420 © WE-EF 2020 subject to change.


Need help?
Do you have a question about the KTX234 LED and is the answer not in the manual?
Questions and answers