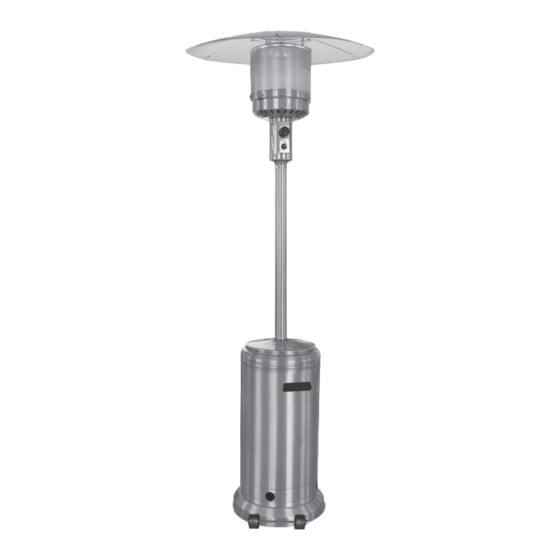
Paramount Fitness KLD7002S Operating Instructions Manual
Outdoor patio heater
Hide thumbs
Also See for KLD7002S:
- Instruction manual (20 pages) ,
- Manual (16 pages) ,
- Instruction manual (16 pages)
Summary of Contents for Paramount Fitness KLD7002S
- Page 1 KLD7002S DANGER WARNING WARNING DANGER DANGER WARNING ATTACH YOUR RECEIPT HERE WARNING Questions, problems, missing parts? – Friday a.m. – p.m., ST...
-
Page 2: Table Of Contents
BEFORE YOU BEGIN TABLE OF CONTENTS Before You Begin Page 2 Safety Information Page 3-4 Package Contents Page 4 Hardware Contents Page 4 Assembly Page 5-8 Operating Instructions Page 9-12 Care and Maintenance Page 13 Troubleshooting Troubleshooting Page 14 Page 14 Page 1 BEFORE YOU BEGIN Monday –... -
Page 3: Safety Information
SAFETY INFORMATION DANGER DANGER CAUTION CAUTION WARNING WARNING WARNING WARNING WARNING: FOR OUTDOOR USE ONLY CARBON MONOXIDE HAZARD... -
Page 4: Package Contents
PACKAGE CONTENTS PART DESCRIPTION QUANTITY packed in inner carton packed under Base packed in 1 inner carton attached to Head Assembly packed in inner carton packed in 1 inner carton packed in inner carton (secures LPG cylinder) packed with post supports *Some models come with an optional sandbox feature. -
Page 5: Assembly
ASSEMBLY PREPARATION ESTIMATED ASSEMBLY TIME: Tools Required for Assembly (NOT included): *Optional Sandbox: For models that come with a sandbox, the Base remove the 4 Large Screws and Large Nuts that secure the base to the sandbox. Pull open the plastic cap on top of the Plastic Cap plastic cap. - Page 6 ASSEMBLY Lower Post Post Supports Post Supports Base Lower Post Post Supports Large Bolt Post Support Small Flange Nut Post Support Wrench Hardware Used: Upper Post Lower Post Tank Housing Upper/Lower Posts Post Supports Tank Housing Base Head Assembly Large Flat Washer Head Assembly Hardware Used:...
- Page 7 ASSEMBLY Head Assembly Upper Post Gas Hose Upper/lower Posts Head Assembly Upper Post mall Bolts with Lock Washers Hardware Used: NOTE: MAKE SURE TO REMOVE PROTECTIVE PLASTIC COVER ON REFLECTOR PIECES PRIOR TO ASSEMBLY! sections, loosen each screw prior to further assembly and retighten after sections are aligned.
- Page 8 ASSEMBLY Head Assembly Large Flat Washers Large Flat Washers Wing Nuts Wing Nuts Hardware Used: only Tank Housing Post Supports Regulator Gas Hose Regulator Chain Tank Housing NOTE: Use this heater only with a propane vapor withdrawal supply system. See chapter 5 of the standard for storage and...
-
Page 9: Operating Instructions
OPERATING INSTRUCTIONS... - Page 10 OPERATING INSTRUCTIONS LEAK TEST BEFORE TURNING GAS SUPPLY ON: WARNING OUTDOOR use only IF BUBBLES APPEAR AT ANY CONNECTION, THERE IS A LEAK. IF NO BUBBLES APPEAR AT ANY CONNECTION, THE CONNECTIONS BEFORE LIGHTING: ARE SECURE. Note: Whenever gas connections are loosened or removed, you must perform a complete leak test.
- Page 11 OPERATING INSTRUCTIONS LIGHTING WARNING NOTE: For initial start or after any cylinder change, hold the control knob in for 2 minutes to purge air from all gas lines PUSH IN before proceeding. WHEN HEATER IS ON: PUSH & HOLD WHILE PUSHING IN BUTTON RE-LIGHTING:...
- Page 12 Operating Instructions OPERATION CHECKLIST: WARNING BEFORE OPERATING: SHUT DOWN: NOTE: After use, some discoloration of the OPERATION INFORMATION AND SAFETY: emitter screen is normal. AFTER OPERATION:...
-
Page 13: Care And Maintenance
CARE AND MAINTENANCE WARNING KEEP EXTERIOR SURFACES CLEAN. STORAGE Between uses: Note: Note: In a salt-air environment (such as near an ocean), corrosion occurs more quickly than normal. Frequently check for corroded areas and repair them promptly. SERVICE: TIP FOR STAINLESS STEEL MODELS: Use high-quality automobile wax to help maintain the appearance of your heater. -
Page 14: Troubleshooting
TROUBLESHOOTING PROBLEM POSSIBLE CAUSE CORRECTIVE ACTION Questions, problems, missing parts? Monday – Friday a.m. – p.m., ST... - Page 15 IMPORT Si vous éprouvez si vous avez des questions ou des For questions, concerns or problems with our product please email our customer service department: préoccupations, prière de faire parvenir un courriel à notre Service à la clientèle customercare@jrhome.com customercare@jrhome.com DATED PROOF OF PURCHASE REQUIRED FOR WARRANTY SERVICE UNE PREUVE D’ACHAT DATÉE EST REQUISE POUR SE PRÉVALOIR DE LA GARANTIE.


Need help?
Do you have a question about the KLD7002S and is the answer not in the manual?
Questions and answers