
Related Manuals for Electrolux ESL5205LO


Summary of Contents for Electrolux ESL5205LO
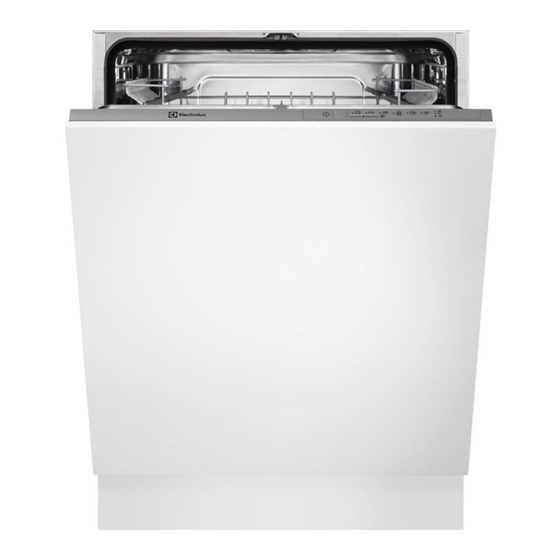
- Page 1 ESL5205LO Dishwasher User Manual Lave-vaisselle Notice d'utilisation Zmywarka Instrukcja obsługi...
-
Page 2: Table Of Contents
12. TECHNICAL INFORMATION................. 19 WE’RE THINKING OF YOU Thank you for purchasing an Electrolux appliance. You’ve chosen a product that brings with it decades of professional experience and innovation. Ingenious and stylish, it has been designed with you in mind. So whenever you use it, you can be safe in the knowledge that you’ll get great results every time. - Page 3 ENGLISH responsible for any injuries or damages that are the result of incorrect installation or usage. Always keep the instructions in a safe and accessible location for future reference. 1.1 Children and vulnerable people safety This appliance can be used by children aged from 8 •...
-
Page 4: Safety Instructions
Do not leave the appliance with the open door • unattended to avoid stepping accidentally onto it. Before any maintenance operation, deactivate the • appliance and disconnect the mains plug from the socket. Do not use high pressure water sprays and/or steam •... -
Page 5: Product Description
ENGLISH • Ensure that there are no visible water • Dishwasher detergents are leaks during and after the first use of dangerous. Obey the safety the appliance. instructions on the detergent • The water inlet hose has a safety packaging. valve and a sheath with an inner •... -
Page 6: Control Panel
Filters Detergent dispenser Rating plate Cutlery basket Salt container Lower basket Air vent Upper basket Rinse aid dispenser 4. CONTROL PANEL On/off button Programme button Programme indicators Delay button Indicators 4.1 Indicators Indicator Description End indicator. Rinse aid indicator. It is always off while the programme operates. -
Page 7: Settings
ENGLISH Programme Degree of soil Programme Consumption values Type of load phases Duration Energy Water (min) (kWh) Normal soil • Pre-wash 130 - 140 1.4 - 1.6 15-17 Crockery and • Wash 65 °C cutlery • Rinses • Dry Fresh soil •... - Page 8 How to enter user mode results and on the appliance. Make sure the appliance is in The higher the content of these minerals, programme selection mode. the harder your water is. Water hardness is measured in equivalent scales.
- Page 9 ENGLISH 3. Press on/off to confirm the setting. 6.3 Acoustic signals Acoustic signals sound when a malfunction of the appliance occurs. It is not possible to deactivate these acoustic signals. There is also an acoustic signal that sounds when the programme is completed.
-
Page 10: Before First Use
7. BEFORE FIRST USE 1. Make sure that the current level of 4. Carefully shake the funnel by its the water softener agrees with the handle to get the last granules inside. hardness of the water supply. If 5. Remove the salt around the opening not, adjust the level of the water of the salt container. -
Page 11: Daily Use
ENGLISH 1. Press the release button (D) to open the lid (C). 2. Pour the rinse aid in the dispenser (A) until the liquid reaches the fill level 'max'. 3. Remove the spilled rinse aid with an absorbent cloth to prevent too much foam. -
Page 12: Hints And Tips
8.3 Setting and starting a Do not try to close the programme appliance door within 2 minutes after AirDry automatically opens it, as Starting a programme this may cause damage to the appliance. 1. Keep the appliance door ajar. - Page 13 ENGLISH programme (if available) or select a 1. Set the highest level of the water programme with a prewash phase. softener. • Always use the whole space of the 2. Make sure that the salt and rinse aid baskets. containers are full. •...
-
Page 14: Care And Cleaning
• The correct quantity of detergent is 2. First remove items from the lower used. basket, then from the upper basket. At the end of the program 9.6 Unloading the baskets water can still remain on the sides and on the door of the 1. -
Page 15: Troubleshooting
ENGLISH 10.2 Cleaning the spray arms Do not remove the spray arms. If the holes in the spray arms are clogged, remove remaining parts of soil with a thin pointed object. 10.3 External cleaning • Clean the appliance with a moist soft cloth. - Page 16 Problem and alarm code Possible cause and solution You cannot activate the appliance. • Make sure that the mains plug is connected to the mains socket. • Make sure that there is no damaged fuse in the fuse box.
- Page 17 ENGLISH Problem and alarm code Possible cause and solution Rattling/knocking sounds from in‐ • The tableware is not properly arranged in side the appliance. the baskets. Refer to basket loading leaflet. • Make sure that the spray arms can rotate freely.
- Page 18 Problem Possible cause and solution The dishes are wet. • The programme does not have a drying phase or has a drying phase with low temperature. • The rinse aid dispenser is empty. • The quality of the rinse aid can be the cause.
-
Page 19: Technical Information
ENGLISH Refer to "Before first use", "Daily use" or "Hints and tips" for other possible causes. 12. TECHNICAL INFORMATION Dimensions Width / height / depth 596 / 818 - 898 / 550 (mm) Voltage (V) 220 - 240 Electrical connection Frequency (Hz) Water supply pressure Min. -
Page 20: Informations De Sécurité
12. CARACTÉRISTIQUES TECHNIQUES............39 NOUS PENSONS À VOUS Merci d'avoir choisi ce produit Electrolux. Avec ce produit, vous bénéficiez de dizaines d'années d'expérience professionnelle et d'innovation. Ingénieux et élégant, il a été conçu sur mesure pour vous. Grâce à cet appareil, vous savez que chaque utilisation vous apportera satisfaction. - Page 21 FRANÇAIS pourra être tenu pour responsable des blessures et dégâts résultant d'une mauvaise installation ou utilisation. Conservez toujours les instructions dans un lieu sûr et accessible pour vous y référer ultérieurement. 1.1 Sécurité des enfants et des personnes vulnérables Cet appareil peut être utilisé par des enfants âgés •...
-
Page 22: Consignes De Sécurité
Si le câble d'alimentation est endommagé, il doit être • remplacé par le fabricant, un service de maintenance agréé ou un technicien qualifié afin d'éviter tout danger. Placez les couverts dans le panier à couverts, avec • les extrémités pointues vers le bas, ou placez-les dans le bac à... - Page 23 FRANÇAIS de l'appareil doit être effectué par AVERTISSEMENT! notre service après-vente agréé. Tension dangereuse. • Ne branchez la fiche d'alimentation à • Si le tuyau d'arrivée d'eau est la prise de courant qu'à la fin de endommagé, fermez immédiatement l'installation. Assurez-vous que la le robinet d'eau et débranchez la fiche prise de courant est accessible une de la prise secteur.
-
Page 24: Description De L'appareil
3. DESCRIPTION DE L'APPAREIL Bras d'aspersion intermédiaire Distributeur de liquide de rinçage Bras d'aspersion inférieur Distributeur de produit de lavage Filtres Panier à couverts Plaque de calibrage Panier du bas Réservoir de sel régénérant Panier du haut Fente d'aération 4. -
Page 25: Programmes
FRANÇAIS 4.1 Voyants Indicateur Description Voyant de fin. Voyant du réservoir de liquide de rinçage. Ce voyant est toujours éteint pendant le déroulement du programme. Voyant du réservoir de sel régénérant. Ce voyant est toujours éteint pendant le déroulement du programme. 5. -
Page 26: Réglages
Programme Degré de sa‐ Phases du pro‐ Valeurs de consommation lissure gramme Type de vais‐ selle Durée Consom‐ (min) mation électri‐ (kWh) Tous • Prélavage 1) Les valeurs de consommation peuvent changer en fonction de la pression et de la tem‐... - Page 27 FRANÇAIS impact négatif sur les résultats de lavage Comment entrer en mode et sur l'appareil. utilisateur Plus la teneur en minéraux est élevée, plus l'eau est dure. La dureté de l'eau est Assurez-vous que l'appareil est en mode mesurée en échelles d'équivalence. Programmation.
- Page 28 • Par exemple, 5 clignotements + pause + 5 clignotements = niveau 5. 2. Appuyez à plusieurs reprises sur la touche de programme pour modifier le réglage. Le niveau augmente à chaque fois que vous appuyez sur la touche de programme. Lorsque vous atteignez le niveau 10 et appuyez à...
-
Page 29: Avant La Première Utilisation
FRANÇAIS • L'indicateur indique le • allumé =AirDry activé. 4. Appuyez sur la touche Marche/Arrêt réglage actuel : éteint = pour confirmer le réglage. AirDry désactivé. 3. Appuyez sur la touche de programme pour modifier le réglage. 7. AVANT LA PREMIÈRE UTILISATION 1. -
Page 30: Utilisation Quotidienne
7.2 Comment remplir le ATTENTION! distributeur de liquide de Utilisez uniquement du rinçage liquide de rinçage spécialement conçu pour les lave-vaisselle. 1. Appuyez sur le bouton d'ouverture (D) pour ouvrir le couvercle (C). 2. Versez le liquide de rinçage dans le distributeur (A) jusqu'à... - Page 31 FRANÇAIS programme que vous souhaitez sélectionner se mette à clignoter. 4. Fermez la porte de l'appareil pour démarrer le programme. Démarrage d'un programme avec départ différé 1. Sélectionnez un programme. 2. Appuyez sur la touche Delay pour retarder le début du programme de 3 heures.
-
Page 32: Conseils
Annulation du départ différé lavage. Maintenez la touche de programme enfoncée jusqu'à ce que l'appareil se Fin du programme mette en mode Programmation. Lorsque le programme est terminé, le Lorsque vous annulez le départ différé, vous devez régler de nouveau le... - Page 33 FRANÇAIS aux instructions figurant sur • Vérifiez que les verres ne se touchent l'emballage du produit de lavage. pas pour éviter qu'ils ne se brisent. • Placez les petits articles dans le 9.3 Que faire si vous ne voulez panier à couverts. •...
-
Page 34: Entretien Et Nettoyage
10. ENTRETIEN ET NETTOYAGE AVERTISSEMENT! Avant toute opération d'entretien, éteignez l'appareil et débranchez la fiche de la prise secteur. Les filtres sales et les bras d'aspersion obstrués diminuent les résultats de 2. Retirez le filtre (C) du filtre (B). -
Page 35: Cas D'anomalie De Fonctionnement
FRANÇAIS bras d'aspersion, éliminez ceux-ci à l'aide d'un objet fin et pointu. 10.3 Nettoyage extérieur • Nettoyez l'appareil avec un chiffon doux humide. • Utilisez uniquement des produits de lavage neutres. • N'utilisez pas de produits abrasifs, de tampons à récurer ni de solvants. 10.4 Nettoyage intérieur 7. - Page 36 Pour certains problèmes, le voyant de fin La plupart des problèmes peuvent clignote pour indiquer un être résolus sans avoir recours au dysfonctionnement. service après-vente agréé. Problème et code d'alarme Cause et solution possibles L'appareil ne s'allume pas. • Assurez-vous que la fiche du câble d'ali‐...
- Page 37 FRANÇAIS Problème et code d'alarme Cause et solution possibles Petite fuite au niveau de la porte de • L'appareil n'est pas de niveau. Desserrez l'appareil. ou serrez les pieds réglables (si disponi‐ bles). • La porte de l'appareil n'est pas centrée avec la cuve.
- Page 38 Problème Cause et solution possibles Résultats de séchage insa‐ • La vaisselle est restée trop longtemps à l'intérieur tisfaisants. de l'appareil, porte fermée. • Il n'y a pas de liquide de rinçage ou le dosage du liquide de rinçage n'est pas suffisant. Augmentez le niveau de distributeur de liquide de rinçage.
-
Page 39: Caractéristiques Techniques
FRANÇAIS Problème Cause et solution possibles Il y a des résidus de déter‐ • La pastille de détergent est restée coincée dans le gent dans le distributeur de distributeur de produit de lavage, qui n'a donc pas produit de lavage à la fin du été... - Page 40 Pression de l'arrivée d'eau Min. / max. bar (MPa) 0.5 (0.05) / 8 (0.8) Arrivée d'eau Eau froide ou eau chau‐ max. 60 °C Capacité Couverts Consommation électrique Mode « Veille » (W) Consommation électrique Mode « Éteint » (W) 0.50...
- Page 41 11. ROZWIĄZYWANIE PROBLEMÓW..............56 12. DANE TECHNICZNE..................60 Z MYŚLĄ O TOBIE Dziękujemy za zakup urządzenia Electrolux. Jest ono owocem dziesięcioleci doświadczeń i innowacji. To pomysłowe i stylowe urządzenie zostało zaprojektowane z myślą o Tobie. Użytkując je, możesz mieć zawsze pewność...
-
Page 42: Informacje Dotyczące Bezpieczeństwa
INFORMACJE DOTYCZĄCE BEZPIECZEŃSTWA Przed przystąpieniem do instalacji i rozpoczęciem eksploatacji urządzenia należy uważnie zapoznać się z załączoną instrukcją obsługi. Producent nie odpowiada za obrażenia ciała ani szkody spowodowane nieprawidłową instalacją lub eksploatacją urządzenia. Należy zachować instrukcję obsługi w bezpiecznym i łatwo dostępnym miejscu do wykorzystania w... -
Page 43: Wskazówki Dotyczące Bezpieczeństwa
POLSKI do obsługi przez klientów w hotelach, motelach, – obiektach noclegowych i innych obiektach mieszkalnych. Nie zmieniać parametrów technicznych urządzenia. • Robocze ciśnienie wody (minimalne i maksymalne) • musi mieścić się w granicach 0.5 (0.05) / 8 (0.8) barów (MPa) Maksymalna liczba kompletów wynosi 13 . - Page 44 2.3 Podłączenie do sieci • Zachować ostrożność podczas przenoszenia urządzenia, ponieważ wodociągowej jest ono ciężkie. Należy zawsze stosować rękawice ochronne i mieć • Uważać, aby nie uszkodzić węży na stopach pełne obuwie. wodnych. • Należy zadbać o to, aby elementy •...
-
Page 45: Opis Urządzenia
POLSKI 2.5 Utylizacja naczyniach mogą pozostać resztki detergentu. • Po otworzeniu drzwi w czasie pracy OSTRZEŻENIE! urządzenia może dojść do uwolnienia Występuje zagrożenie gorącej pary. odniesieniem obrażeń ciała • Nie umieszczać w urządzeniu, na nim lub uduszeniem. ani w jego pobliżu łatwopalnych •... -
Page 46: Panel Sterowania
4. PANEL STEROWANIA Przycisk wł./wył. Przycisk wyboru programu Wskaźniki programów Przycisk Delay Wskaźniki 4.1 Wskaźniki Wskaźnik Opis Wskaźnik zakończenia programu. Wskaźnik płynu nabłyszczającego. W trakcie programu wskaźnik ten jest zawsze wyłączony. Wskaźnik soli. W trakcie programu wskaźnik ten jest zawsze wyłączo‐... -
Page 47: Ustawienia
POLSKI Program Stopień za‐ Fazy programu Parametry eksploatacyjne brudzenia Rodzaj zała‐ dunku Czas Zużycie Zużycie trwania energii wody (min) (kWh) Średnie • Zmywanie 130 - 140 1.4 - 1.6 15-17 Naczynia sto‐ wstępne łowe i sztućce • Zmywanie 65°C • Płukanie •... - Page 48 6.2 Zmiękczanie wody Po włączeniu urządzenia jest ono domyślnie w trybie wyboru programów. Zmiękczacz usuwa z wody substancje W przeciwnym wypadku należy przejść mineralne, które mogą mieć negatywny do trybu wyboru programów w wpływ na efekty zmywania lub na pracę...
- Page 49 POLSKI • Wskaźnik pokazuje aktualne Ustawianie poziomu zmiękczania wody ustawienie: Wskaźnik wyłączony = sygnał dźwiękowy Upewnić się, że urządzenie jest w trybie wyłączony. użytkownika. 3. Nacisnąć przycisk wyboru programu, aby zmienić ustawienie. 1. Zaczekać, aż wskaźniki • Wskaźnik włączony = sygnał zgasną, a wskaźnik zacznie dźwiękowy włączony.
-
Page 50: Przed Pierwszym Użyciem
• Wskaźnik pokazuje aktualne Wyłączanie opcji AirDry ustawienie: Wskaźnik Upewnić się, że urządzenie jest w trybie wyłączony = funkcja AirDry jest użytkownika. wyłączona. 3. Nacisnąć przycisk wyboru programu, 1. Nacisnąć dwukrotnie przycisk wyboru aby zmienić ustawienie. programu. • Włączą się wskaźniki •... -
Page 51: Codzienna Eksploatacja
POLSKI UWAGA! UWAGA! Podczas napełniania Należy stosować wyłącznie zbiornika soli może się z płyn nabłyszczający niego wydostawać woda i przeznaczony do zmywarek. sól. Dlatego po napełnieniu 1. Nacisnąć przycisk zwalniający (D), zbiornika soli należy aby otworzyć pokrywę (C). niezwłocznie uruchomić 2. - Page 52 8.1 Stosowanie detergentu 8.3 Ustawianie i uruchamianie programu Uruchamianie programu 1. Uchylić drzwi urządzenia. 2. Nacisnąć przycisk wł./wył., aby włączyć urządzenie. Upewnić się, że urządzenie jest w trybie wyboru programów. 3. Naciskać kilkakrotnie przycisk wyboru programu, aż zacznie migać...
-
Page 53: Wskazówki I Porady
POLSKI Przed uruchomieniem nowego programu Nie należy zamykać drzwi w należy upewnić się, że w dozowniku ciągu 2 minut od znajduje się detergent. automatycznego otworzenia drzwi przez funkcję AirDry, Zakończenie programu ponieważ urządzenie może się uszkodzić. Jeśli następnie użytkownik Po zakończeniu programu wskaźnik zamknie drzwi w ciągu jest włączony. - Page 54 • Nie wkładać do urządzenia stosowanie zwykłego detergentu do przedmiotów pochłaniających wodę zmywarek (proszku, żelu lub tabletek (gąbki, ściereczki). bez dodatkowych składników), płynu • Większe resztki żywności z naczyń nabłyszczającego i soli. należy wyrzucić do kosza.
-
Page 55: Konserwacja I Czyszczenie
POLSKI 10. KONSERWACJA I CZYSZCZENIE OSTRZEŻENIE! Przed przystąpieniem do konserwacji należy wyłączyć urządzenie i wyjąć wtyczkę przewodu zasilającego z gniazda elektrycznego. Brudne filtry i zapchane ramiona spryskujące 2. Wyjąć filtr (C) z filtra (B). pogarszają efekt zmywania. 3. Wyjąć filtr płaski (A). Należy je regularnie sprawdzać... -
Page 56: Rozwiązywanie Problemów
10.2 Czyszczenie ramion spryskujących Nie wolno wyjmować ramion spryskujących. Jeżeli otwory w ramionach spryskujących są zatkane, zabrudzenia należy usunąć za pomocą cienkiego, spiczastego przedmiotu. 10.3 Czyszczenie obudowy • Czyścić urządzenie za pomocą wilgotnej szmatki. 7. Włożyć filtry (B) i (C). - Page 57 POLSKI Większość występujących problemów kontaktowania się z autoryzowanym można rozwiązać bez potrzeby centrum serwisowym. Problem i kod alarmowy Możliwa przyczyna i rozwiązanie Urządzenie nie włącza się. • Upewnić się, że wtyczkę przewodu zasilają‐ cego włożono do gniazdka. • Upewnić się, że bezpiecznik w skrzynce bezpieczników jest sprawny.
- Page 58 Problem i kod alarmowy Możliwa przyczyna i rozwiązanie Niewielki wyciek z drzwi urządzenia. • Urządzenie nie jest dobrze wypoziomowa‐ ne. Poluzować lub dokręcić regulowane nóżki (jeśli dotyczy). • Drzwi urządzenia nie są wyśrodkowane względem komory. Wyregulować tylną nóż‐ kę (jeśli dotyczy).
- Page 59 POLSKI Problem Możliwa przyczyna i rozwiązanie Niezadowalające efekty su‐ • Naczynia pozostawały za długo w zamkniętym szenia. urządzeniu. • Nie ma płynu nabłyszczającego lub dozowana jest jego niewystarczająca ilość. Ustawić wyższy po‐ ziom dozowania płynu nabłyszczającego. • Przedmioty z tworzywa sztucznego mogą wyma‐ gać...
-
Page 60: Dane Techniczne
Problem Możliwa przyczyna i rozwiązanie Po zakończeniu programu w • Tabletka z detergentem zablokowała się w dozow‐ dozowniku znajdują się po‐ niku i woda nie wypłukała jej całkowicie. zostałości detergentu. • Woda nie wypłukała detergentu z dozownika. Nale‐ ży sprawdzić, czy ramię spryskujące może się ob‐... - Page 61 POLSKI Dopływ wody maks. 60°C Zimna lub ciepła woda Pojemność Liczba kompletów naczyń Pobór mocy Tryb czuwania (W) Pobór mocy Tryb wyłączenia (W) 0.50 1) Pozostałe wartości znajdują się na tabliczce znamionowej. 2) Jeżeli ciepła woda pochodzi z alternatywnych źródeł energii (np. z kolektorów słonecz‐ nych, elektrowni wiatrowych), można użyć...
- Page 62 www.electrolux.com...
- Page 63 POLSKI...
- Page 64 www.electrolux.com/shop...
Need help?
Do you have a question about the ESL5205LO and is the answer not in the manual?
Questions and answers