
Subscribe to Our Youtube Channel
Related Manuals for Electrolux ESL5360LA


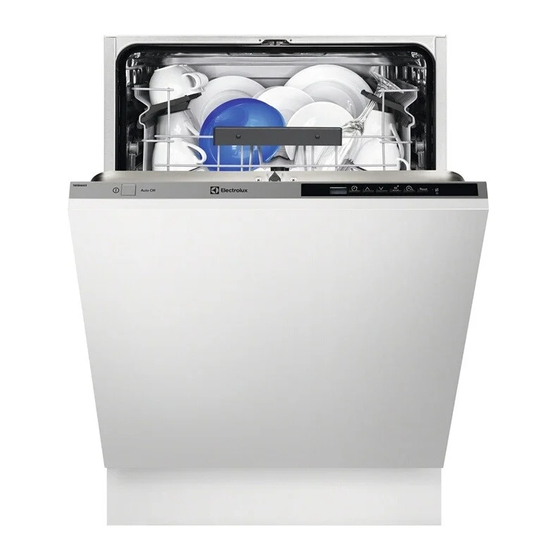
Summary of Contents for Electrolux ESL5360LA
- Page 1 ESL5360LA Dishwasher User Manual Máquina de lavar loiça Manual de instruções...
-
Page 2: Table Of Contents
13. TECHNICAL INFORMATION................. 22 WE’RE THINKING OF YOU Thank you for purchasing an Electrolux appliance. You’ve chosen a product that brings with it decades of professional experience and innovation. Ingenious and stylish, it has been designed with you in mind. So whenever you use it, you can be safe in the knowledge that you’ll get great results every time. - Page 3 ENGLISH responsible for any injuries or damage that are the result of incorrect installation or usage. Always keep the instructions in a safe and accessible location for future reference. 1.1 Children and vulnerable people safety This appliance can be used by children aged from 8 •...
-
Page 4: Safety Instructions
If the supply cord is damaged, it must be replaced by • the manufacturer, its Authorised Service Centre or similarly qualified persons in order to avoid a hazard. Put the cutlery in the cutlery basket with the sharp •... - Page 5 ENGLISH 2.4 Use be replaced, this must be carried out by our Authorised Service Centre. • Do not put flammable products or • Connect the mains plug to the mains items that are wet with flammable socket only at the end of the products in, near or on the appliance.
-
Page 6: Product Description
2.7 Disposal • Cut off the mains cable and discard it. • Remove the door catch to prevent WARNING! children and pets to get closed in the Risk of injury or suffocation. appliance. • Disconnect the appliance from the mains supply. -
Page 7: Control Panel
ENGLISH • When the appliance has a When AirDry is activated malfunction, the red light flashes. during the drying phase, the The Beam-on-Floor is off projection on the floor may when the appliance is not be completely visible. To deactivated. see if the cycle has ended, check the control panel. - Page 8 Programme Degree of soil Programme phases Options Type of load • Heavy soil • Prewash • TimeManager • Crockery, cut‐ • Wash 70 °C • XtraDry lery, pots and • Rinses pans • Dry • Fresh soil • Wash 60 °C or 65 °C •...
-
Page 9: Settings
ENGLISH Water Energy Duration 1) 2) Programme (kWh) (min) 1) The pressure and the temperature of the water, the variations of the mains supply, the options, the quantity of dishes and the degree of soil can change the values. 2) The values for programmes other than ECO are indicative only. 5.2 Information for test institutes To receive the necessary information for conducting performance tests (e.g. - Page 10 Softening hard water increases the consumption of water and energy as well as the programme duration. The higher the level of water softener, the higher the consumption and the longer the duration. Water hardness German de‐ French de‐ mmol/l Clarke de‐...
- Page 11 ENGLISH If standard detergent or multi-tablets 3. Press on/off to confirm the setting. without rinse aid are used, activate the 6.5 AirDry notification to keep the rinse aid refill indicator active. AirDry improves the drying results with less energy consumption. During the How to deactivate the rinse aid drying phase, the door opens empty notification...
-
Page 12: Options
3. Press on/off to confirm the setting. • The indicator still flashes. • The display shows the current setting: = AirDry activated. 2. Press to change the setting: = AirDry deactivated. 7. OPTIONS automatically used in next cycles. This... - Page 13 ENGLISH 3. Fill the rinse aid dispenser. 4. Open the water tap. 5. Start a programme to remove any processing residuals that can still be inside the appliance. Do not use detergent and do not put dishes in the baskets. After starting the programme, the appliance recharges the resin in the 6.
-
Page 14: Daily Use
You can turn the selector of the released quantity (B) between position 1 (lowest quantity) and position 4 or 6 (highest quantity). 9. DAILY USE 1. Open the water tap. For information about the 2. Press the on/off button to activate the detergent dosage, refer to appliance. -
Page 15: Hints And Tips
ENGLISH 5. Close the appliance door to start the Cancelling the delay start while programme. the countdown operates Starting a programme with When you cancel the delay start you have to set the programme and options delay start again. 1. Set a programme. Press and hold Reset until the appliance 2. - Page 16 • Load the dishwasher to its full • At least once a month run the capacity to save water and energy. appliance with the use of appliance For best cleaning results, arrange cleaner which is particularly suitable items in the baskets as instructed in for this purpose.
-
Page 17: Care And Cleaning
ENGLISH • Only use the appliance to wash items • The filters are clean and correctly that are dishwasher-safe. installed. • Do not wash in the appliance items • The cap of the salt container is tight. made of wood, horn, aluminium, •... - Page 18 7. Reassemble the filters (B) and (C). 8. Put back the filter (B) in the flat filter (A). Turn it clockwise until it locks. 2. Remove the filter (C) out of filter (B). 3. Remove the flat filter (A).
-
Page 19: Troubleshooting
ENGLISH • If you regularly use short duration • To maintain the performance of your programmes, these can leave appliance at its best, we recommend deposits of grease and limescale to use monthly a specific cleaning inside the appliance. To prevent this, product for dishwashers. - Page 20 Problem and alarm code Possible cause and solution The appliance stops and • It is normal. It provides optimal cleaning results and starts more times during energy savings. operation. The programme lasts too • Select the TimeManager option to shorten the pro‐...
- Page 21 ENGLISH 12.1 The washing and drying results are not satisfactory Problem Possible cause and solution Poor washing results. • Refer to "Daily use", "Hints and tips" and basket loading leaflet. • Use more intensive washing programmes. • Clean spray arm jets and filter. Refer to "Care and Cleaning".
-
Page 22: Technical Information
Problem Possible cause and solution There are residues of deter‐ • The detergent tablet got stuck in the dispenser and gent in the dispenser at the therefore was not completely washed away by wa‐ end of the programme. ter. - Page 23 ENGLISH Power consumption Left-on mode (W) Off-mode (W) 0.10 1) Refer to the rating plate for other values. 2) If the hot water comes from alternative source of energy (e.g. solar panels), use the hot water supply to decrease energy consumption. 14.
-
Page 24: Informações De Segurança
13. INFORMAÇÃO TÉCNICA................46 ESTAMOS A PENSAR EM SI Obrigado por ter adquirido um aparelho Electrolux. Escolheu um produto que traz com ele décadas de experiência profissional e inovação. Engenhoso e elegante, foi concebido a pensar em si. Assim, quando o utilizar, terá a tranquilidade de saber que obterá... - Page 25 PORTUGUÊS ser responsabilizado por ferimentos ou danos resultantes de instalação incorreta ou utilização incorreta. Guarde sempre as instruções num sítio seguro e acessível para consultar no futuro. 1.1 Segurança para crianças e pessoas vulneráveis Este aparelho pode ser utilizado por crianças de 8 ou •...
-
Page 26: Instruções De Segurança
A pressão da água fornecida tem de estar entre 0.5 • (0.05) / 8 (0.8) bar (MPa) (mínima / máxima) Siga o número máximo de 13 definições de • colocação. Se o cabo de alimentação estiver danificado, deve ser •... - Page 27 PORTUGUÊS 2.2 Ligação elétrica um revestimento com um cabo de alimentação no seu interior. AVISO! Risco de incêndio e choque elétrico. • O aparelho tem de ficar ligado à terra. • Certifique-se de que os parâmetros indicados na placa de características são compatíveis com as características da alimentação eléctrica.
-
Page 28: Product Description
• Note que uma reparação própria ou eletrodomésticos, tais como não profissional pode ter temperatura, vibração, humidade, ou consequências para a segurança e destinam-se a sinalizar informação anular a garantia. relativamente ao estado operacional 2.7 Eliminação do aparelho. -
Page 29: Painel De Comandos
PORTUGUÊS Depósito de sal Cesto de talheres Saída de ar Cesto inferior Distribuidor de abrilhantador Cesto superior Distribuidor de detergente 3.1 Beam-on-Floor O Beam-on-Floor apaga-se quando o aparelho é O Beam-on-Floor é uma luz que é desactivado. projectada no chão, por baixo da porta do aparelho. - Page 30 Programa Nível de sujidade Fases do programa Opções Tipo de carga • Sujidade nor‐ • Pré-lavagem • TimeManager • Lavagem a 50 °C • XtraDry • Loiça e talheres • Enxaguamentos • Secar • Tudo • Pré-lavagem • XtraDry •...
-
Page 31: Programações
PORTUGUÊS Água Energia Duração 1) 2) Programa (kWh) (min) 13 - 15 1.4 - 1.6 140 - 160 13 - 14 0.9 - 1.1 70 - 85 1) A pressão e a temperatura da água, bem como as variações da corrente elétrica, as op‐ coes, a quantidade de pratos e os graus de sujidade podem alterar os valores. - Page 32 Para entrar no modo de utilizador, O amaciador da água deve ser regulado de acordo com a dureza da água da sua mantenha os botões premidos área. Os serviços de abastecimento de em simultâneo até que os indicadores água podem indicar qual é o grau de comecem a piscar e o dureza da água na sua área.
- Page 33 PORTUGUÊS 6.4 Sinais sonoros • O visor apresenta a definição actual: por exemplo, = nível O aparelho emite sinais sonoros quando ocorre alguma anomalia. Não é possível 2. Prima repetidamente para mudar desactivar estes sinais sonoros. a definição. Também existe um sinal sonoro que é 3.
-
Page 34: Opções
Como desactivar a opção CUIDADO! Não tente fechar a porta do AirDry aparelho durante os primeiros 2 minutos após a Certifique-se de que o aparelho está no abertura automática. Isso modo de utilizador. pode danificar o aparelho. 1. Prima AirDry é... -
Page 35: Antes Da Primeira Utilização
PORTUGUÊS 7.2 TimeManager Noutros programas, a selecção da opção XtraDry é permanente e é utilizada Esta opção aumenta a pressão e a automaticamente nos ciclos seguintes. temperatura da água. As fases de Esta configuração pode ser alterada em lavagem e secagem são mais curtas. qualquer momento. -
Page 36: Utilização Diária
CUIDADO! O compartimento (A) destina-se apenas a abrilhantador. Não encha com detergente. CUIDADO! Utilize apenas abrilhantador 6. Rode a tampa do depósito de sal no especificamente concebido sentido horário para fechar o para máquinas de lavar depósito de sal. - Page 37 PORTUGUÊS 9.1 Utilizar o detergente • Após 5 minutos se um programa não for iniciado. Iniciar um programa 1. Mantenha a porta do aparelho entreaberta. 2. Prima o botão On/Off para activar o aparelho. Certifique-se de que o aparelho está no modo de selecção de programa.
-
Page 38: Sugestões E Dicas
Mantenha Reset premido até que o Se abrir a porta durante a aparelho entre no modo de selecção de fase de secagem e deixá-la programa. aberta durante mais de 30 segundos, o programa Cancelar o programa termina. Isto não acontece se a porta for aberta pela Mantenha Reset premido até... - Page 39 PORTUGUÊS – Ateste o depósito de sal sempre • Certifique-se de que o nível do que necessário. amaciador da água está certo. Se o – Utilize a dosagem recomendada nível estiver muito alto, a quantidade de detergente e de abrilhantador. aumentada de sal na água pode –...
-
Page 40: Manutenção E Limpeza
• Certifique-se de que os copos não • Existe sal e abrilhantador suficiente tocam noutros copos. (exceto se utilizar pastilhas • Coloque as peças pequenas no cesto combinadas). dos talheres. • A disposição das peças nos cestos é • Coloque as peças leves no cesto a correta. - Page 41 PORTUGUÊS 8. Reinstale o filtro (B) no filtro plano (A). Rode-o no sentido horário até bloquear. 2. Retire o filtro (C) do filtro (B). 3. Retire o filtro plano (A). CUIDADO! Uma posição incorrecta dos filtros pode causar 4. Lave os filtros. resultados de lavagem insatisfatórios e danos no aparelho.
-
Page 42: Resolução De Problemas
12. RESOLUÇÃO DE PROBLEMAS necessidade de contactar um Centro AVISO! de Assistência Técnica Autorizado. A reparação inadequada do Consulte a tabela abaixo para aparelho pode colocar em informações sobre possíveis problemas. perigo a segurança do utilizador. - Page 43 PORTUGUÊS Problema e código de Possível causa e solução alarme O dispositivo anti-inunda‐ • Feche a torneira da água. ção foi ativado. • Certifique-se de que o aparelho está corretamente O visor exibe i30. instalado. • Certifique-se de que os cestos estão carregados conforme instruído no manual do utilizador.
- Page 44 Centro de Assistência Consulte a secção "Antes Técnica Autorizado. da primeira utilização", "Utilização diária", ou AVISO! “Sugestões e dicas” para Não recomendamos a outras causas possíveis. utilização do aparelho até que o problema esteja Após verificar o aparelho, desative e completamente resolvido.
- Page 45 PORTUGUÊS Problema Possível causa e solução A loiça está molhada. • Para obter o melhor desempenho na secagem, ati‐ ve a opção XtraDry e defina AirDry . • O programa não tem fase de secagem ou tem uma fase de secagem a baixa temperatura. •...
-
Page 46: Informação Técnica
Problema Possível causa e solução Loiça baça, descolorada ou • Certifique-se de que apenas as peças laváveis na lascada. máquina são lavadas no aparelho. • Carregue e descarregue os cestos com cuidado. Consulte o folheto com as instruções de carrega‐... - Page 48 www.electrolux.com/shop...
Need help?
Do you have a question about the ESL5360LA and is the answer not in the manual?
Questions and answers