Advertisement
Quick Links
-
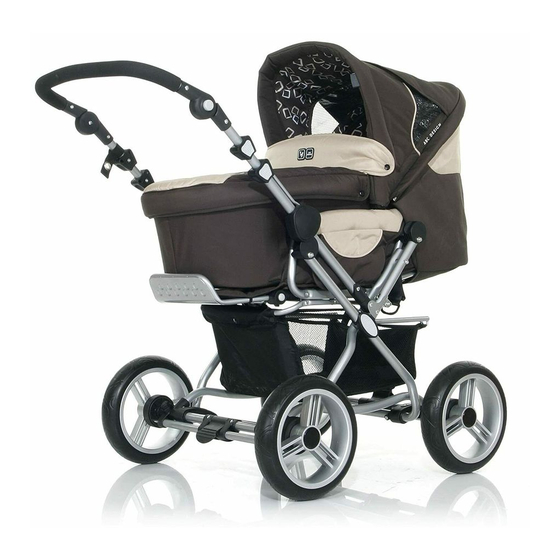
Pramy Luxe
- Frame made of Aluminum
- Carrier bag included
- Pocket and w indow on the roof
- Height Adjustable Handle
- Adjustable 3 position back rest
- Suitable for children 0 - 3 years of age
(max. 15 kg )
- Weight: 17.2 kg
- Tested according to EN 1888 : 2005
This stroller is not intended for
This stroller is not intended for
This stroller is not intended for
This stroller is not intended for
jogging or other exercise
jogging or other exercise
jogging or other exercise
jogging or other exercise
purposes.
purposes.
purposes.
purposes.
Advertisement

Related Manuals for ABC Design Pramy Luxe


Summary of Contents for ABC Design Pramy Luxe
- Page 1 Pramy Luxe - Frame made of Aluminum - Carrier bag included - Pocket and w indow on the roof - Height Adjustable Handle - Adjustable 3 position back rest - Suitable for children 0 - 3 years of age (max. 15 kg ) - Weight: 17.2 kg...
- Page 2 Dear Cust omer, Congratulations on the purchase of your ABC-Design St roller. We are pleased that you have chosen one of our products and hope that you will be completely satisfied with the service you receive from the product. We advise you to read the Instruction Leaflet carefully bef ore use of the pram and then to keep it in a safe place.
- Page 3 1. Opening the Stroller 1. Opening the Stroller 1. Opening the Stroller 1. Opening the Stroller Pull the handle up. Press the handle toward the back, until the joints lock in place on the left and right. WARNING: WARNING: WARNING: WARNING: Please make sure that all locks are closed before using.
- Page 4 3. Removing the Wheels 3. Removing the Wheels 3. Removing the Wheels 3. Removing the Wheels In order to remove the wheels, you must press the button on the axle, as shown in the picture, so that the wheel unlocks. Now you can pull the wheel off the axle.
- Page 5 7. Locking the Belt 7. Locking the Belt 7. Locking the Belt 7. Locking the Belt In order to lock the belt, you just have to stick both plastic parts (1) into each other until they lock in place. Position the belt adjustment device so that the child will be held in its designated place.
- Page 6 11. Adjusting the Foot Rest 11. Adjusting the Foot Rest 11. Adjusting the Foot Rest 11. Adjusting the Foot Rest In order to adjust the footrest, you must push the buttons on both sides inward, and then adjust the height. Then let go of the buttons again, so the footrest locks in place.
- Page 7 14. Folding up the Stroller 14. Folding up the Stroller 14. Folding up the Stroller 14. Folding up the Stroller Attention: The handle must first be on the canopy side of the stroller! Pull the two upper levers on the handle up, as shown in the photo.
- Page 8 15. Securing the Handle's Velcro Strap 15. Securing the Handle's Velcro Strap 15. Securing the Handle's Velcro Strap 15. Securing the Handle's Velcro Strap You can secure the handle additionally using the Velcro straps provided. Thread (1) the Velcro strap through behind the frame, and then lay (2) the counter-piece on the frame to lock it with the Velcro.
- Page 9 16. Removing the Seat Cover 16. Removing the Seat Cover 16. Removing the Seat Cover 16. Removing the Seat Cover Release all the buttons attaching the seat cover to the stroller, and remove the seat cover. In order to put the seat cover back on, attach it again using the buttons on the frame.
- Page 10 3 in 1 Tragewanne 3 in 1 Tragewanne 3 in 1 Tragewanne 3 in 1 Tragewanne 17 17 17 17. Aufklappen der Trage . Aufklappen der Trage . Aufklappen der Trage . Aufklappen der Tragewanne wanne wanne wanne Heben Sie die Seitenwände der Tragetasche an. Spannen Sie die Seitenwände indem Sie die beiden Bügel nach außen in die Halterungen drücken.
- Page 11 20. Befestigen der Wanne am Wagen 20. Befestigen der Wanne am Wagen 20. Befestigen der Wanne am Wagen 20. Befestigen der Wanne am Wagen Bringen Sie die Rückenlehne in Liegeposition. Legen Sie die Tasche auf die Liegefläche Ziehen sie den Gurt, der an der Hinterseite der Wanne angebracht ist, wie auf dem Bild gezeigt durch den Schlitz im Bezug der Sitzeinheit.
- Page 12 Schnallen Sie den zweiten Gurt am Fußende der Wanne um die hochgeklappte Fußstütze. Schließen Sie den Gurt und ziehen Sie ihn fest an. 21 21 21 21. Anbringen der Beindecke . Anbringen der Beindecke . Anbringen der Beindecke . Anbringen der Beindecke Stülpen Sie den geschlossenen Teil der Beindecke über das Fußende der Wanne.
- Page 13 22 22 22 22..Befestigen des Moskitonet Befestigen des Moskitonet Befestigen des Moskitonet Befestigen des Moskitonetzes Öffnen Sie den Reißverschluss am Ende der Beindecke und ziehen Sie das Moskitonetz heraus. Spannen Sie das Moskitonet über das Verdeck und befestigen Sie die Druckknöpfe auf beiden Seiten am Verdeck.
- Page 14 23. Anbringen des Fußsacks Anbringen des Fußsacks Anbringen des Fußsacks Anbringen des Fußsacks Öffnen Sie den Gurt und legen Sie die Einlage auf den Sitz. Ziehen Sie anschließend die fünf Gurtenden durch die dafür vorgesehenen Schlitze. Nun können Sie die Beindecke mit dem Reißverschluss an der Einlage befestigen.
- Page 15 24. Anbringen der Beindecke 24. Anbringen der Beindecke 24. Anbringen der Beindecke 24. Anbringen der Beindecke Nehmen Sie das Unterteil des Fußsacks aus der Tasche. Verbinden Sie Ober- und Unterteil des Fußsacks mit dem Reißverschluss. Befestigen sie den Fußsack wie auf dem Bild gezeigt am Kinderwagen.
- Page 16 Read these instructions carefully before using this stroller, and save them. WARNING WARNING WARNING WARNING: If you do not follow these instructions, the safety of your child can be impacted. This stroller is meant for children from birth to 3 years old with a maximum weight of 15 kg . WARNING WARNING WARNING...
- Page 17 - Fading is not impossible caused by solar radiation, the influence of sweat, detergents, abrasion, or too frequent washing, and thus is not a defect. - Worn-down tires are w ear and tear, and shall not constitute an entitlement for complaint. ABC Design GmbH Dr. Rudolf-Eberle-Str. 29 D-79774 Albbruck...
Need help?
Do you have a question about the Pramy Luxe and is the answer not in the manual?
Questions and answers