Table of Contents
Advertisement
Quick Links
Advertisement
Table of Contents

Related Manuals for LifeSize Passport


Summary of Contents for LifeSize Passport
- Page 1 ® LifeSize Passport Installation Guide February 2011...
-
Page 2: Preparing For Installation
The size, shape, layout, and occupancy of the room dictate where you place your video conferencing components. For example, in a small office installation place the LifeSize Focus at one end or corner of the room. In a multi-user conference room, place the LifeSize MicPod at the center of the group of participants. - Page 3 Ensure that the room that houses the codec is properly ventilated and temperature controlled. Refer to the LifeSize quick reference card included with your system for a visual depiction of the proper setup. The numbers that appear on the quick reference card correspond to the following steps:...
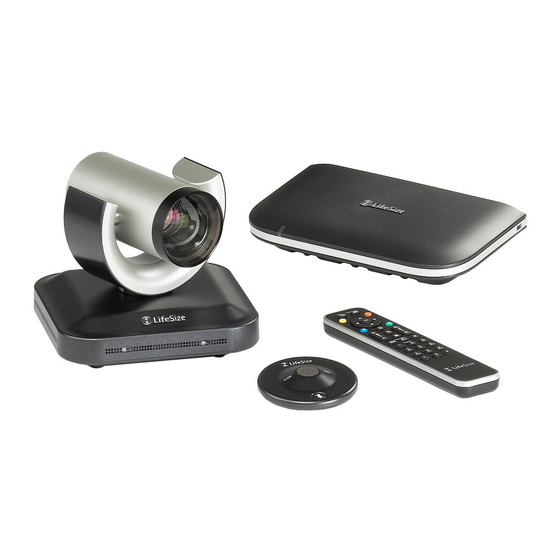
- Page 4 To install LifeSize Camera 200 as your camera component and LifeSize MicPod as your audio input device, complete the following steps: • Insert the camera cable into the port on the rear of the LifeSize Camera 200 and plug the opposite end into the camera port on the codec.
-
Page 5: Placement Behind A Firewall
LifeSize Passport Installation Guide The LifeSize system starts and illuminates a blue LED on the front of the codec. The system status bar at the bottom of the screen indicates system and network status. When the system is booting, status also appears at the top of the REDIAL list to indicate the current state of the system. -
Page 6: Configuring Dual Lifesize Micpods
The adhesive tape on the strain relief clip is intended for a single use. Attach the strain relief clip to the codec and route the LifeSize MicPod cable through the strain relief clip as shown in the following illustration: To obtain a replacement strain relief clip, contact your LifeSize Partner. -
Page 7: Verifying Your Installation
Disconnect the PSU from the AC source. Connect the PSU to the LifeSize codec. Reconnect the PSU to the AC source. If the LifeSize codec fails to boot and the green LED on the PSU dims, the codec may be the source of the problem. -
Page 8: Ip Address Displays Invalid Value
Video from the camera appears in a small window on the main screen of the user interface above the REDIAL list. If no video from the camera appears, do the following: • Ensure that the camera is properly connected to the LifeSize codec as described in Installing LifeSize Passport. -
Page 9: Status Icons
Indicates the status of the registration process with the SIP server. The yellow SIP icon appears when your LifeSize system is trying to register with the SIP server. If the registration fails, the red SIP icon appears. - Page 10 ©2009 – 2011 Logitech, and its licensors. All rights reserved. LifeSize Communications, a division of Logitech, has made every effort to ensure that the information contained in this document is accurate and reliable, but assumes no responsibility for errors or omissions. Information in this document is subject to change without notice.
Need help?
Do you have a question about the Passport and is the answer not in the manual?
Questions and answers