Table of Contents
Advertisement
Quick Links
Advertisement
Table of Contents

Related Manuals for Zimmer ergo k


Summary of Contents for Zimmer ergo k
- Page 1 User Manual...
-
Page 3: Table Of Contents
Technical Data Ergometer / Blood Pressure Module Trouble Shooting Ident Nr. PL58GB 09/05 Rights of Revision reserved. This Manual is intended as a user guide only. Zimmer MedizinSysteme GmbH maintains no liability for omissions or errors or damage resulting thereof. -
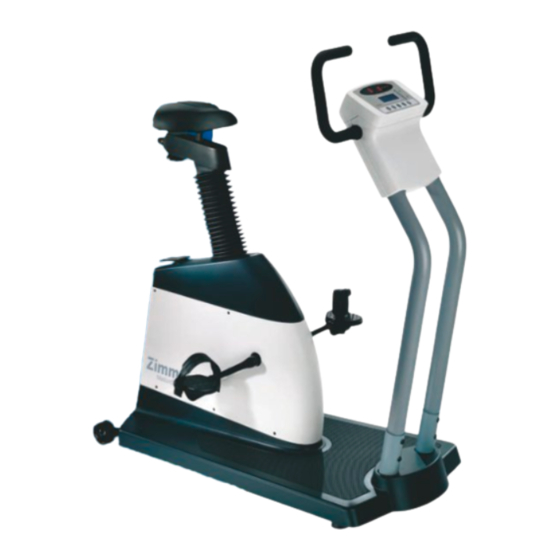
Page 4: Ergo K
Optional Blood Pressure Module • Automatic blood pressure measurement during the stress test • The Ergo K can be upgraded with an optional blood pressure module at anytime Remarks Ergo K is only to be used and operated by trained and authorized personnel. -
Page 5: Start-Up
Start-up Short Start-up Power Supply Connect the power cable to power supply § § Switch on Ergometer using switch “8”. (See schematic diagram on page 4) Patient Preparation § Request patient to get on the ergometer and provide instructions regarding ergometer functions and procedures. Seat and Handle Bar §... - Page 6 Start - Up Assembly Assembly Ensure that the ergometer is not located in: -wet, humid or dusty areas -direct sunshine or near other warm sources -acidic steam or in contact with acidic fluids, which could causes irreparable damage -near vicinity of x-ray or diathermic systems, motors, or transformers -explosive environments.
- Page 7 Start-up Assembly / Installation / Set-up Foot Adjustment Two adjustable floor pads are located under the front end of the base plate to level out uneven floors. Castors After lifting the front end of the ergometer, it can be pushed or pulled in either direction on these two castors.
- Page 8 Afterwards, the following information appears briefly on the screen: ERGOMETRY ERGO K Welcome to Zimmer Elektromedizin! Then the unit enters the normal operating mode. It indicates the load profile used last before the unit was turned off. Function Test §...
- Page 9 Start-up Controls Status Display The large LED status displays show the momentary data during a program run. The left part indicates the currently applied load, the center part shows the speed achieved by the patient and the right part indicates the elapsed test duration. Programming and In stand-by Mode the screen shows the selected load program.
- Page 10 Start-up Controls Load Start the load profile presently indicated in the LCD window by pressing the START / STOP “START/STOP“ button. The preset values are selected automatically. • Press the “START/STOP“ button to stop the load cycle and to switch over the recovery phase automatically. •...
-
Page 11: Operating The Unit
Operating the Unit Load Profiles / Profile Screens Load Profile To perform an exercise test under load, the program must first be defined. The following load profiles are readily available for selection: Square Load Test (RT) This profile provides a constant load for a certain time after which a recovery phase can be defined. - Page 12 Operating the Unit Load Profiles / Profile Screens Pulse-Steady-State-Test The test in this example starts with 25 W. Then the load increases by 1 W/sec until the heart rate reaches 110 beats per minute. From then on the load is regulated in 1W steps in order to keep the heart rate constant.
- Page 13 Operating the Unit Load profile / Profile screens After the Load After the load program has been terminated automatically or manually, the data last used or measured are displayed on the LCD screen: END: 0h 14m 12s Line 1: Load period in hours, minutes and seconds. at 125W Sys= 180 Dia=100 mmHg Line 2: Last applied load level.
- Page 14 Operating the Unit Load Profile / Profile Screens Changing the settings Changing the Press the “PROG/HOLD“ button to scroll through the individual points of the load Load Profiles profile. The presently selected value flashes. This (flashing) value can be altered by means of the “+“...
-
Page 15: Ergometric Session
Within the speed ranges shown below, the ergometer keeps the preset load constant even with an irregular pedaling speed. U 1/min 130 -- 120 -- Operating range Ergometer Ergo K 110 -- 100 -- 90 -- 80 --... - Page 16 Ergometric Session Remarks / Performing Unattended ergometric sessions are not permitted and should be strictly Unattended Session avoided! The patient’s clothing must be appropriate for the ergometric. Should problems arise during the ergometric session, the patient must report the problem immediately and terminate the session. The patient must be informed and instructed as to the stress test to be performed (process, behavior, termination criteria, etc).
-
Page 17: Blood Pressure Module (Optional)
Contact your sales representative for further details. Preparation The blood pressure module incorporated in the Ergo K bicycle ergometer is ready Connection for operation when the device is turned on. Make sure that cuff and microphone are properly connected. -
Page 18: Positioning The Cuff / Procedure
Blood Pressure Module (optional) Positioning the Cuff Positioning the Cuff Place the cuff around the bare upper arm. § Fit the cuff tightly to prevent it from slipping. § Arrange the cuff so that it is at the level of the heart during the measurement. - Page 19 Blood Pressure Module (optional) Procedure Warning Should the pressure exceed the limits permissible in the cuff, remove immediately. Reapply and repeat. If the pressure is still excessive, contact service personnel before further use. Measuring The blood pressure is measured automatically. You are not required to control the Procedure inflating pressure or the deflating rate since the system automatically determines these parameters.
- Page 20 Blood Pressure Module (optional) Procedure Measurement During an During an ergometric session, the ergometer or the controlling unit performs the Ergometric Session measurement of the blood pressure. Initial Measurement / The first measurement after turning the unit on or starting an ergometric session is Analytical Measurement usually an analytical measurement.
-
Page 21: Safety / Warnings
Operating Instructions is essential for proper use and correct handling of the unit as well as for the safety of patient and operating personnel. Warranty Zimmer Elektromedizin GmbH assumes the responsibility for safety, reliability and functionality of the unit only if: §... - Page 22 Warning! Ergo K Ergometry system is intended to be used for ergometry and cardio-vascular rehabilitation only! The Instruction Manual is to be observed. The manufacturer is not liable for other uses and/or damage resulting there from.
- Page 23 Devices may only be combined or connected after ensuring the safety for the patient, operator and the vicinity. Only original parts from Zimmer Elektromedizin GmbH are permissible. Should there be a question as to permissible combinations, the operator is to contact the manufacturer or competent representative.
-
Page 24: Cleaning And Disinfection
Cleaning and Disinfection Cleaning and The ergometer and accessories should be cleaned regularly; daily when Disinfection necessary. Always turn the ergometer off and disconnect the power cable before cleaning or disinfecting the unit! In addition to regular cleaning with commercially available plastic cleansers or commercially available disinfectants (i.e. -
Page 25: Rear Panel
Rear Panel Connections Mains connector The equipment power connector for the supply of the mains voltage from a properly grounded medical grade wall outlet is located on the rear panel. Only use the power cable supplied with the unit. The power input is protected by two fuses of type "T 1.6 AL". They may be replaced by identical fuse links only. -
Page 26: Service Menu
Once switched on, the ergometer performs a display test that takes about 3 seconds. Press the "START/STOP" button during this time to open the Service Menu. The following screen is displayed: ERGO K / V x. x / xx-xx n= nnn / min Pist= i i i W p=ppp mmHg Psol= sss... - Page 27 ELMED Ergoline P1 std. ELMED Ergoline P10 / Schiller ELMED Zimmer Cardiodata, Cardiocompact Ergoline P10 Ergoline P1, Polymed Selecting the Baud Rate In order to have the ergometer controlled by a connected ECG recorder or PC ECG, it is necessary to set the correct baud rate for the communication.
- Page 28 Service Menu Testing Measurement Consistency and Accuracy Legal Provisions According to the operator ordinance applicable in the Federal Republic of Germany, all ergometers and non-invasive blood pressure devices that are used under medical supervision require a "metrological inspection", which must be performed and documented in compliance with the directions of the manufacturer by a qualified specialist at least every two years.
- Page 29 § Turn the unit on again and enter the service menu by pressing the "START/STOP" button (see above). ERGO K / V x . x / xx - xx p= ppp mmHg Psol= sss W n= nnn / min Pist= i i i W S=S Pr P Bd B HF= hhh /m Remove the cover at the rear of the unit.
- Page 30 – 40 30 – 2. Call the Service Menu (ref. page 24). Set the blood pressure module to calibration mode. ERGO K / V x . x / xx - xx p= ppp mmHg Psol= sss W n= nnn / min...
-
Page 31: Accessories
Accessories Always use original accessories from Zimmer Elektromedizin GmbH to guarantee the proper and safe operation of the system. Accessories * Art.-Nr. * Unit with Ergo K Power cable § § 8 Screws, allen M8x14 (Front frame 83.080.140 assembly) 84.208.001 §... -
Page 32: Conformity Declaration
CE Council Directive 93/42/EEC. Zimmer Elektromedizin GmbH hereby declares, that the ergometer Ergo K / Ergo K with Blood Pressure Module conforms to the standards in accordance with the CE Council Directive 93/42/EEC concerning medical devices. -
Page 33: Technical Data
Technical Data Ergometer „Ergometer“ Type of Load Speed-independent load control, Hysteresis brake Load Range 10 ... 1000 Watt (Reading max. 999 W) Speed Range 10 ... 250 min –1 Control Range Acc. to DIN VDE 750 – 238 Accuracy In the speed-independent operating range Up to 60 Watt: +/- 3 Watt Over 60 Watt: +/- 5 % Speed... - Page 34 Technical Data Blood Pressure Module Environmental Conditions Transport and Storage -10 °C to +70 °C 10 %...95 % steady humidity level 500 hPa...1060 hPa pressure +10 °C to +45 °C 10 %...95 % steady humidity level 700 hPa...1060 hPa pressure Optional: „Blood Pressure Module“...
-
Page 35: Trouble Shooting
Trouble Shooting Should difficulties arise, refer to the trouble shooting tips below. If further support is necessary, please contact: Zimmer Elektromedizin GmbH Hotline Circulatory Diagnostics Junkersstraße 9 89231 Neu-Ulm Germany Tel. + 49 (0) 731 9761- 115 +49 (0) 731/9761- 4443 e-Mail support@zimmer.de... - Page 36 Zimmer MedizinSysteme GmbH Junkersstraße 9 D-89231 Neu-Ulm Tel. 0731. 9761-291 Fax 0731. 9761-299 www.zimmer.de...
Need help?
Do you have a question about the ergo k and is the answer not in the manual?
Questions and answers