Advertisement
Advertisement
Table of Contents

Related Manuals for Amico Reflection Series


Summary of Contents for Amico Reflection Series
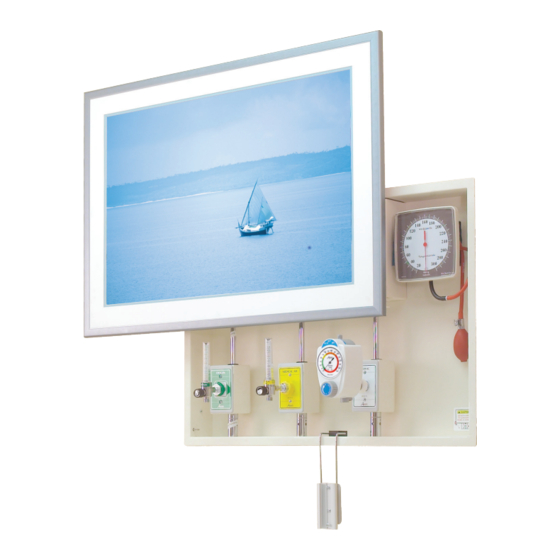
- Page 1 Installation lnstructions Reflection Series Artwall...
- Page 2 • Artwall installation should conform to the local building codes. All on-site preparations must be done prior to the delivery of the Artwall. Please contact Amico to confirm and review all information listed below. Failing to do so may result in discrepancies/misalignments during installation.
- Page 3 14" 12" [356 mm] [305 mm] 25" 24" [635 mm] [610 mm] 22 1/2" 22 1/2" [572 mm] [572 mm] 11 1/2" 31 1/2" 10 7/8" 44" [292 mm] [800 mm] [275 mm] [1118 mm] 3-Gas Box 5-Gas Box www.amico.com...
- Page 4 NOTE: Make sure to use appropriate screw to attach the back box onto the wall structure as screws are exposed to the end users. Figure 1 Figure 2 Building Studs Facing Each Other Artwall Back Box Installation on Building Studs Top View Figure 3 Wall Structure Artwall Back Gap for Drywall Artwall Setup In Place Amico Corporation...
- Page 5 NOTE: Ensure frame is centered on backing plate. Place assembly in a safe location. NOTE: The weight of the picture frame shall not exceed 15 lbs. Figure 5 Art and frame attached to the backing plate. Hardware provided by Picture Frame others. Picture Backing Plate www.amico.com...
- Page 6 8. Tighten whiz flange screws using a 5/16" wrench. IMPORTANT: The frame has been removed in Figure 6 to show the parts behind it. Do not remove your frame from the movement assembly! Figure 6 Screw Locations (5) Amico Corporation...
- Page 7 Notes www.amico.com...
- Page 8 Amico Corporation | 85 Fulton Way, Richmond Hill, ON L4B 2N4, Canada 600 Prime Place, Hauppauge, NY 11788, USA US LISTED C US LI Toll Free Tel: 1.877.462.6426 | Tel: 905.764.0800 | Fax: 905.764.0862 Email: info@amico.com | www.amico.com ACA-IM-ARTWALL 05.08.2020...
Need help?
Do you have a question about the Reflection Series and is the answer not in the manual?
Questions and answers