Table of Contents
Advertisement
Quick Links
Advertisement
Table of Contents

Subscribe to Our Youtube Channel
Related Manuals for Amico MRS Series


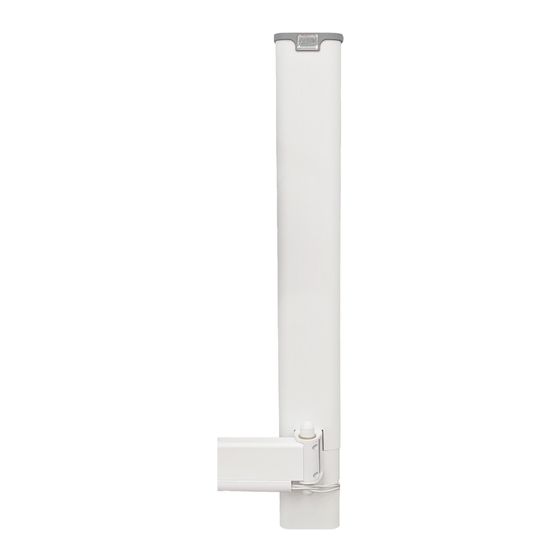
Summary of Contents for Amico MRS Series
- Page 1 Installation Instructions MRS Flanged Cover...
-
Page 2: Method
This instruction manual is your guide to ensuring that you get the best performance out of your equipment. Amico Accessories is not responsible for any damage as a result of (but not limited to) abuse and other malfunctions that may be a direct or indirect result of failure to comply with the instructions provided in this manual. -
Page 3: Table Of Contents
Table of Contents Section 1: Product Specifications Features Section 2: Installation Preparation Installation Tools Typical Installation Reference Section 3: Installation of Device Section 4: Installation of Wires Section 5: Installation onto Mounting Platform Attaching the Cover Cutting the Cover Finalizing Setup and Wiring Installing End Cap Section 6: Adjustment Add/Remove Wires... -
Page 4: Section 1: Product Specifications
• Offer a clean and organized appearance. • Simplifies cleaning process and provide easy access for maintenance, and quick and efficient repair/upgrade. • Standard in black or white colour with grey end caps. Compatible Amico Part Number Colour Physical Dimensions... -
Page 5: Section 3: Installation Of Device
ARMS (DEVICES) HAVE BEEN INSTALLED ONTO THE MRS RAIL. IT IS THE RESPONSIBILITY OF THE CUSTOMERS TO VERIFY THAT MRS RAILS HAVE BEEN INSTALLED IN ACCORDANCE WITH AMICO RAIL INSTALLATION LY BE INSTALLED AFTER ALL THE REQUIRED DEVICES HAVE BEEN INSTALLED ONTO THE MRS RAIL. IT IS INSTRUCTIONS. - Page 6 __-_ ONTO THE MRS RAIL. NOTE: INSTALLATION HEIGHTS OF AHM-RIT_-_-___-_ SHOULD BE IN ACCORDANCE WITH AMICO GUIDELINES. IT IS RECOMMENDED THAT THE MOUNTING ADAPTER IS MOUNTED AT LEAST 17" ABOVE THE BOTTOM OF THE MRS RAIL TO ACHIEVE AN IDEAL ERGONOMIC SET UP AS SEEN IN FIGURE 2C THE RECOMMENDED HEIGHT TO MOUNT THE MRS IS 27"...
-
Page 7: Section 4: Installation Of Wires
Fax: (905) 763.8587 FIGURE 3i www.amico.com Fax: (905) 763.8587 DESCRIPTION: THIS PRINT IS PROPERTY OF AMICO ACCESSORIES DESCRIPTION: FIGURE 3ii ASSEMBLY INSTRUCTIONS FOR MRS COVER THIS PRINT IS PROPERTY OF AMICO ACCESSORIES ASSEMBLY INSTRUCTIONS FOR MRS COVER FIGURE 3ii... -
Page 8: Section 5: Installation Onto Mounting Platform
FOR USE WITH: MRS-CVR-__-___-_ CUSTO www.amico.com Fax: (905) 763.8587 DESCRIPTION: DEVICE THIS PRINT IS PROPERTY OF AMICO ACCESSORIES ASSEMBLY INSTRUCTIONS FOR MRS COVER DEVICES FIGURE 8B AND IS LOANED IN CONFIDENCE SUBJECT TO RETURN INSTALLATION ONTO MOUNTING PLATFORM PART NO:... - Page 9 Tel: (905) 763.7778 PRIVATE AND CONFIDENTIAL www.amico.com Fax: (905) 763.8587 DESCRIPTION: THIS PRINT IS PROPERTY OF AMICO ACCESSORIES ASSEMBLY INSTRUCTIONS FOR MRS COVER AND IS LOANED IN CONFIDENCE SUBJECT TO RETURN PART NO: MRS-CVR-__-___-_ UPON REQUEST AND WITH THE UNDERSTANDING THAT...
-
Page 10: Cutting The Cover
DRAW A LINE ACROSS THE BACK MADE FROM DESCRIPTION: SHOWN IN FIGURE 14. INCH AWAY THIS PRINT IS PROPERTY OF AMICO ACCESSORIES FACE OF THE X-MRS-CVR-__-___-_ ASSEMBLY INSTRUCTIONS FOR MRS COVER FIGURE 13 DRAW A LINE ACROSS HERE WHEN NO CPUMNT_-M IS... - Page 11 FIGURE 16 SHOWS THE RESULTING TWO PARTS LABLLED AS THE TOP AND BOTTOM PIECE. the TOP PIECE and BOTTOM PIECE. DESCRIPTION: THIS PRINT IS PROPERTY OF AMICO ACCESSORIES ASSEMBLY AND IS LOANED IN CONFIDENCE SUBJECT TO RETURN PART NO:...
-
Page 12: Finalizing Setup And Wiring
MOVING THE ASSEMBLY CAUSES WIRING TO SNAP OFF, REDO THE WIRING, WHILE LEAVING MORE SLACK. THESE DIMENSIONS ARE BASED ON AMI SLACK. THESE DIMENSIONS ARE BASED ON AMICO INSTALLATION GUIDELINES AND MAY NOT WORK IN EVERY NOT WORK IN EVERY SCENARIO. FIGURE 17Bi SHOWS THIS NOT WORK IN EVERY SCENARIO. - Page 13 The TOP PIECE and BOTTOM PIECES created in the "Cutting the Cover" section need to be attached to the MRS Rail. INSTALLATION ONTO MOUNTING PLATFORM (Cont'd) MOVING THE ASSEMBLY CAUSES WIRING TO SNAP OFF, REDO THE WIRING, WHILE LEAVING MORE SLACK. THESE DIMENSIONS ARE BASED ON AMICO INSTALLATION GUIDELINES AND MA NOT WORK IN EVERY SCENARIO. FIGURE 17Bi SHOWS THIS (Figures 30 and 31).
-
Page 14: Installing End Cap
Section 5: Installation onto Mounting Platform Installing End Cap a. Align the top End Cap with MRS Cover on one side to engage as shown in Figure 34. Figure 34 b. Push down on the other side of the End Cap and press firmly to engage fully as shown in Figure 35. Figure 35... -
Page 15: Section 6: Adjustment
Figure 37 NO COPIES ARE TO B FIGURE 19 OF AMICO ACCESSO ALL RIGHTS TO DESIG NOTE: BE CAREFUL WHILE CARRYING OUT THE NEXT STEP. EDGES AND CORNERS ON X-MRS-CVR-__-___-_ MAY BE SHARP. IT SHOULD ALSO BE NOTED THAT CHOICE OF HAND USED FOR THE NEXT STEP IS UP TO THE USER. - Page 16 Fax: (905) 763.8587 DESCRIPTION: FOR USE WITH: MRS-CVR-__-___-_ FOR USE WITH: MRS-CVR-__-___-_ CUSTOMER DRAWING CUSTOMER DRAWING THIS PRINT IS PROPERTY OF AMICO ACCESSORIES ASSEMBLY INSTRUCTIONS FOR MRS COVER AND IS LOANED IN CONFIDENCE SUBJECT TO RETURN PART NO: MRS-CVR-__-___-_ PUSH/INSERT WIRES IN...
-
Page 17: Add/Remove Mrs Cover For Custom Spacing
X-MRS-CVR-___-MID Tel: (905) 763.7778 PRIVATE AND CONFIDENTIAL www.amico.com Fax: (905) 763.8587 MEASURE DESCRIPTION: THIS PRINT IS PROPERTY OF AMICO ACCESSORIES ASSEMBLY INSTRUCTIONS FOR MRS COVER FIGURE 25 MEASURE AND IS LOANED IN CONFIDENCE SUBJECT TO RETURN DISTANCE PART NO: MRS-CVR-__-___-_... -
Page 18: Section 7: Troubleshooting, Preventative Maintenance & Cleaning
Follow steps in the “Attaching the Cover” section. If problem still persist, Cover feels loose. Cover not engaged into MRS fully. please contact Amico Accessories. Make sure the engaging tab of the MRS End Cap slides inside of the channel Top End Cap falls. -
Page 19: Section 8: Warranty
Amico Accessories Inc. will warrant its materials to be free from defect for an additional period of four (4) years, (five [5] years from the date of shipment). Within this period, Amico Accessories Inc. will replace any part which is proven to be defective, at no charge. - Page 20 Amico Accessories Inc. | 122 East Beaver Creek Road, Richmond Hill, ON L4B 1G6, Canada Toll Free Tel: 1.877.264.2697 | Tel: 905.763.7778 | Fax: 905.763.8587 Email: info@amico-accessories.com | www.amico.com AMICO-AA--MRS-FLANGED-COVER-MANUAL 08.02.2024...
Need help?
Do you have a question about the MRS Series and is the answer not in the manual?
Questions and answers