Table of Contents
Advertisement
Advertisement
Table of Contents

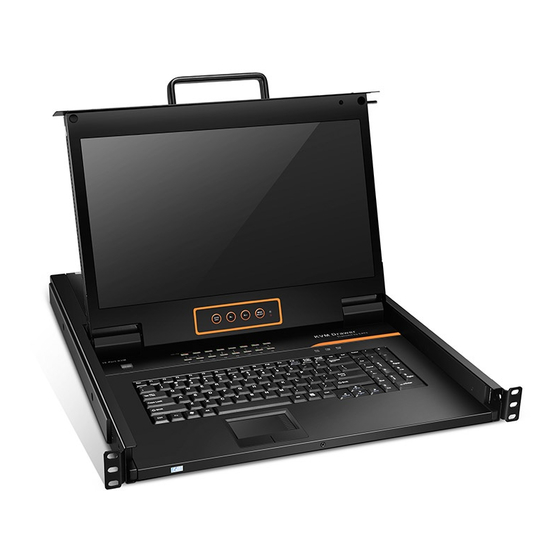
Summary of Contents for FS KVM-160217IP
- Page 1 Cat5e/6/7 Rack-Mount USB KVM SWITCHES Quick Start Guide V1.0...
- Page 2 Introduction Thank you for choosing FS KVM switches. This guide is designed to familiarize you with the layout of the KVM switch and describes how to deploy it in your network. UNLOCK KVM-160217IP/KVM-080217IP ONLINE SELECTED Matrix KVM over IP AUTO SCAN...
-
Page 3: Hardware Overview
Hardware Overview Front Panel Buttons 16 Port KVM HD&Matrix ONLINE SELECTED KVM over IP RESET SCAN Station ID Buttons Components Function 1~8/16 Port Selection Switch freely from port 1 to port 8/16. Press [1] and [2] at the same time for three seconds to Reset reset the keyboard and mouse. -
Page 4: Front Panel Leds
Press [6] for three seconds to initialize the brightness and de nition of each port. Press [7] and [8] at the same time for three seconds to Scan enter the auto scan mode. LED OSD Controls KVM-080217IP/KVM-160217IP AUTO MENU EXIT SELECT Buttons... -
Page 5: Status Description
KVM-0802IP/KVM-080217IP/KVM-160217IP ONLINE SELECTED Matrix KVM over IP AUTO SCAN K/M RESET FW UPGRADE POWER STATION ID NORMAL RECOVER UPGRADE RESET LEDs Status Description KVM is powered on. Power Blue KVM has been connected to its corresponding computer Online LED lights Green and powered on. -
Page 6: Site Environment
Ports Description A power input port for AC power cord. Power Input (AC) Power Switch Turn on/o the power. Power Input (DC) A power input port for DC power cord. LAN Port Connect the remote computer for remote control. USB Port Connect external keyboard, mouse and monitor for local control. - Page 7 NOTE: The rack-mount kit is provided for KVM-080217IP and KVM-160217IP only. Grounding the KVM Switch 1. Connect one end of the grounding wire to a proper earth ground, such as the rack in which the KVM switch is mounted.
-
Page 8: Connecting The Power
Connecting the Power Va c 1. Plug the provided AC power cord into the power port on the back of the KVM switch. 2. Connect the other end of the power cord to an AC power source. 3. Open the power switch on the rear panel. WARNING: Do not install power cables while the power switch is on. -
Page 9: Connecting To The Lan Port
Connecting to the LAN Port Va c 1. Connect an Ethernet cable to the RJ45 port of a server or computer. 2. Connect the other end of the Ethernet cable to the LAN port of the switch. Connecting to USB and HDMI Ports DC 12V RS485 Keyboard Mouse... -
Page 10: Opening & Closing The Console
Opening & Closing the Console KVM-080217IP/KVM-160217IP Opening the Console UNLOCK UNLOCK UNLOCK 1. Release the lock and pull the KVM console. NOTE: The lock can only do horizontal locking, it can’t bear any load. 2. Pull the KVM console all the way out until it clicks into place;... -
Page 11: Local Control
Local Control Step 1: KVM-080217IP and KVM-160217IP can be set with its' own keyboard and LED screen. While KVM-0802IP can be set with the external keyboard, mouse and monitor connected to the USB and HDMI port of the KVM rear panel. - Page 12 Step 7: Open an explorer, enter 192.168.1.167, the interface shows below: User Name: admin Password: admin Welcome to FS KVM Switch admin ****** English Sign in After logging in for the rst time, a prompt for "loading the ActiveX" will appear below the browser.
-
Page 13: Online Resources
Contact Us Product Warranty Warranty: FS KVM Switches enjoy 2 years limited warranty againist defect in materials or workmanship. For more details about warranty, please check at https://www.fs.com/policies/warranty.html Return: If you want to return item(s), information on how to return can be found at... - Page 14 Q.C. PASSED Copyright © 2020 FS.COM All Rights Reserved.


Need help?
Do you have a question about the KVM-160217IP and is the answer not in the manual?
Questions and answers