Table of Contents
Advertisement
Advertisement
Table of Contents

Related Manuals for Lockly MORTISE EDITION SECURE LUX PGD829AFUS


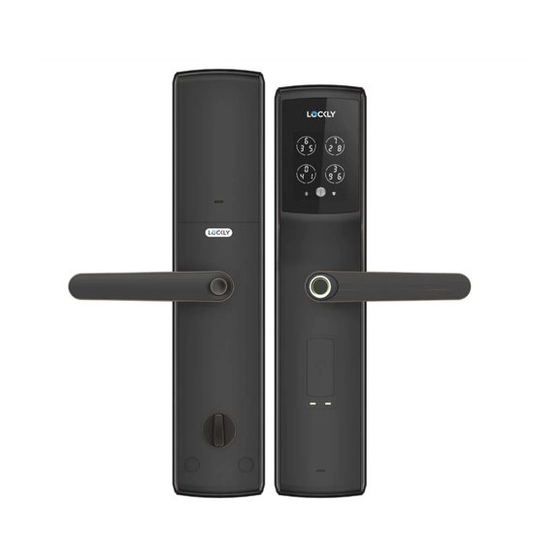
Summary of Contents for Lockly MORTISE EDITION SECURE LUX PGD829AFUS
- Page 1 MORTISE EDITION SECURE LUX INSTALLATION MANUAL...
-
Page 2: Installation Overview
INSTALLATION OVERVIEW Door Battery Cover KM5 X 10mm Screw Interior Panel Mounting Plate Exterior Panel Screw Cap Flat Shaft Lock Cylinder Cotter Pin PM5 X 12mm Screw Escutcheon Pad Escutcheon Screw Shaft Spindle Lockset PM4 X 10mm Screw Position Pad KA4 X 25mm Screw Door Frame KA4 X 18mm Screw... -
Page 3: Parts List
PARTS LIST 40~120mm Standard Door Thickness Cotter Pin through here when door thickness is larger than 70mm Cotter Pin through here when door thickness is less than 70mm Strike(X1) Dust Box(X1) Flat Shaft(X1) Shaft(X1) Lock Cylinder(X1) Position Pad(X2) KA4 X 25mm Screw(X4) KA4 X 18mm Screw (X2) Screw Cap(X2) EscutcheonPad(X2) - Page 4 KNOW YOUR DOOR There are 4 common door-opening directions, the lockset configuration as shown on each diagram below corresponds to the respective door-opening direction. RIGHT IN-SWING DOOR Make sure the latch throw is correctly oriented as shown to fit your right in-swing door Make sure the pit hole is correctly oriented as shown.
- Page 5 KNOW YOUR DOOR LEFT IN-SWING DOOR Make sure the latch throw is correctly oriented as shown to fit your left in-swing door Make sure the pit hole is correctly oriented as shown. LEFT OUT-SWING DOOR Make sure the latch throw is correctly oriented as shown to fit your left out-swing door Make sure the pit hole is...
- Page 6 HOW TO ADJUST THE LATCH THROW Here is how to change the latch throw direction. The factory setting of the throw is for right in-swing door. You do not need to change direction if you have a right in-swing door. 1.
- Page 7 HOW TO ADJUST THE CYLINDER Here is how to change the cylinder direction. The factory setting of the cylinder is for right in-swing door. You do not need to change direction if you have a right in-swing door. 1. You need a Phillips screwdriver. 2.
- Page 8 HOW TO ADJUST THE DOOR HANDLE *The diagram below shows how to shift the door handle from right to left direction. The factory setting of the handle is for right handed door. You do not need to change direction if you have a right handed door. 1.
-
Page 9: Step 1: Preparing Your Door
STEP 1: PREPARING YOUR DOOR Hole template Centerline above 1M from ground. Hole for handle Make sure your door is prepared for installation. You may need to drill a new hole. Please use the supplied template for drilling holes required before installa- tion. - Page 10 STEP 2: INSTALLING THE LOCKSET Route the cable inside the door KA4 X 25mm Screw(4X) Make sure the pit hole of this spin is pointed downward and facing the door outside during installation. Lockset(1X) Install the mortise lockset into door pocket and tighten it with the 4 screws supplied.
- Page 11 STEP 3. INSTALLING THE LOCK CYLINDER AND THE SPINDLE Exterior Panel(1X) Lock cylinder (1X) PM4 X 10mm Screw(X2) Remove this plastic cover before installing the lock cylinder. Spindle(X2) Spindle pad(X2) 23.5 Discard this end after cutting 1 2 3 4 Note: When the door thickness is less than 70mm cut the Spindle from here.
- Page 12 STEP 4. INSTALLING THE EXTERIOR PANEL Note: This side needs to be inserted through the outer part of the door Exterior Panel(1X) Positioning sleeve(X1) Remove and discard positioning sleeve after fixing the screws. Escutcheon Fixing Screw(2X) Mounting Plate Shaft(1X) Escutcheon Pad(2X) How to cut the shaft Note: Insert the shaft through the door.
- Page 13 Shaft Installation Outside Door: After the shaft is installed, pull the shaft outward by hand in the direction of the arrow, and ensure the shaft cannot be pulled out. Inside Door: The shaft must be inserted in place after installation. The shaft must pass through completely the lock body, as shown below.
- Page 14 STEP 5 . INSTALLING THE INTERIOR PANEL Remove and discard the positioning sleeve then insert both lock cables to the corresponding socket of the interior panel. Insert the cotter pin to the flat shaft. See notes as illustrated in the diagram. Then insert the flat shaft to the corresponding holes and tighten with screws provided.
-
Page 15: Step 6. Final Check
STEP 6. FINAL CHECK After installation is completed, lift both the interior and exterior handles up and down making sure they are running smoothly. Then check if the deadbolt and strike plate is thrown smoothly with the physical keys. -
Page 16: Step 7. Installing Batteries
STEP 7. INSTALLING BATTERIES Check the functions of the lock per user manual after installing the batteries. Make sure the batteries are correctly positioned. Then close the battery cover. Screw Caps(2X) - Page 17 STEP 8. PREPARING THE DOOR FRAME AND MOUNTING PLATE Install the dust box as shown below. Open the door frame, install dust box, then the strike plate and fix it with screws. When installing to a wooden door, cut the dust box as shown.
- Page 18 SECURE For an online version of this installation guide and videos, visit: http://lockly.com/help IMCPGD829US200114...
Need help?
Do you have a question about the MORTISE EDITION SECURE LUX PGD829AFUS and is the answer not in the manual?
Questions and answers