Table of Contents
Advertisement
Quick Links
Instruction manual
Instruction manual
Operating & Maintenance
Operating & Maintenance
4812162501_F.pdf
4812162501_F.pdf
Static Three-drum Roller
Static Three-drum Roller
Deutz TD 3.6 L04 (IIIB/T4f)
Deutz TD 3.6 L04 (IIIB/T4f)
Serial number
Serial number
10000514xxA016632 -
10000514xxA016632 -
Translation of original instruction
Translation of original instruction
Reservation for changes
Reservation for changes
Printed in Sweden
Printed in Sweden
CS1400
CS1400
Engine
Engine
Advertisement
Table of Contents

Subscribe to Our Youtube Channel
Related Manuals for Dynapac CS1400


Summary of Contents for Dynapac CS1400
- Page 1 Instruction manual Instruction manual Operating & Maintenance Operating & Maintenance 4812162501_F.pdf 4812162501_F.pdf Static Three-drum Roller Static Three-drum Roller CS1400 CS1400 Engine Engine Deutz TD 3.6 L04 (IIIB/T4f) Deutz TD 3.6 L04 (IIIB/T4f) Serial number Serial number 10000514xxA016632 - 10000514xxA016632 -...
-
Page 3: Table Of Contents
Table of Contents Introduction ..........................1 The machine ....................1 Intended use ....................1 Warning symbols..................1 Safety information ..................1 General ....................... 2 CE marking and Declaration of conformity..........3 Safety - General instructions....................5 Safety - when operating ......................7 Driving near edges .................. - Page 4 Air Conditioning / Automatic Climate Control (ACC) (Optional) ....17 Tightening torque ..................18 ROPS - bolts ..................... 19 Hydraulic system..................19 Machine description ....................... 21 Diesel engine .................... 21 Propulsion system/Transmission .............. 21 Brake system .................... 21 Steering system ..................21 FOPS and ROPS ..................
- Page 5 Operation ..........................39 Before starting ......................39 Battery disconnector/ Electrical battery disconnector (Option) - Operation ....................39 Operator’s seat - Adjusting............... 39 Parking brake - Check................40 Operator's station ..................40 View ......................41 Interlock..................... 41 Instruments and lamps - Checking............42 Starting ........................
- Page 6 Steering cylinder, hinges, etc..............52 Hoods, tarpaulin ..................52 Miscellaneous ........................53 Lifting ........................53 Locking the articulation ................53 Lifting the roller..................53 Unlocking the articulation ................54 Transport ......................... 54 Roller prepared for transport ..............54 Towing/Recovering....................55 Short distance towing with the diesel engine switched off/not running ..
- Page 7 Maintenance, 10h ........................71 Engine hood support ................. 71 Diesel engine Check oil level ..............71 Hydraulic reservoir, Level check - Filling........... 72 Coolant level - Check ................72 Fuel tank - Refueling ................. 73 Water tanks - Filling .................. 73 Sprinkler system - Check/Cleaning ............
- Page 8 Hinges, controls - Lubrication..............86 Diesel engine - Oil change ................ 87 Hydraulic reservoir cap - Check ..............87 Maintenance - 1000h ......................89 Engine hood support ................. 89 Radiator - Check/Cleaning ................ 90 Hinges, controls - Lubrication..............90 Diesel engine - Oil change ................ 91 Replacing the fuel filter / fuel prefilter............
- Page 9 Air conditioning (Optional) Drying filter - Inspection ................105 Hydraulic reservoir - Draining..............106 2018-04-25 4812162501_F.pdf...
- Page 10 4812162501_F.pdf 2018-04-25...
-
Page 11: Introduction
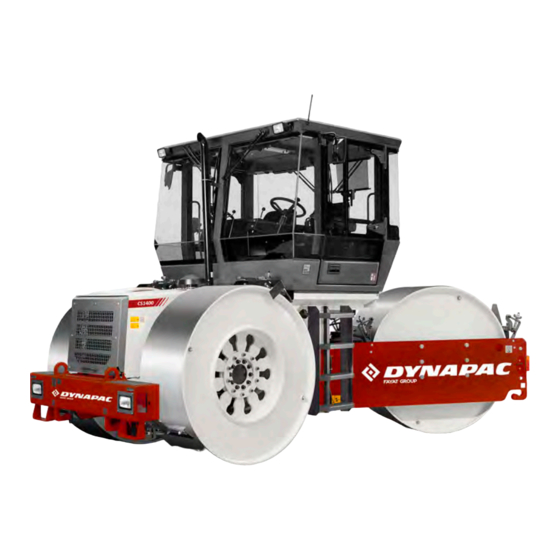
Introduction Introduction The machine Dynapac CS1400 is a static 3-drums roller in 11 metric tonnes class with a compaction width of 2100 mm (83 in.) and with same static linear load on all drums. The machine has articulated steering and is equipped with drive and braking on all drums. -
Page 12: General
This manual contains instructions for periodic maintenance, where maintenance after every 10 and 50 hours of operation can be performed by the machine operator. Other maintenance intervals must be carried out by accredited (Dynapac) service personnel. 4812162501_F.pdf 2018-04-25... -
Page 13: Ce Marking And Declaration Of Conformity
Introduction Additional instructions for the engine can be Additional instructions for the engine can be found in the manufactuer's engine manual. found in the manufactuer's engine manual. Specific maintenance and checks on diesel Specific maintenance and checks on diesel engines must be carried out by the engine engines must be carried out by the engine supplier’s certified personnel. - Page 14 Introduction 4812162501_F.pdf 2018-04-25...
-
Page 15: Safety - General Instructions
Safety - General instructions Safety - General instructions (Also read the safety manual) The operator must be familiar with the contents of the OPERATION section The operator must be familiar with the contents of the OPERATION section before starting the roller. before starting the roller. - Page 16 Changes are only to be made after written approval has been given safety. Changes are only to be made after written approval has been given by Dynapac. by Dynapac. 18. Avoid using the roller before the hydraulic fluid has reached its normal 18.
-
Page 17: Safety - When Operating
Safety - when operating Safety - when operating Prevent persons from entering or remaining in Prevent persons from entering or remaining in the danger area, i.e. a distance of at least 7 m the danger area, i.e. a distance of at least 7 m (23 ft) in all directions from operating machines. - Page 18 Safety - when operating To exit the cab in an emergency, release the To exit the cab in an emergency, release the hammer on the rear right post and break the rear hammer on the rear right post and break the rear window.
-
Page 19: Special Instructions
Special instructions Special instructions Standard lubricants and other recommended oils and fluids Before leaving the factory, the systems and components are filled with the oils and fluids specified in the lubricant specification. These are suitable for ambient temperatures in the range -15°C to +40°C (5°F - 105°F). -
Page 20: Fire Fighting
Special instructions Fire fighting If the machine catches fire, use an ABC-class powder fire extinguisher. A BE-class carbon dioxide fire extinguisher can also be used. Roll Over Protective Structure (ROPS), ROPS approved cab If the machine is fitted with a Roll Over If the machine is fitted with a Roll Over Protective Structure (ROPS, or ROPS approved Protective Structure (ROPS, or ROPS approved... -
Page 21: Jump Starting
Special instructions Jump starting Do not connect the negative cable to the Do not connect the negative cable to the negative terminal on the dead battery. A spark negative terminal on the dead battery. A spark can ignite the oxy-hydrogen gas formed can ignite the oxy-hydrogen gas formed around the battery. - Page 22 Special instructions 4812162501_F.pdf 2018-04-25...
-
Page 23: Technical Specifications
Technical specifications Technical specifications Vibrations - Operator station (ISO 2631) Vibration levels have been measured according to the operational cycle described in the Vibration levels have been measured according to the operational cycle described in the EU directive 2000/14/EC on machines equipped for the EU market with operator seat in EU directive 2000/14/EC on machines equipped for the EU market with operator seat in transport position. -
Page 24: Dimensions, Side View
Technical specifications Dimensions, side view Dimensions Dimensions Wheel base Wheel base 2900 2900 114.2 114.2 Diameter, drum Diameter, drum 1500 1500 Height, with cab Height, with cab 2990 2990 117.7 117.7 Height, without cab/ROPS Height, without cab/ROPS 2500 2500 98.4 98.4 Height, with ROPS Height, with ROPS... -
Page 25: Dimensions, Top View
Technical specifications Dimensions, top view Dimensions Dimensions 2100 2100 82.7 82.7 1515 1515 59.7 59.7 1060 1060 41.7 41.7 22.4 22.4 2018-04-25 4812162501_F.pdf... -
Page 26: Weights And Volumes
Technical specifications Weights and volumes Weights Weights Operating mass, with Operating mass, with 13200 kg 13200 kg 29,100 lbs 29,100 lbs ROPS/Cab and ballast ROPS/Cab and ballast (EN500) (EN500) Drum module weight (with Drum module weight (with 6900 kg 6900 kg 15,210 lbs 15,210 lbs ballast), front... -
Page 27: General
Technical specifications General Engine Engine Manufacturer/Model Manufacturer/Model Deutz TD3.6 L04 (IIIB/T4) Deutz TD3.6 L04 (IIIB/T4) Water-cooled turbo diesel Water-cooled turbo diesel Power output (SAE J1995), 2200 rpm 55 kW Power output (SAE J1995), 2200 rpm 55 kW 74 hp 74 hp Engine speed Engine speed - idling... -
Page 28: Tightening Torque
Technical specifications Tightening torque Tightening torque in Nm for oiled or dry bolts tightened with a torque wrench. Metric coarse screw thread, bright galvanized (fzb): STRENGTH CLASS: 8.8, Oiled 8.8, Oiled 8.8, Dry 8.8, Dry 10.9, Oiled 10.9, Oiled 10.9, Dry 10.9, Dry 12.9, Oiled 12.9, Oiled... -
Page 29: Rops - Bolts
Technical specifications ROPS-bolts which are to be torque tightened ROPS-bolts which are to be torque tightened must be dry. must be dry. ROPS - bolts Bolt dimensions : Bolt dimensions : (PN 4700195096 - (PN 4700195096 - 4700195097) 4700195097) Strength class : Strength class : 10.9 10.9... - Page 30 Technical specifications 4812162501_F.pdf 2018-04-25...
-
Page 31: Machine Description
FOPS/ROPS structure must be replaced immediately. Never perform any modifications on the cab or FOPS/ROPS structure without first having discussed the modification with Dynapac's production unit. Dynapac determines whether the modification could result in the approval according to the FOPS/ROPS standards becoming invalid. -
Page 32: Identification
Machine description Identification Product and component plates Product plate - Product Identification Number (PIN), model/type designation Product plate - Product Identification Number (PIN), model/type designation Engine plate - Type description, product and serial numbers Engine plate - Type description, product and serial numbers Component plate, ROPS Product and serial numbers Component plate, ROPS Product and serial numbers Component plate, Cab Product and serial numbers... -
Page 33: Machine Plate
Machine description Machine plate The machine type plate (1) is affixed on the left side of the rear frame. The plate specifies the manufacturers name and address, the type of machine, the PIN, Product Identification Number (serial number), operating weight, engine power and year of manufacture. (On machines supplied to outside the EU, there are no CE markings and in some cases no year of manufacture.) Fig. -
Page 34: Engine Plates
Machine description Engine plates The engine's type plate (1) is located on top of the cylinder head cover. The plate specifies the type of engine, its serial number and the engine specification. Please specify the engine serial number when ordering spares. Refer also to the engine manual. Fig. -
Page 35: Decals
Machine description Decals Location - decals Warning, crush zone Warning, crush zone 4700903422 4700903422 Fuel with low sulphur content Fuel with low sulphur content 4811000344 4811000344 Warning, rotating engine Warning, rotating engine 4700903423 4700903423 Hoisting plate Hoisting plate 4700904870 4700904870 components components Warning, burning hot surfaces 4700903424... -
Page 36: Safety Decals
Machine description Safety decals Always make sure that all safety decals are completely legible, and remove dirt or order new decals if they have become illegible. Use the part number specified on each decal. 4700903422 Warning - Crush zone, articulation/drum. Maintain a safe distance from the crush zone. - Page 37 Machine description 4700904406 Warning - Danger of slipping or falling. Warning, danger of slipping or falling. Read the instruction manual. 4812125363 Warning - Locking The articulation must be locked during transport and lifting, but be open during operation. Read the instruction manual. 2018-04-25 4812162501_F.pdf...
-
Page 38: Info Decals
Machine description Info decals Noise power level Noise power level Diesel fuel Diesel fuel Lifting point Lifting point Hoisting plate Hoisting plate Handbook compartment Handbook compartment Master switch Master switch Hydraulic fluid Hydraulic fluid Biological hydraulic fluid Biological hydraulic fluid Fixing point Fixing point PANOLIN... -
Page 39: Instruments/Controls
Machine description Instruments/Controls Locations - Control panel and controls 4 24 11 12 13 14 Steering wheel Steering wheel Manual/Automatic sprinkler Manual/Automatic sprinkler Forward/reverse lever Forward/reverse lever Sprinkler timer Sprinkler timer Emergency stop Emergency stop Gear selector, low/high Gear selector, low/high Warning lamp, engine Warning lamp, engine Warning lamp, battery charging... -
Page 40: Function Descriptions
Machine description Function descriptions Designation Designation Symbol Symbol Function Function Steering wheel Steering wheel There are two steering wheels, one on the left and one There are two steering wheels, one on the left and one on the right side. on the right side. - Page 41 Machine description Designation Designation Symbol Symbol Function Function Starter motor activation. Starter motor activation. Watering, switch Watering, switch In the left position, the drums are continually watered. In the left position, the drums are continually watered. In the middle position, watering is off. In the middle position, watering is off.
- Page 42 Machine description Designation Designation Symbol Symbol Function Function Browse in error codes Browse in error codes Turn off / on the ignition. Turn off / on the ignition. Turn the switch to the right to show the error code on the Turn the switch to the right to show the error code on the display and the engine warning light starts flashing.
-
Page 43: Locations - Instruments And Controls, Cab
Machine description Locations - Instruments and controls, cab Fig. Cab, control between seats, with Fig. Cab roof AC (optional) Fig. Cab roof, radio 2018-04-25 4812162501_F.pdf... -
Page 44: Function Description Of Instruments And Controls In The Cab
Machine description Function description of instruments and controls in the cab Designation Designation Symbol Symbol Function Function Working lights, switch Working lights, switch Press to switch on the working lights. Press to switch on the working lights. Front wiper, switch Front wiper, switch Press to operate the front screen wiper. - Page 45 Machine description Fuses The figure shows the position of the fuses. The table below gives fuse amperage and function. All fuses are flat pin fuses. Fuse box (F1) Fuse box (F1) VBS relay, Interlock VBS relay, Interlock Control panel, Indicator lamps Control panel, Indicator lamps Instrument, Low/High speed Instrument, Low/High speed...
-
Page 46: Relays
Machine description Relays Main relay Main relay Neutral start Neutral start Lights Lights 1 2 3 4 5 6 7 8 9 Direction indicators Direction indicators Brake lamp Brake lamp Neutral Neutral Fig. Instrument panel Sprinkler timer Sprinkler timer Interlock Interlock High/Low speed High/Low speed... -
Page 47: Relays In Cab
Machine description Relays in cab Washer pump Washer pump Condenser Condenser AC fan AC fan AC fan AC fan Fig. Relays in cab roof Fuses in cab Flat pin fuses protect the electrical regulating and control system. The fuse boxes (1) are located on the right side of the cab roof. - Page 48 Machine description 4812162501_F.pdf 2018-04-25...
-
Page 49: Operation
Operation Operation Before starting Battery disconnector/ Electrical battery disconnector (Option) - Operation Remember to carry out daily maintenance. Refer to the maintenance instructions. The battery disconnector is located in the front beam. Turn the key (3) to the On position. The roller is now supplied with power. -
Page 50: Parking Brake - Check
Operation Parking brake - Check Make sure that the parking brake knob (12) is Make sure that the parking brake knob (12) is definitely in the right-hand position. The roller can definitely in the right-hand position. The roller can start to roll when the engine is started on sloping start to roll when the engine is started on sloping ground, if the parking brake is not applied. -
Page 51: View
Operation View Before starting, make sure that the view forwards and backwards is unobstructed. All cab windows should be clean and the rear view mirrors should be correctly adjusted. Fig. View Interlock The roller is equipped with Interlock. The engine switches off 4 seconds after the operator rises from the seat. -
Page 52: Instruments And Lamps - Checking
Operation Instruments and lamps - Checking Make sure that the emegency stop is pulled out Make sure that the emegency stop is pulled out and the parking brake is activated. When the and the parking brake is activated. When the forward/reverse lever is in neutral, the automatic forward/reverse lever is in neutral, the automatic brake function is engaged. -
Page 53: Starting
Operation Starting Starting the engine Ensue that there is good ventilation (air extraction) Ensue that there is good ventilation (air extraction) if the engine is run indoors. Risk of carbon if the engine is run indoors. Risk of carbon monoxide poisoning. monoxide poisoning. -
Page 54: Driving
Operation Driving Operating the roller Always drive with engine revs higher than 1500 Always drive with engine revs higher than 1500 rpm. rpm. Increase engine speed to 2200 rpm for maximum driving speed. When changing the operator seat the interlock When changing the operator seat the interlock must be changed to suit the new seat via the must be changed to suit the new seat via the... - Page 55 Operation Put the gear selector (20) at "Tortoise" setting and carefully move the forward/reverse lever (2) in the desired direction of travel. Speed increases as the lever is moved away from the neutral position. The speed should always be controlled using the The speed should always be controlled using the forward/reverse lever and never by changing the forward/reverse lever and never by changing the...
-
Page 56: Interlock/Emergency Stop/Parking Brake - Check
Operation Interlock/Emergency stop/Parking brake - Check The interlock, emergency stop and parking brake must The interlock, emergency stop and parking brake must be checked daily before operating. A function check of be checked daily before operating. A function check of the interlock and emergency stop requires a restart. - Page 57 Operation Sprinkler system/Water tanks Basic setting Two tanks - one pump (lower) One tank (lower) - one pump (upper) One tank (lower) - two pumps Fig. Sprinkler system A. Open B. Closed Allow water from the upper tank to Allow water from the upper tank to fill the lower one, then close the tap fill the lower one, then turn off the before the filter.
-
Page 58: Braking
Operation Braking Normal braking Forward Move the forward/reverse lever (2) to neutral to stop the roller. Always activate the parking brake, even for short stops Reverse on sloping ground. Fig. Control panel 2. Rev control in neutral Set speed control (3) in idling position (900 rpm). Allow the engine to idle for a few minutes to cool down. -
Page 59: Emergency Brake
Operation Emergency brake Braking is normally activated using the forward/reverse lever. The hydrostatic transmission retards and slows the roller when the lever is moved towards the neutral position. A disc brake in each drum motor also acts as emergency brake when driving, and as a parking brake when stationary. -
Page 60: Parking
Operation Parking Chocking the drums Never get off the roller when the diesel engine is Never get off the roller when the diesel engine is running, without first activating the parking brake. running, without first activating the parking brake. Make sure that the roller is parked in a safe place Make sure that the roller is parked in a safe place with respect to other road users. -
Page 61: Long-Term Parking
Long-term parking Long-term parking The following instructions should be followed The following instructions should be followed when long term parking (more than one month). when long term parking (more than one month). These measures apply when parking for a period of up to 6 months. -
Page 62: Hydraulic Reservoir
Long-term parking Hydraulic reservoir Fill the hydraulic reservoir to the uppermost level mark (see under the heading ‘Every 10 hours of operation.’) Steering cylinder, hinges, etc. Lubricate the steering joint bearings and both bearings on the steering cylinder with grease (see under the heading 'Every 50 hours of operation'). -
Page 63: Miscellaneous
Miscellaneous Miscellaneous Lifting Locking the articulation Articulation must be locked to prevent inadvertent Articulation must be locked to prevent inadvertent turning before lifting the roller. turning before lifting the roller. Turn the steering wheel to the straight ahead position. Push in the emergency/parking brake knob. Pull up the locking pin (2), provided with wire. -
Page 64: Unlocking The Articulation
Miscellaneous Unlocking the articulation Remember to unlock the articulation before Remember to unlock the articulation before operating. operating. Pull out the lowermost locking pin (1), which has a a wire attached. Pull up the locking dowel (2) which also has a wire attached. Fold the locking arm (3) back and secure it in the locking lug (4) with the locking dowel (2). -
Page 65: Towing/Recovering
Miscellaneous Towing/Recovering The roller can be moved up to 300 meters (330 yards) using the instructions below. Short distance towing with the diesel engine switched off/not running Chock the drums to prevent the roller from moving Chock the drums to prevent the roller from moving when the brakes are hydraulically disengaged. -
Page 66: Brake Release Pump
Miscellaneous Brake release pump Chock the drums to prevent the roller from Chock the drums to prevent the roller from moving when the brakes are hydraulically moving when the brakes are hydraulically disengaged. disengaged. The disengagement pump for the brakes is located behind the hydraulic tank, near the articulated link. - Page 67 Miscellaneous Brake release pump Chock the drums to prevent the roller from moving Chock the drums to prevent the roller from moving when the brakes are hydraulically disengaged. when the brakes are hydraulically disengaged. The release pump for the brakes is located in the front part of the engine compartment.
-
Page 68: Towing
Miscellaneous Towing A towing bar must be used when towing, as the A towing bar must be used when towing, as the roller has no brakes and can only be slowed and roller has no brakes and can only be slowed and stopped by the vehicle towing the roller. -
Page 69: Operating Instructions - Summary
Operating instructions - Summary Operating instructions - Summary Follow the SAFETY INSTRUCTIONS specified in the Safety Manual. Follow the SAFETY INSTRUCTIONS specified in the Safety Manual. Make sure that all instructions in the MAINTENANCE section are followed. Make sure that all instructions in the MAINTENANCE section are followed. Turn the master switch to the ON position. - Page 70 Operating instructions - Summary 4812162501_F.pdf 2018-04-25...
-
Page 71: Preventive Maintenance
Preventive maintenance Preventive maintenance Complete maintenance is necessary for the machine to function satisfactorily and at the lowest possible cost. The Maintenance section includes the periodic maintenance that must be carried out on the machine. The recommended maintenance intervals assume that the machine is used in a normal environment and working conditions. - Page 72 Preventive maintenance 4812162501_F.pdf 2018-04-25...
-
Page 73: Maintenance - Lubricants And Symbols
Dynapac. ENGINE OIL ENGINE OIL Air temperature -15°C - +50°C Air temperature -15°C - +50°C Dynapac Engine oil 200 P/N 4812161855 (5 liter), Dynapac Engine oil 200 P/N 4812161855 (5 liter), (5°F-122°F) (5°F-122°F) P/N 4812161856 (20 liter), P/N 4812161856 (20 liter),... -
Page 74: Maintenance Symbols
Maintenance - Lubricants and symbols Maintenance symbols Engine, oil level Engine, oil level Air filter Air filter Engine, oil filter Engine, oil filter Battery Battery Hydraulic reservoir, level Hydraulic reservoir, level Sprinkler Sprinkler Hydraulic fluid, filter Hydraulic fluid, filter Sprinkler water Sprinkler water Lubricating oil Lubricating oil... -
Page 75: Maintenance - Maintenance Schedule
Maintenance - Maintenance schedule Maintenance - Maintenance schedule Service and maintenance points Fig. Service and maintenance points Engine oil Engine oil Sprinkler system Sprinkler system 15. Hydraulic reservoir 15. Hydraulic reservoir Radiator Radiator Battery Battery 16. Diesel engine 16. Diesel engine Drum nuts Drum nuts 10. -
Page 76: General
Maintenance - Maintenance schedule General Periodic maintenance should be carried out after the number of hours specified. Use the daily, weekly etc. periods where number of hours cannot be used. Remove all dirt before filling, when checking Remove all dirt before filling, when checking oils and fuel and when lubricating using oil or oils and fuel and when lubricating using oil or grease. -
Page 77: Every 50 Hours Of Operation (Weekly)
Maintenance - Maintenance schedule Every 50 hours of operation (Weekly) Refer to the contents to find the page number of the sections referred to ! Action Action Comment Comment Check/clean the filter element in the air cleaner. Check/clean the filter element in the air cleaner. Lubricate the articulation Lubricate the articulation Lubricate the steering cylinder mounts... -
Page 78: Every 1000 Hours Of Operation
Maintenance - Maintenance schedule Every 1000 hours of operation Refer to the contents to find the page number of the sections referred to ! Pos. Pos. Action Action Comment Comment in fig in fig Clean the cooler element Clean the cooler element If necessary If necessary Change the engine oil and oil filter... -
Page 79: Every 2000 Hours Of Operation
Maintenance - Maintenance schedule Every 2000 hours of operation Refer to the contents to find the page number of the sections referred to ! Pos. Pos. Action Action Comment Comment in fig in fig Clean the cooler element Clean the cooler element If necessary If necessary Change the engine oil and oil filter... -
Page 80: Service - Checklist
Maintenance - Maintenance schedule Service - Checklist 4812162501_F.pdf 2018-04-25... -
Page 81: Maintenance, 10H
Maintenance, 10h Maintenance, 10h Every 10 hours of operation (Daily) Park the roller on a level surface. Park the roller on a level surface. The engine must be switched off and the The engine must be switched off and the parking brake activated when checking or parking brake activated when checking or adjusting the roller, unless otherwise specified. -
Page 82: Hydraulic Reservoir, Level Check - Filling
Maintenance, 10h Hydraulic reservoir, Level check - Filling Wipe the sight glass (1) and check that the oil level is between the upper and lower marks. If necessary, fill with hydraulic fluid by unscrewing the filler cap (2). See under the "Lubricants" heading for the correct oil grade. -
Page 83: Fuel Tank - Refueling
Maintenance, 10h Fuel tank - Refueling Never refuel while the engine is running, do not Never refuel while the engine is running, do not smoke, and avoid spilling fluid. smoke, and avoid spilling fluid. Refuel every day before commencing work. Unscrew the lockable tank cap (1) fill with diesel up to the lower edge of the filler pipe. -
Page 84: Sprinkler System - Check/Cleaning
Maintenance, 10h Sprinkler system - Check/Cleaning Start the sprinkler system and make sure that no nozzle (1) is clogged. Clean the nozzle and the roughing filter located by the water pump (2) if necessary see fig. below. Fig. Sprinkler ramp 1. -
Page 85: Brakes - Check
Maintenance, 10h Inspect the intake water filters of the pumps every day. The water filter housing (2) can be removed. Flush the housing and the filter clean with water and then put them back into place. Only use clean water in the water tank. Only use clean water in the water tank. -
Page 86: Scrapers - Check/Cleaning
Maintenance, 10h Scrapers - Check/Cleaning Make sure that the scrapers are undamaged. The spring-action scrapers require no adjustment because the spring force provides the correct contact force. Asphalt remnants can accumulate on the scraper and influence the contact force. Clean as necessary. Make sure the scrapers are retracted from the Make sure the scrapers are retracted from the drum when transporting. -
Page 87: Maintenance - 50H
Maintenance - 50h Maintenance - 50h Every 50 hours of operation (Weekly) Park the roller on a level surface. Park the roller on a level surface. The engine must be switched off and the The engine must be switched off and the parking brake activated when checking or parking brake activated when checking or adjusting the roller, unless otherwise specified. -
Page 88: Backup Filter - Change
Maintenance - 50h Release the clips (1), pull off the cover (2), and pull out the main filter (3). Do not remove the backup filter (4). Clean the air cleaner if necessary, see section Air cleaner - Cleaning. When replacing the main filter (3), insert a new filter and refit the air cleaner in the reverse order. -
Page 89: Air Cleaner - Cleaning
Maintenance - 50h Air cleaner - Cleaning Wipe clean the inside of the cover (2) and the filter housing (5). See the previous illustration. Wipe clean on both sides of the outlet Wipe also both surfaces for the outlet pipe; see pipe. -
Page 90: Tightening The Drum Nuts - Check
Maintenance - 50h Turn the machine back for driving straight ahead. This makes the rear bearing (1) of the left steering cylinder accessible from the left side of the machine. Wipe the lubricant nipple and grease with three strokes of the hand grease gun. Fig. -
Page 91: Air Conditioning (Optional) - Inspection
Maintenance - 50h Air conditioning (Optional) - Inspection Never work under the roller when the engine is Never work under the roller when the engine is running. Park the roller on a level surface, chock running. Park the roller on a level surface, chock the wheels and depress the parking brake control. - Page 92 Maintenance - 50h 4812162501_F.pdf 2018-04-25...
-
Page 93: Maintenance Measures - 250 H
Maintenance measures - 250 h Maintenance measures - 250 h Every 250/750/1250/1750..hours of operation (every 3 months) Park the roller on a level surface. Park the roller on a level surface. The engine must be switched off and the The engine must be switched off and the parking brake activated when checking or parking brake activated when checking or... -
Page 94: Radiator - Check/Cleaning
Maintenance measures - 250 h Radiator - Check/Cleaning Check that air can pass unobstructed through the radiators (1) and (2). Clean a dirty radiator using compressed air or a high-pressure water jet. Blow air or direct water through the cooler in the opposite direction to that of the cooling air. -
Page 95: Maintenance Measures - 500 H
Maintenance measures - 500 h Maintenance measures - 500 h Every 500/1500..hours of operation (every six months) Park the roller on a level surface. Park the roller on a level surface. The engine must be switched off and the The engine must be switched off and the parking brake activated when checking or parking brake activated when checking or... -
Page 96: Radiator - Check/Cleaning
Maintenance measures - 500 h Radiator - Check/Cleaning Check that air can pass unobstructed through the radiators (1) and (2). Clean a dirty radiator using compressed air or a high-pressure water jet. Blow air or direct water through the cooler in the opposite direction to that of the cooling air. -
Page 97: Diesel Engine - Oil Change
Maintenance measures - 500 h Diesel engine - Oil change Run the engine warm before draining the oil. Make sure that ventilation (extraction) is Make sure that ventilation (extraction) is adequate if the engine is run indoors. (Risk of adequate if the engine is run indoors. (Risk of carbon monoxide poisoning). - Page 98 Maintenance measures - 500 h 4812162501_F.pdf 2018-04-25...
-
Page 99: Maintenance - 1000H
Maintenance - 1000h Maintenance - 1000h Performed after 1000 operating hours (each year) Park the roller on a level surface. Park the roller on a level surface. The engine must be switched off and the The engine must be switched off and the parking brake activated when checking or parking brake activated when checking or adjusting the roller, unless otherwise specified. -
Page 100: Radiator - Check/Cleaning
Maintenance - 1000h Radiator - Check/Cleaning Check that air can pass unobstructed through the radiators (1) and (2). Clean a dirty radiator using compressed air or a high-pressure water jet. Blow air or direct water through the cooler in the opposite direction to that of the cooling air. -
Page 101: Diesel Engine - Oil Change
Maintenance - 1000h Diesel engine - Oil change Run the engine warm before draining the oil. Make sure that ventilation (extraction) is Make sure that ventilation (extraction) is adequate if the engine is run indoors. (Risk of adequate if the engine is run indoors. (Risk of carbon monoxide poisoning). -
Page 102: Replacing The Fuel Filter / Fuel Prefilter
Maintenance - 1000h Replacing the fuel filter / fuel prefilter Place a container underneath to collect fuel that runs out when the filter is released. Loosen and unscrew the fuel filter (1). Replace the filter unit. Unscrew the lower part of the fuel filter (2) and drain off any water, and then replace the filter unit. -
Page 103: Hydraulic Fluid Filter - Replacement
Maintenance - 1000h Hydraulic fluid filter - Replacement The filter is located on the left side of the frame. Clean thoroughly around the oil filter. Remove the oil filter (1) and discard it in a safe Remove the oil filter (1) and discard it in a safe manner. -
Page 104: Fresh Air Filter - Replacement
Maintenance - 1000h Fresh air filter - Replacement The fresh air intake is located behind the back of the left seat. Replace the fresh air filter (1) and clean the fresh air compartment. Restore. Fig. Fresh air intake 1. Fresh air filter Fuel tank - Draining off water Water can be drained via the drain plug at the bottom of the tank. -
Page 105: Hydraulic Reservoir - Draining
Maintenance - 1000h Hydraulic reservoir - Draining Drain condensation water via the drain plug (1) at the bottom of the tank. Draining should be done when the roller has been standing still for some time, eg, overnight. Drain as follows: Put a can underneath the drain plug (1). - Page 106 Maintenance - 1000h 4812162501_F.pdf 2018-04-25...
-
Page 107: Maintenance - 2000H
Maintenance - 2000h Maintenance - 2000h Performed after 2000 operating hours (every two years) Park the roller on a level surface. Park the roller on a level surface. The engine must be switched off and the The engine must be switched off and the parking brake activated when checking or parking brake activated when checking or adjusting the roller, unless otherwise specified. -
Page 108: Radiator - Check/Cleaning
Maintenance - 2000h Radiator - Check/Cleaning Check that air can pass unobstructed through the radiators (1) and (2). Clean a dirty radiator using compressed air or a high-pressure water jet. Blow air or direct water through the cooler in the opposite direction to that of the cooling air. -
Page 109: Diesel Engine - Oil Change
Maintenance - 2000h Diesel engine - Oil change Run the engine warm before draining the oil. Make sure that ventilation (extraction) is Make sure that ventilation (extraction) is adequate if the engine is run indoors. (Risk of adequate if the engine is run indoors. (Risk of carbon monoxide poisoning). -
Page 110: Replacing The Fuel Filter / Fuel Prefilter
Maintenance - 2000h Replacing the fuel filter / fuel prefilter Place a container underneath to collect fuel that runs out when the filter is released. Loosen and unscrew the fuel filter (1). Replace the filter unit. Unscrew the lower part of the fuel filter (2) and drain off any water, and then replace the filter unit. -
Page 111: Hydraulic Fluid Filter - Replacement
Maintenance - 2000h Hydraulic fluid filter - Replacement The filter is located on the left side of the frame. Clean thoroughly around the oil filter. Remove the oil filter (1) and discard it in a safe Remove the oil filter (1) and discard it in a safe manner. -
Page 112: Fresh Air Filter - Replacement
Maintenance - 2000h Fresh air filter - Replacement The fresh air intake is located behind the back of the left seat. Replace the fresh air filter (1) and clean the fresh air compartment. Restore. Fig. Fresh air intake 1. Fresh air filter Fuel tank - Draining off water Water can be drained via the drain plug at the bottom of the tank. -
Page 113: Hydraulic Reservoir - Changing The Fluid
Maintenance - 2000h Hydraulic reservoir - Changing the fluid Danger of being burned when draining hot oil. Danger of being burned when draining hot oil. Protect your hands. Protect your hands. Place a receptacle that will hold at least 50 liters Place a receptacle that will hold at least 50 liters under the drain plug. -
Page 114: Water Tank - Cleaning
Maintenance - 2000h Water tank - Cleaning Draining the tanks 1, 2 Fig. Water tank 1. Cover 2. Filter The rear (lower) tank's drain plug is placed to the left under the tank. The front (upper) tank is drained via the sprinkler system by disconnecting the filter from the water hose (3) to the tank. -
Page 115: Compressor - Check (Optional)
Maintenance - 2000h Compressor - Check (Optional) Inspect the attachment of the compressor (1). The compressor is located below the air filter in the engine compartment. The unit should, if possible, be run at least five minutes every week to ensure the lubrication of the gaskets and compressor in the system. - Page 116 Maintenance - 2000h Hydraulic reservoir - Draining Drain condensation water via the drain plug (1) at the bottom of the tank. Draining should be done when the roller has been standing still for some time, eg, overnight. Drain as follows: Put a can underneath the drain plug (1).
- Page 118 Dynapac Compaction Equipment AB Box 504, SE 371 23 Karlskrona, Sweden www.dynapac.com...
Need help?
Do you have a question about the CS1400 and is the answer not in the manual?
Questions and answers