Table of Contents
Advertisement
Quick Links
Advertisement
Table of Contents

Subscribe to Our Youtube Channel
Related Manuals for Sunny Health & Fitness SF-RW5728


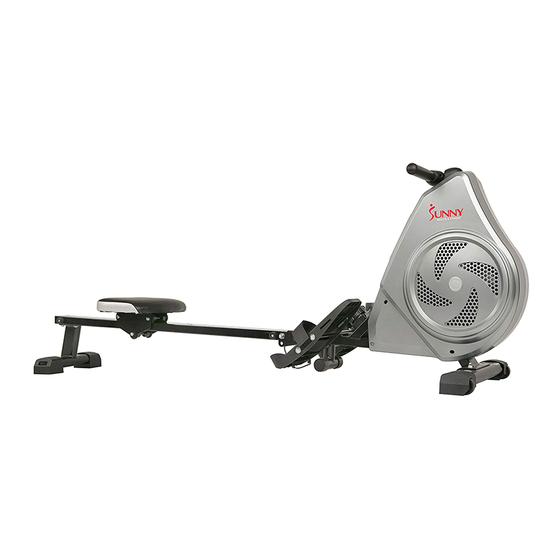
Summary of Contents for Sunny Health & Fitness SF-RW5728
- Page 1 AIR MAGNETIC ROWING MACHINE SF-RW5728 USER MANUAL IMPORTANT! Please retain owner’s manual for maintenance and adjustment instructions. Your satisfaction is very important to us, PLEASE DO NOT RETURN UNTIL YOU HAVE CONTACTED support@sunnyhealthfitness.com or 1- 877 - 90SUNNY (877-907-8669).
-
Page 2: Important Safety Information
IMPORTANT SAFETY INFORMATION We thank you for choosing our product. To ensure your safety and health, please use this equipment correctly. It is important to read this entire manual before assembling and using the equipment. Safe and effective use can only be achieved if the equipment is assembled, maintained and used properly. It is your responsibility to ensure that all users of the equipment are informed of all warnings and precautions. -
Page 3: Exploded Diagram
EXPLODED DIAGRAM... -
Page 4: Hardware Package
HARDWARE PACKAGE #16 1PC #32 2PCS #13 Φ10*105 1PC #44 M8 2PCS #40 M8*55 2PCS #46 M8*20 6PCS #42 M10 2PCS #45 M6*20 2PCS #52 Φ8.4*Φ19.0*T1.6 8PCS #53 Φ10.3*Φ20.0*T2.0 2PCS #58 S13-17 2PCS #57 S5 2PCS Ordering Replacement Parts (U.S. and Canadian Customers only) Please provide the following information in order for us to accurately identify the part(s) needed: ✓... -
Page 5: Parts List
PARTS LIST Description Spec. Qty. Description Spec. Qty. Coil Spring Handlebar Assembly Fan Assembly Front Stabilizer Computer Belt 270J6 Magnetic Board Tension Control Knob Assembly Idler Wheel Pedal Strap Left End Cap Foam Grip Seat Hex Bolt M6*12 Right End cap Carriage Bolt M8*55 Adjustable End... - Page 6 ASSEMBLY INSTRUCTIONS STEP 1: Attach Front Stabilizer (No. 34) to Main Frame (No. 11) with 2 Carriage Bolts (No. 40), 2 Flat Washers (No. 52) and 2 Domed Nuts (No. 44). Secure and tighten with Open End Wrench (No. 58). STEP 2: Insert 2 Axles for Pedal (No.
- Page 7 STEP 4: Attach Rear Support (No. 12) onto Sliding Rail (No. 10) with 4 Flat Washers (No. 52) and 4 Screws (No. 46). Secure and tighten with Allen Wrench (No. 57). STEP 5: Attach Sliding Rail (No. 10) onto Main Frame (No. 11). Make sure that the hole on position e of Sliding Rail (No.
-
Page 8: Adjustment Guide
ADJUSTMENT GUIDE ❖ PEDAL STRAP ADJUSTMENT pedal strap adjustable personalized to fit the user’s foot size. ❖ MOVING THE MACHINE To move the rower, lift up the rear support until the transportation wheels on the front stabilizer touch the ground. With the wheels on the ground, you can transport the rower to the desired location with ease. -
Page 9: Folding The Machine
❖ FOLDING THE MACHINE When not in use, you can save Figure A space by folding the Sliding Rail (No. 10). 1. Pull out the Pull Pin (No. 13). Fold the Sliding Rail (No. 10) to vertical angle (Figure A). SAFETY NOTE: the seat will glide down when folding the sliding rail. -
Page 10: Replace The Battery
❖ REPLACE THE BATTERY One AAA battery is included in the Computer (No. 3). To replace the battery, remove the computer from Main Frame (No. 11), and disconnect the Trunk Wire (No. 56) and the link wire of computer. Replace the battery. Do not mix battery types and do not mix old and new battery. -
Page 11: Exercise Computer
EXERCISE COMPUTER SPECIFICATIONS: CNT(COUNT) ---------------------------------------------0~9999 TIME(TIME)-------------------------------------------------0:00~99:59MIN RPM( STRIEDES/MINUTE) ----------------------------0~9999 CAL(CALORIES)------------------------------------------ 0~9999 (0.0~999.9)KCAL DIST /ML(DISTANCE) -----------------------------------0.1-999.9M/ML KEY FUNCTIONS MODE: Press to select functions, time, calories, rpm, distance, scan, count. Hold the button for 2 seconds to have a total reset. OPERATION PROCEDURES: AUTO ON/OFF If the machine is put into motion or the mode button is pressed, the computer will become active.
Need help?
Do you have a question about the SF-RW5728 and is the answer not in the manual?
Questions and answers