Advertisement
Advertisement
Table of Contents

Related Manuals for Sunny Health & Fitness SF-RW5854


Summary of Contents for Sunny Health & Fitness SF-RW5854
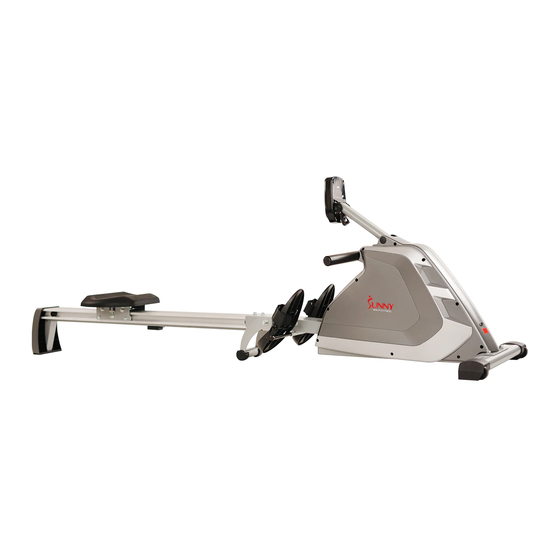
- Page 1 PROGRAMMABLE MAGNETIC ROWER SF-RW5854 USER MANUAL IMPORTANT! Please retain owner’s manual for maintenance and adjustment instructions. Your satisfaction is very important to us, PLEASE DO NOT RETURN UNTIL YOU HAVE CONTACTED US: support@sunnyhealthfitness.com or 1- 877 - 90SUNNY (877-907-8669).
-
Page 2: Important Safety Information
IMPORTANT SAFETY INFORMATION We thank you for choosing our product. To ensure your safety and health, please use this equipment correctly. It is important to read this entire manual before assembling and using the equipment. Safe and effective use can only be achieved if the equipment is assembled, maintained, and used properly. -
Page 3: Exploded Diagram
EXPLODED DIAGRAM 1 40 39 41 40... - Page 4 EXPLODED DIAGRAM 2 71 70...
-
Page 5: Hardware Package
HARDWARE PACKAGE Ordering Replacement Parts (U.S. and Canadian Customers only) Please provide the following information in order for us to accurately identify the part(s) needed: ✓ The model number (found on cover of manual) ✓ The product name (found on cover of manual) ✓... -
Page 6: Parts List
PARTS LIST Description Spec. Description Spec. Computer Seat Computer Wire Seat Post Computer Wire Bolt M8*16 Computer Wire Bolt M8*32 Nylon Nut M8*H7.5*S13 Nylon Nut d8*Φ20*2 Washer Adjusting Bolt M6*40 Bolt M8*90*20*S13 Adjusting U Seat Handlebar Nylon Nut Φ12.5*Φ8.2*10 Mesh Belt Spacer Φ32*17 End Cap... - Page 7 Description Spec. Description Spec. Axle for Mesh Belt Bolt M5*10 Wheel Volute Spring Outer PC Board for Belt Mesh Belt Wheel Power Cord Bearing 6300-2RS Sensor Seat C Clip Bolt M10*112 Mesh Belt Plate Φ19*2 Spacer Bearing Bearing 6000-ZZ Bearing 16003-2RS Outer Cover for Φ15*Φ10.2...
- Page 8 ASSEMBLY INSTRUCTIONS We value your experience using Sunny Health and Fitness products. For assistance with parts or troubleshooting, please contact us at support@sunnyhealthfitness.com or 1-877-90SUNNY (877-907-8669). STEP 1: #25 M8*50*S14 2PCS #15 d8 2PCS Attach Front Stabilizer (No. 9) to Main d8*Φ22*2 2PCS Frame (No.
- Page 9 We value your experience using Sunny Health and Fitness products. For assistance with parts or troubleshooting, please contact us at support@sunnyhealthfitness.com or 1-877-90SUNNY (877-907-8669). STEP 3: Φ10.9*80*14 1PC d6*Φ16*1.2 1PC M6*16*S5 1PC Attach Seat (No. 31) onto Aluminum Rail Φ11.4*Φ27*26 2PCS (No.
- Page 10 We value your experience using Sunny Health and Fitness products. For assistance with parts or troubleshooting, please contact us at support@sunnyhealthfitness.com or 1-877-90SUNNY (877-907-8669). STEP 5: #4 M8*90*20*S13 Connect Trunk Wire (No. with #3 d8*Φ20*2 2PCS Computer Wire (No. 1a). #2 M8*H7.5*S13 Connect Trunk Wire 2 (No.
-
Page 11: Exercise Computer
EXERCISE COMPUTER OPERATING INSTRUCTIONS: 1. Connect all cables to the monitor. 2. After turning on, all LCD segments will light up for 2 seconds and the Computer will start at level 1. The monitor will go to initial mode. NOTE: If the connection cables were installed incorrectly, motor will not run. Before servicing, please examine if all connection cables are well connected and then reset the power until you hear a beeping sound or press RESET... - Page 12 FUNCTIONS: TIME: Exercise time will be shown on the display when exercising. If the computer is inactive for over 4 minutes, it will enter sleep mode. To turn on the computer, press any button or start the work out, all values will reset to zero.
- Page 13 PROGRAM: Preset Program: Program 1- Program 7 4. Press the +/- button to select the desired program. 5. Press MODE to enter the program. 6. The time display will flash, press the +/- button to set up the desired time to do the exercise. Press MODE button to confirm your setting value.
- Page 14 2. Press MODE button to enter the pulse program. 3. Pulse display will flash, press the +/- button to set up the desired pulse value you would like to reach. Press MODE button to confirm your setting value. 4. The time display will flash, press the +/- button to set up the desired time to do the exercise. Press MODE button to confirm your setting value.
- Page 15 ADJUSTMENTS GUIDE PEDAL ADJUSTMENT The pedal strap is adjustable and can be personalized to fit the user’s foot size. MOVING THE MACHINE To move the machine, lift the Aluminum Rail (No. 44) until the transportation wheels on End Caps (No. 10L/R) touch the ground.
-
Page 16: Storage Guide
STORAGE GUIDE When not in use, you can save space by folding the Aluminum Rail (No. 44). 1. Unscrew the L Knob (No. 16) until the rod of L Knob (No. 16) completely detaches from Aluminum Rail Link (No. Figure A 22), and at the same time, bring the L Knob (No.
Need help?
Do you have a question about the SF-RW5854 and is the answer not in the manual?
Questions and answers