Advertisement
Available languages
Available languages
Quick Links
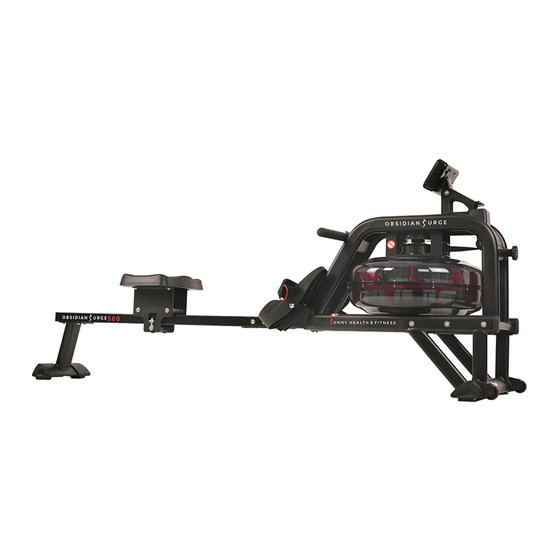
OBSIDIAN SURGE 500 METER
WATER ROWING MACHINE
SF-RW5713
USER MANUAL
English, Page 7~13 IMPORTANT: For customer service, please contact: support@sunnyhealthfitness.com.
Español, Page 14~20 IMPORTANTE: Para servicio al cliente, comuníquese a: support@sunnyhealthfitness.com.
Français, Page 21~27 IMPORTANT: Pour le service après-vente, contacter: support@sunnyhealthfitness.com.
中文, 28~34 页注意!组装及使用此产品前,请仔细阅读本说明书。产品外形以实物为准,如有更改恕不另行通知。产品组
装及使用过程中如有任何问题请电联 400-8233-119 或发邮件至 service@sunnyhealthfitness.cn。
Advertisement

Subscribe to Our Youtube Channel
Related Manuals for Sunny Health & Fitness SF-RW5713


Summary of Contents for Sunny Health & Fitness SF-RW5713
- Page 1 OBSIDIAN SURGE 500 METER WATER ROWING MACHINE SF-RW5713 USER MANUAL English, Page 7~13 IMPORTANT: For customer service, please contact: support@sunnyhealthfitness.com. Español, Page 14~20 IMPORTANTE: Para servicio al cliente, comuníquese a: support@sunnyhealthfitness.com. Français, Page 21~27 IMPORTANT: Pour le service après-vente, contacter: support@sunnyhealthfitness.com.
- Page 2 IMPORTANT SAFETY INFORMATION We thank you for choosing our product. To ensure your safety and health, please use this equipment correctly. It is important to read this entire manual before assembling and using the equipment. Safe and effective use can only be achieved if the equipment is assembled, maintained, and used properly. It is your responsibility to ensure that all users of the equipment are informed of all warnings and precautions.
- Page 3 INFORMATIONS DE SÉCURITÉ IMPORTANTES Nous vous remercions d’avoir choisi notre produit. Pour votre santé et votre sécurité, veuillez utiliser correctement cet appareil. Il est important de lire entièrement le présent manuel avant d’assembler l’appareil et de l’utiliser. L’utilisation sûre et efficace n’est possible que si l’appareil est correctement assemblé, entretenu et utilisé.
- Page 4 EXPLODED DIAGRAM HARDWARE PACKAGE...
- Page 5 PARTS LIST Description Spec. Qty. Description Spec. Qty. Description Spec. Qty. Main Frame Bearing 61905 Bolt M8*70 Front Stabilizer Fill Plug Rubber, black Screw M5*12 Slide Rail O-shaped Ring Rubber, black Bolt M8*125 Rear Stabilizer Stopper Rubber, black PC Board OD40*ID20*0.5 Sensor Stand Seat...
- Page 6 LIS TE DES ÉLÉMENTS Description Spec. Qty. Description Spec. Qty. Description Spec. Qty. Cadre Principal Roulement 61905 Boulon M8*70 Bouchon De En caoutchouc, Stabilisateur Avant M5*12 Remplissage noir En caoutchouc, Rail Coulissant Anneau Rond Boulon M8*125 noir En caoutchouc, Stabilisateur Arrière Butée Joint En Plastique OD40*ID20*0.5...
- Page 7 Ordering Replacement Parts (U.S. and Canadian Customers only) Please provide the following information in order for us to accurately identify the part(s) needed ✓ The model number (found on cover of manual) ✓ The product name (found on cover of manual) ✓...
-
Page 8: Main Frame (
ASSEMBLY INSTRUCTIONS We value your experience using Sunny Health and Fitness products. For assistance with parts or troubleshooting, please contact us at support@sunnyhealthfitness.com or 1-877-90SUNNY (877-907- 8669). STEP 1: NOTE: We recommend having 2 people to assemble the product. Turn over the Slide Rail (No. 3) and Seat (No. 36). -
Page 9: Slide Rail (
We value your experience using Sunny Health and Fitness products. For assistance with parts or troubleshooting, please contact us at support@sunnyhealthfitness.com or 1-877-90SUNNY (877-907- 8669). STEP 4: NOTE: Move the Seat (No. 36) to the front of the Slide Rail (No. 3) before assembly to prevent it from gliding down during assembly. - Page 10 BATTERY INSTALLATION & REPLACEMENT Battery Battery Cover BATTERY INSTALLATION: 1. Take out 2 AA batteries from computer box. 2. Press the buckle of battery cover on the back of the Meter (No. 46), then remove battery cover. 3. Install 2 AA batteries into the battery case on the back of the Meter (No. 46). Pay attention to the battery + and –...
- Page 11 HOW TO FILL AND EMPTY THE TANK 1. Remove the Fill Plug (No. 33) from the Upper Tank Cover (No. 12). 2. To fill the tank with water, refer to Fig. A. Insert the Funnel (No. 77) into the tank, then use a cup or the Pumping Siphon (No.
- Page 12 ADJUSTMENTS GUIDE MOVING THE ROWER ADJUSTING THE BALANCE To move the rower, lift up the Rear Stabilizer (No. 4) until the Adjust the Ajustable End Caps (No. 27L/R) on the Rear transportation wheels on the front stabilizer touch the ground. With the Stabilizer (No.
- Page 13 EXERCISE METER Our computerized display console on the Sunny Obsidian Surge 500 Meter Water Rowing Machine allows the user to tailor a personalized workout by monitoring their progress. During a workout, the display console will alternately and repeatedly display the Time, Time/500M, SPM, Distance, Strokes, Total Strokes, Calories Burned, and Pulse (all the above).
- Page 14 When you enter the SPORT screen, MANUAL and RACE will flash. Press UP or DOWN to select MANUAL or RACE. Press ENTER to confirm your selection. (1) MANUAL (Fig. 4): There are 2 options in MANUAL mode. A. The meter can be set to countdown. When you select MANUAL, the value of TIME will start to flash. Press UP to set the value of TIME to countdown.
-
Page 15: Bastidor Principal 1
INSTRUCCIONES DE MONTAJE Valoramos su experiencia con los productos de Sunny Health and Fitness. Para obtener ayuda con las piezas o la solución de problemas, contáctenos en support@sunnyhealthfitness.com o al 1-877- 90SUNNY (877-907-8669). PASO 1: NOTA: Recomendamos que sean 2 personas las que armen el producto. -
Page 16: Riel Corredizo 1
Valoramos su experiencia con los productos de Sunny Health and Fitness. Para obtener ayuda con las piezas o la solución de problemas, contáctenos en support@sunnyhealthfitness.com o al 1-877- 90SUNNY (877-907-8669). PASO 4: NOTA: Mueva el Asiento (n.°36) a la parte delantera del Riel Corredizo (n.°3) antes del armado, para evitar que se deslice hacia abajo durante el proceso. - Page 17 INSTALACIÓN Y REEMPLAZO DE LA BATERÍA Batería Tapa de la Batería INSTALACIÓN DE LA BATERÍA: 1. Saque 2 baterías AA de la caja de la computadora. 2. Presione la hebilla de la tapa de la batería en la parte posterior del Medidor (No. 46), luego retire la tapa de la batería.
- Page 18 CÓMO LLENAR Y VACIAR EL TANQUE 1. Retire el Tapón De Llenado (n.°33) de la Cubierta Superior Del Tanque (n.°12). 2. Para llenar el tanque con agua, consulte la Fig. A. Inserte el Embudo (n.°77) en el tanque, luego use una taza o la Sifón De Bombeo (n.°76) y un balde para llenar el tanque. Utilice el indicador de nivel de agua en el lado del tanque para medir el nivel de agua deseado en este.
- Page 19 GUÍA DE AJUSTES TRASLADO DE LAMÁQUINA AJUSTE DEL BALANCE Para mover la máquina, levante el Estabilizador Trasero (n.°4) hasta Ajuste las tapas de los extremos del Estabilizador que las ruedas de transporte en el soporte delantero toquen el suelo. Trasero (n.°4) de la máquina si la máquina se Con las ruedas en el suelo, puede transportar la remadora al lugar desequilibra durante el uso.
- Page 20 MEDIDOR DE EJERCICIO La consola de visualización computarizada de la Máquina de remo de 500 m Obsidian Surge de Sunny permite que el usuario realice un entrenamiento personalizado y supervise su progreso. Durante un entrenamiento, la consola de visualización mostrará de forma alterna y repetida su tiempo, tiempo/500 m, SPM, distancia, latidos, latidos totales, calorías quemadas y pulso (todo lo anterior).
- Page 21 3. Al entrar en la pantalla SPORT, MANUAL (MANUAL) y RACE (CARRERA) parpadearán. Pulse UP o DOWN para seleccionar MANUAL o RACE. Pulse ENTER para confirmar su selección. (1) MANUAL (Fig. 4): Hay 2 opciones en el modo MANUAL. A. La computadora puede establecerse como cuenta regresiva. Cuando seleccione MANUAL, el valor de TIME comenzará a parpadear. Pulse UP para establecer el valor de TIME a cuenta regresiva.
- Page 22 INSTRUCTIONS D’ASSEMBLAGE Nous apprécions votre expérience d'utilisation des produits Sunny Health and Fitness. Pour obtenir de l'aide concernant pièces dépannage, veuillez nous contacter à support@sunnyhealthfitness.com ou au 1-877-90SUNNY (877-907-8669). ÉTAPE 1: REMARQUE: Il est recommandé d’être deux pour assembler le produit. Retourner le Rail Coulissant (n 3) et le Siège 36) commeci-dessus.
- Page 23 Nous apprécions votre expérience d'utilisation des produits Sunny Health and Fitness. Pour obtenir de l'aide concernant pièces dépannage, veuillez nous contacter à support@sunnyhealthfitness.com ou au 1-877-90SUNNY (877-907-8669). ÉTAPE 4: 36) à l’avant Remarque: Déplacer le Siège (n 3) avant l’assemblage du Rail Coulissant (n pour éviter...
- Page 24 INSTALLATION ET REMPLACEMENT DE LA BATTERIE Batterie Couvercle de la batterie INSTALLATION DE LA BATTERIE: 1. Retirez 2 piles AA du boîtier de compteur. 2. Appuyez sur la languette du cache de la batterie à l'arrière de Compteur (n ° 46) pour retirer le cache de la batterie.
- Page 25 COMMENT REMPLIR ET VIDER LE RÉSERVOIR 1. Retirer le Bouchon De Remplissage (n 33) du Couvercle Supérieur Du Réservoir (n 12). 2. Pour remplir le réservoir d’eau, reportez-vous à la Fig. A. Insérer l’entonnoir (n 77) dans le 76) ainsi qu’un seau pour réservoir, puis utiliser une tasse ou la Siphon De Pompage (n remplir le réservoir.
- Page 26 GUIDE DE RÉGLAGE RÉGLAGE DE L’ÉQUILIBRE DÉPLACERL’APPAREIL Régler les embouts d’extrémité sur le Stabilisateur Pour déplacer l’appareil, soulever le Stabilisateur Arrière (n o 4) Arrière (n o 4) de l’appareil si celui-ci est déséquilibré jusqu’à ce que les roues de transport sur le support avant touchent le pendant l’utilisation.
- Page 27 COMPTEUR D’EXERCICE Notre écran informatisé sur le rameur à eau Sunny Obsidian Surge 500 m permet à l’utilisateur de créer un entraînement personnalisé tout en surveillant ses progrès. Au coursd’une séance d’entraînement, la console affichera de façon alternative et répétée la durée, le temps sur 500 M, le SPM, la distance, les mouvements, le total des mouvements, les calories brulées et le pouls (tout ce quiprécède).
- Page 28 Lorsque vous êtes sur l’écran SPORT, MANUAL (MANUEL) et RACE (COURSE) clignotent. Appuyer sur UP ou DOWN pour sélectionner MANUAL ou RACE Appuyer sur ENTER pour confirmer votre sélection. (1) MANUAL (MANUEL) (Fig. 4): Il existe 2 options en mode MANUEL. A.
- Page 29 组装说明 产品组装及使用过程中如有任何问题请电联 400-8233-119 或发邮件至 service@sunnyhealthfitness.cn。 步骤一 将轨道管(#3)和坐垫(#36)按左图所示翻转 过来; 将坐垫(#36)装入轨道管(#3)上,然后把 档胶垫(#35)放在轨道管(#3)上,用 2 个 M6*10 沉头十字螺钉(#67)穿入孔内,然后用 开口扳手(#75)锁紧; 把后支撑管(#4)放在轨道管(#3)上,用 4 个垫圈(#71)和 4 个 M8*15 圆头内六角螺钉 (#60)穿入孔内,然后用六角扳手(#74)锁紧. 步骤二 把 前 贴 地 管 塞 左 ( #25 ) 和 前 贴 地 管 塞 右 (#26)装入前支撑管(#2)上,用...
-
Page 30: M8*70
产品组装及使用过程中如有任何问题请电联 400-8233-119 或发邮件至 service@sunnyhealthfitness.cn。 步骤四: 注意: 组装前请先将坐垫(#36 )移到轨道管 (#3)的前部,以防组装过程中坐垫下滑导致 受伤。 首先将轨道管(#3)插入主架(#1)内,然 后把 4 个垫圈(#71),4 个 M8*15 圆头内六角 螺钉(#60)和 4 个 M8*15 沉头内六角螺钉 ( #58 ) 穿 入孔内,把 4 个 沉头内六角螺 钉 (#58)和 4 个圆头内六角螺钉(#60)都旋入 2~3 牙后,再用六角扳手(#74)锁紧。 步骤五: 将感应器(#47)的两条伸出线跟两条感应线 (#93)分别连接在一起; 将感应器固定片(#5)放在主架(#1)上, 用... - Page 31 电池的安装与更换 电池 电池盖 电池安装: 1. 从装电子表的盒子里取出 2 节 AA 号电池; 2. 按住电子表(#46)背后的电池盖右侧的卡扣,然后取下电池盖; 3. 把 2 节 AA 号电池装入电子表(#46)背后的电池座内;安装电池前请特别注意要对好电池与电池座 的+/-极; 4. 按住电池盖的卡扣,然后将电池盖装回电子表(#46)背后的电池座上; 5. 电池安装完成! 电池更换: 1. 按住电子表(#46)背后的电池盖右侧的卡扣,然后取下电池盖; 2. 取出电子表(#46)背后电池座内的 2 节旧的 AA 号电池然后装入 2 节新的 AA 号电池。安装电池前请 特别注意要对好电池与电池座的+/-极; 3. 按住电池盖的卡扣,然后将电池盖装回电子表(#46)背后的电池座上; 4. 电池更换完成! 注意:更换电池时,请...
- Page 32 如何向水箱注水和抽水 1. 从上水箱(#12)上拔掉水箱塞(#33)。 2. 按照图示 A 注水;将加水器(#77)插入水箱,然后用杯子或抽水器(#76)和水桶往水箱注水。参照 水箱侧面的水位标来测量水箱中的水量。 3. 按照图示 B 抽水;在机器旁边放一个水桶,用抽水器(#76)从水箱抽水到水桶中。 4. 将水箱塞(#33)塞进上水箱(#12),用干布擦干机台上和周围的水。 注意事项: • 仅能将自来水注入水箱。增加净水片(包装含一包),不要使用劣质的净水片或漂白剂,会损坏 水箱,且不在保修范围内。 • 每 6 个月或按照需求加一次净水片。如果水质已十分浑浊,请更换水箱中的水。 • 水箱中更换出来的水不适合再次消耗,请按污水处理。 • 如长时间不使用,请将水箱中的水抽空再竖立机台。 水位标 • 请见图示 A。水位标在水箱的侧面,最大加水量是 6 档。切勿超出此水位线。若加水超过最大水位 线导致产品损坏,不在保修范围内。 • 阻力取决于水箱里面的水量。1 档水位代表最低阻力,6 档水位代表最高阻力。...
- Page 33 调节指引 移动机台 调节平衡 如果机台组装后不平, 请调节后支撑管(#47)上的后贴 要移动机台,抬起后支撑管(#4)直到前支撑管上 的移动轮接触地 地管塞(#27L/R)使其平衡。 面,然后就可以随心所欲的将机台移动到您想要放置的地方。 警告! 当移动像坐垫等零件时可能会压伤或割伤身体。使用机器 时,手请不要触摸轨道管。 机器收纳 警告! 当竖起机台时请注意头部可能会碰到后支撑 管(#4)。 不 使 用 时 你 可 以 将 机 台 竖 立起 来 节 省 空 间 , 抬 起 后 支 撑 管 (#4) 即...
- Page 34 电子表说明书 Sunny Obsidian Surge 500 Meter 水阻划船机上的电子表通过操作程序可使用户设定专属于自己的程式。运动时,显示屏上会依次重复显示时间,运动 500M 所需时间,每分钟划的次数,距离,划船次数,总次数,卡路里和心率。 【按键功能】 按这两个按键可做功能选择;UP/DOWN 调节功能数值。 UP▲/ DOWN▼: 确认设定按钮。运动中,按此键可浏览各功能显示。 ENTER: 开始或停止选择的运动程序。 START / STOP: 复位,使电子表返回主界面。 RESET: 运动后,按下此按键进入恢复程序,立即自动测量运动者的健康状况。 RECOVERY: 【显示功能】 按 UP/DOWN 来预设目标时间(1 分~99 分);每次递增/递减 1 分钟。 TIME: 自动显示平均 500 米所需要的时间并持续更新。 TIME/500M: 每分钟划的次数。 SPM: 按 UP/DOWN 预设目标距离。(100 ~99900 米);每次递增/递减 100 米。 DISTANCE: 按...
- Page 35 进入 SPORT 模式时,MANUAL 和 RACE 闪烁(图 3): 按 UP/DOWN 选择想要进入的模式,然后按 ENTER 确认选择。 (1) MANUAL 手动模式 (图 4): 手动模式下可以有两种选择. A. 此电子表可以设定倒计功能。当你选定手动模式,TIME 就会开始闪烁。按 UP 可以设定时间,按 ENTER 确认。如果你不想设定时间倒计功能,直 接按 ENTER 就可以进入下个功能。你也可以按 UP 键设置距离、划行次数、卡路里和心率的倒计功能。(一次只能设定一项数值的倒计功能,若时 间的目标值已设定,那么距离就不能设定,反之亦然)。 按 START 键开始,STOP 图标消失 当选择的功能倒数至 0 时或按 STOP 键时,LCD 停止并显示平均值。 B.
Need help?
Do you have a question about the SF-RW5713 and is the answer not in the manual?
Questions and answers