Table of Contents
Advertisement
Advertisement
Table of Contents

Subscribe to Our Youtube Channel
Related Manuals for Member's Mark CG2036001-MM


Summary of Contents for Member's Mark CG2036001-MM
- Page 1 Traditional Barrel BBQ Grill Owner’s Manual Assembly and Operating Instructions Model # CG2036001-MM Tools required for assembly: (Not Included) Pliers, Philips & Flathead Screwdrivers, Adjustable Wrench. Keep this manual for future reference. CG2036001-MM Eng Page 1 of 24 20121008 V.1...
- Page 2 DO NOT attempt to move the grill. Wear protective gloves or oven mitts. DO NOT touch any hot grill surfaces. DO NOT wear loose clothing or allow hair to come in contact with grill. CG2036001-MM Eng Page 2 of 24 20121008 V.1...
- Page 3 Use caution and common sense when operating your grill, Failure to adhere to safety warning and guidelines in this manual could result in bodily injury or property damage. Save this manual for future reference. CG2036001-MM Eng Page 3 of 24 20121008 V.1...
- Page 4 Inspect contents of the box to ensure all parts are included and undamaged. We recommend two people for assembly of this grill. The following tools are required for assembly and are not included: l Pliers l Philips & Flathead Screwdrivers l Adjustable Wrench CG2036001-MM Eng Page 4 of 24 20121008 V.1...
-
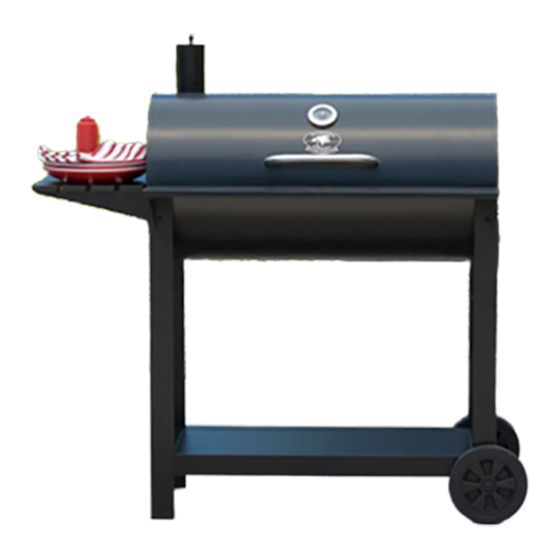
Page 5: Product Diagram
Product Diagram CG2036001-MM Eng Page 5 of 24 20121008 V.1... -
Page 6: Component List
2 pcs 2 pcs 2 pcs 1 pc 13. Front table slate 14. Right front table 15. Left front table 16. Temperature Gauge support support 2 pcs 1 pc 1 pc 1 pc CG2036001-MM Eng Page 6 of 24 20121008 V.1... - Page 7 25. Charcoal Grate 26. Cooking Grid Handle 1 pc 3 pcs STOP! DO NOT RETURN TO RETAILER. For assembly assistance, missing or damaged parts, please contact customer service at CustomerService@Rankam.com or at 1-888-837-1380. CG2036001-MM Eng Page 7 of 24 20121008 V.1...
- Page 8 2 pcs Flange Nut (M6) 2 pcs Hinge Pin 2 pcs Cotter Pin Lid Handle Insulation 2 pcs Washer 2 pcs Wheel Washer Charcoal Grate Handle 2 pcs Insulation Washer 1 pc Spring CG2036001-MM Eng Page 8 of 24 20121008 V.1...
-
Page 9: Assembly Procedures
(5) as well. Then tighten them with nut M8(F). Assembly of legs on the right hand side of the grill CG2036001-MM Eng Page 9 of 24... - Page 10 Place the Bottom Rack (8) under the Grill Body and tighten it with bolt M6x12 (D) to each leg’s bracket.. Mount the Charcoal Grate Clip (9) with Bolt M6x12 (D) and Nut M6 (H) CG2036001-MM Eng Page 10 of 24...
- Page 11 Assemble the Lower Hinges (11) on Grill Body (5) by bolts M6x30 (C) and lock nuts M6 (I). Do not tighten them at this moment Step 6. Assemble the Side Shelf (12) to Left legs (1) and (4), and Grill body (5) by bolt M6x12 (D) and nut M6 (H). CG2036001-MM Eng Page 11 of 24 20121008 V.1...
- Page 12 Attach Front Table to Grill Body by using bolt M8x15 (A) - upper, bolt M6x12 (D) – lower and Nut M8 (F), and also bolt (D) to the front legs as well. CG2036001-MM Eng Page 12 of 24 20121008 V.1...
- Page 13 Temperature Gauge (16) to middle front of Lid (19) and tighten with the nut. Do not tighten thermometer by turning thermometer head; tighten rear bolt to moderate tension. DO NOT OVER TIGHTEN DAMAGE MAY OCCUR TO THERMOMETER. CG2036001-MM Eng Page 13 of 24 20121008 V.1...
- Page 14 Assemble the Warming Rack (22) to the Lid (19) and Grill Body (5), and tighten the wire end with cap nut M6 (J) and Cap nut M5 (K). Hang the Grease Cup Holder (23) to the right side of Grill Body (5) CG2036001-MM Eng Page 14 of 24...
- Page 15 Charcoal Grate smoothly towards the Grill Body. (IV) Keep pushing the Charcoal Grate in until the back lock at the bottom of Charcoal Grate hooks up to the latch on the inside of Grill Body. See below illustration Step 1 – Step 4 CG2036001-MM Eng Page 15 of 24 20121008 V.1...
- Page 16 Charcoal Grate hooks up to the latch on the inside of Grill Body, then add charcoal. See below illustration Step 1 – Step 3. NOTE: Always close the Air-Vent and wear mittens/gloves before removing the Charcoal Grate CG2036001-MM Eng Page 16 of 24 20121008 V.1...
- Page 17 Grill Body. (IV) Remove the Charcoal Grate and proceed with cleaning. See below illustration Step 1 – Step 3. NOTE: Always close the Air-Vent and wear mittens/gloves before removing the Charcoal Grate CG2036001-MM Eng Page 17 of 24 20121008 V.1...
- Page 18 Step 17. Place cooking grid (26) onto the Grill Body (5). Step 18. Assembly completed! CG2036001-MM Eng Page 18 of 24 20121008 V.1...
-
Page 19: Preparation For Use & Lighting Instructions
Start with 5 pounds (2.3kg) of charcoal. This should be enough charcoal to cook with, once the curing process has been completed. When charcoal is burning strong, carefully place hot coals on charcoal grate. CG2036001-MM Eng Page 19 of 24... - Page 20 Follow the instructions below carefully to build a fire. You may use charcoal and/or wood as fuel in the Barrel Grill (see “Adding Charcoal/Wood During Cooking” section of this manual). WARNING Never use charcoal that has been pre-treated with lighter fluid. Use only a high grade plain charcoal or charcoal/wood mixture. CG2036001-MM Eng Page 20 of 24 20121008 V.1...
- Page 21 Place food on cooking grids and close grill lid. Always use a meat thermometer to ensure food is fully cooked before removing from grill. Step 7 Allow grill to cool completely, and then follow instructions in the “After-Use Safety” and “Proper Care & Maintenance” sections of this manual. CG2036001-MM Eng Page 21 of 24 20121008 V.1...
-
Page 22: Flavoring Wood
When charcoal is burning strong again, wear oven mitts/gloves and carefully the return charcoal grid to grill body. Extinguish any hot ashes, coals or embers which may have fallen from the grill or beneath and around grill. CG2036001-MM Eng Page 22 of 24... -
Page 23: After-Use Safety
Cleaning of the grids should be done before the cooking begins not after the cooking is over. A little residue left on the Cast Iron grates helps protect them between uses. The more Cast Iron Grids are used the better the non-stick qualities become. This is a great excuse to grill often! CG2036001-MM Eng Page 23 of 24 20121008 V.1... -
Page 24: Limited Warranty
Do not return product to the store. WE CAN HELP. Rankam Metal Products Manufactory Ltd customerservice@rankam.com Please contact Customer Service at 1-888-837-1380 or at , Mon to Fri, 9:00 a.m. – 5:00 p.m. Pacific Standard Time. CG2036001-MM Eng Page 24 of 24 20121008 V.1...
Need help?
Do you have a question about the CG2036001-MM and is the answer not in the manual?
Questions and answers