Table of Contents
Advertisement
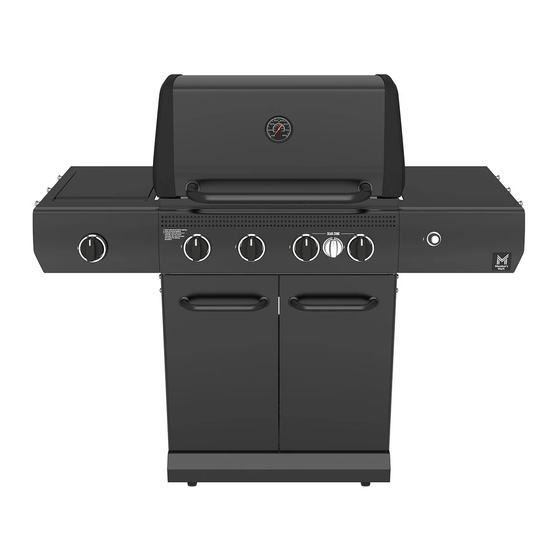
5-BURNER GAS GRILL
Assembly Instructions & User Manual
Model G48101
Quick Start Video
Scan this QR code.
STOP
Do not return this product to the store. If you need help or require parts, call the Customer Care Hotline:
1-833-454-0864
This manual must remain with the product at all times.
FOR OUTDOOR USE ONLY.
Manual Revision #: 08.15.2024
Advertisement
Table of Contents

Related Manuals for Member's Mark G48101


Summary of Contents for Member's Mark G48101
- Page 1 5-BURNER GAS GRILL Assembly Instructions & User Manual Model G48101 Quick Start Video Scan this QR code. STOP Do not return this product to the store. If you need help or require parts, call the Customer Care Hotline: 1-833-454-0864 This manual must remain with the product at all times.
- Page 2 IMPORTANT SAFETY WARNINGS THIS MANUAL MUST REMAIN WITH THIS PRODUCT AT ALL TIMES CAUTION DANGER 1. If you smell gas: Read and follow all safety statements, assembly instructions, use and care directions a. Shut off gas to the appliance. before attempting to assemble and cook. b.
-
Page 3: Table Of Contents
MODEL G48101 TABLE OF CONTENT INSTALLATION / ADDITIONAL WARNINGS LP GAS CYLINDER HOOK-UPS AND WARNINGS SAFETY HOSE AND REGULATOR: Installing LP gas cylinder Regulator reset procedure Leak test procedure LIGHTING INSTRUCTIONS START GRILLING PREVENTION MAINTENANCE STORING YOUR GRILL TROUBLESHOOTING ASSEMBLY INSTRUCTIONS WARRANTY AND SERVICE DANGER: Indicates an imminently hazardous situation which, if not avoided, will result in death or serious injury. -
Page 4: Installation
MODEL G48101 INSTALLATION Installation must conform with local codes or, in the absence of local codes, with either the National Fuel Gas Code, ANSI Z223.1/NFPA 54, Natural Gas and Propane Installation Code, CSA B149.1, or Propane Storage and Handling for Recreational Vehicles, ANSI A 119.2/NFPA 1192, and CSA Z240 RV Series, Recreational Vehicle Code, as applicable. -
Page 5: Lp Gas Cylinder Requirements
MODEL G48101 LP GAS CYLINDER REQUIREMENTS DO NOT connect to a LP gas cylinder exceeding 9 kg (20 lb) capacity or use a cylinder with any other type of cylinder valve connection device. LP gas supply cylinder must be constructed and marked in accordance with the specifications for LP gas cylinders of the U.S.Department ofTransportation (DOT) or the National Standard of Canada, CAN/CSA-B339, Cylinders Spheres... -
Page 6: Installing Lp Gas Cylinder
MODEL G48101 LP GAS CYLINDER RUBBER SEAL INSPECTION LP GAS WARNINGS: • Inspect LP gas cylinder valve rubber seal for cracks, wear or deterioration prior to use. A damaged rubber seal can cause a gas leak, possibly resulting in an explosion, fire or severe bodily harm. -
Page 7: Hose And Regulator
MODEL G48101 INSTALLING THE LP GAS CYLINDER HOSE AND REGULATOR Your grill is equipped with a Type 1 connection device with the following features: The system will not allow gas flow from cylinder until a positive connection to valve has been made. -
Page 8: Regulator Reset Procedure
MODEL G48101 REGULATOR RESET PROCEDURE If you are experiencing any of the following performance issues, you may have activated the flow limiting feature in your regulator: • Burners not getting hot enough. • Low or incomplete burner flames. Flow Limiting Device Video •... -
Page 9: Leak Test Procedure
MODEL G48101 LEAK TEST PROCEDURE WHEN TO PERFORM A LEAK TEST: • After assembling your grill and before lighting for the first time, even if purchased fully assembled. • Every time LP gas cylinder is refilled, exchanged or if any of the gas components are disconnected or replaced. -
Page 10: Lp Cylinder Removal, Transport And Storage
MODEL G48101 LP CYLINDER REMOVAL, TRANSPORT AND STORAGE BEFORE DISCONNECTING THE LP CYLINDER: Turn “OFF” all control knobs and the LP gas cylinder valve. 2. Turn coupling nut counter-clockwise by hand only - do not use tools to disconnect. Remove LP gas cylinder from inside cabinet. -
Page 11: Lighting Instructions
MODEL G48101 LIGHTING INSTRUCTIONS LIGHTING THE MAIN BURNERS AND SEAR ZONE BURNER: Read instructions before lighting. Lighting Instruction Video Scan this QR code. Open lid before lighting. 2. Make sure all control knobs and the LP gas cylinder shut-off valve are “OFF.”... -
Page 12: Lighting The Side Burner
MODEL G48101 LIGHTING INSTRUCTIONS LIGHTING THE SIDE BURNER NOTE: After using the side burner, wait until the unit is completely cool before closing the side burner lid. Open the side burner lid. 2. Confirm that all burner control knobs are in the “OFF” position before opening the gas supply. -
Page 13: Using The Side Burners
MODEL G48101 LIGHTING INSTRUCTIONS USING THE SIDE BURNERS • The side burner can be used to prepare side dishes such as beans, potatoes, corn, or to warm sauces. • The burner valve can be adjusted from high to low depending upon your cooking demands. -
Page 14: Start Grilling
MODEL G48101 START GRILLING WARNING: Read and follow all warnings and instructions contained in the preceding sections of this manual. • DO NOT cover cooking grates or other components with aluminum foil, as this blocks ventilation and damage to grill or result in personal injury. -
Page 15: Rotisserie Cooking
MODEL G48101 START GRILLING USING RUBS AND SAUCES Always apply dry rubs to meat in advance of cooking and let it sit, covered at room temperature for a minimum of 20 minutes. Dry rubs contribute to the delicious, bold flavors and crunchy “bark” or crust that builds up during low and slow cooking. -
Page 16: Grill Cooking Tips
MODEL G48101 START GRILLING GRILL COOKING TIPS: WARNING TO ENSURE THAT IT IS SAFE TO EAT, FOOD MUST BE COOKED TO THE MINIMUM INTERNAL TEMPERATURES LISTED IN THE TABLE BELOW. USDA SAFE MINIMUM INTERNAL TEMPERATURES Fish 145° F (63° C) Pork 160°... -
Page 17: Prevention
MODEL G48101 PREVENTION CONTROLLING FLARE-UPS/GREASE FIRES: • Flare-ups are a common occurrence when cooking meats on a gas grill. Use caution when opening lid, as sudden flare-ups may occur. Excessive flare-ups can overcook your food and create a dangerous situation for you and your grill. - Page 18 MODEL G48101 PREVENTION BLOCKED BURNER VENTURI Blockages in the burner venturi caused by spiders, insects or nests can cause a FLASHBACK FIRE. A flashback fire occurs when a blockage in the venturi tubes caused by spiders, insects and nests blocks the flow of gas, forcing it back towards the control panel and control knob.
-
Page 19: Maintenance
MODEL G48101 MAINTENANCE PROPER CARE & MAINTENANCE ATTENTION: If you are experiencing any of the following performance or safety issues: 1) grill not reaching temperature potential, 2) yellow burner flames, 3) the smell gas, 4) popping noises, 5) delayed burner ignition, 6) uneven heat, 7) flash fires, or 8) grease fires, TURN OFF YOUR GRILL immediately and perform the following maintenance regime. - Page 20 MODEL G48101 MAINTENANCE CLEANING THE BURNERS Keeping burners free of blockages including spiders, insects, nests and other debris that can block the burner ports is essential for safe operation. 1. Use a clean grill brush to clean the outside of the burner.
-
Page 21: Storing Your Grill
MODEL G48101 MAINTENANCE CLEANING THE EXTERIOR PAINTED, PORCELAIN ENAMEL SURFACES (IF APPLICABLE) 1. Clean painted and porcelain-coated surfaces with warm soapy water. 2. After wiping down all surfaces, rinse thoroughly with water. 3. Dry with a soft microfiber cloth. DO NOT USE ANY CHEMICAL CLEANERS ON PAINTED SURFACES AS THEY COULD STRIP THE PAINT AND PERMANENTLY DAMAGE THE SURFACE, LEAVING IT UNPROTECTED. -
Page 22: Troubleshooting
MODEL G48101 TROUBLESHOOTING RESOLVING IGNITION ISSUES, QUICK CHECK: Press the ignition button located on the left shelf fascia (see image A). You should hear a continuous clicking sound when the button is pressed. If you hear no sound, 1) replace the battery (see image B), 2) check that all wires are firmly pushed in (see image C). - Page 23 MODEL G48101 TROUBLESHOOTING PROBLEM IDENTIFYING THE CAUSE: Flow limiting device in regulator has been activated, either due to a leak or improper lighting. You must conduct a leak test (page 9) and reset the regulator (page 8). Low or out of propane.
-
Page 24: H Ot S U R Fac E S
WARNING: H OT S U R FAC E S WARNING: EXTERIOR SURFACES WILL BECOME VERY HOT. TO PREVENT BURNS, ALWAYS WEAR INSULATED PROTECTIVE GRILL MITTS WHEN WORKING AT THE GRILL. • KEEP AWAY FROM COMBUSTIBLE MATERIALS. • KEEP CHILDREN AND PETS AWAY FROM THIS GAS-FIRED GRILL. •... -
Page 26: Package Contents
MODEL G48101 PACKAGE CONTENTS Component Description Lid Handle Warming Rack Front Brace Carton Lid Firebox Assembly Door Door Handle Side Shelf Assembly Side Burner Shelf Assembly Protection V Board Grease Cup Holder Caster Side Burner Assembly Electronic Ignition Module Grease Cup... -
Page 27: Hardware Pack
MODEL G48101 ASSEMBLY INSTRUCTIONS HARDWARE PACK Description Picture Description Picture Φ6.5 Washer 1/4"-20UNC x18 Screw Sideburner Valve Clip 1/4"-20UNC x 13 Screw 1/4" Flange Nut NO.10-24UNC x13 Screw NO.8-32UNC X10 Screw 1/4"-20UNC x38 Screw ST4.2X10 Tapping Screw NO.5-40 X 10 Screw... -
Page 28: Exploded Diagram
MODEL G48101 ASSEMBLY INSTRUCTIONS EXPLODED DIAGRAM HARDWARE PACK B6 B7 ASSEMBLY MANUAL 1-833-454-0864... -
Page 29: Parts List
MODEL G48101 PARTS LIST Description Part No. Description Part No. Top Lid Assembly G481-2000-C1 Electronic Ignition Module Cap G501-0072-C1 Lid Handle G481-0004-C1 Tool Hook G474-0029-C1 Lid Handle Bezel G481-0034-C1 Temperature Gauge G481-0003-C1 Bottom Shelf G481-0600-C1 Top Lid Hardware G481-0005-C1 Locking Caster... - Page 30 MODEL G48101 ASSEMBLY INSTRUCTIONS ASSEMBLY MANUAL 1-833-454-0864...
- Page 31 MODEL G48101 ASSEMBLY INSTRUCTIONS ASSEMBLY MANUAL 1-833-454-0864...
- Page 32 MODEL G48101 ASSEMBLY INSTRUCTIONS ASSEMBLY MANUAL 1-833-454-0864...
- Page 33 MODEL G48101 ASSEMBLY INSTRUCTIONS ASSEMBLY MANUAL 1-833-454-0864...
- Page 34 MODEL G48101 ASSEMBLY INSTRUCTIONS ATTENTION: Clips on the bottom. ASSEMBLY MANUAL 1-833-454-0864...
- Page 35 MODEL G48101 ASSEMBLY INSTRUCTIONS Front D18 B2 Back ASSEMBLY MANUAL 1-833-454-0864...
- Page 36 MODEL G48101 ASSEMBLY INSTRUCTIONS ASSEMBLY MANUAL 1-833-454-0864...
- Page 37 MODEL G48101 ASSEMBLY INSTRUCTIONS ASSEMBLY MANUAL 1-833-454-0864...
- Page 38 MODEL G48101 ASSEMBLY INSTRUCTIONS ATTENTION: All five electrode wires are the same size. They can be found under the right side shelf. Position Electrode set wires (B5, B6, B7) into Electronic Ignition outputs based on the length of each wire. Grasp each electrode wire with your thumb and index finger and push in firmly until you feel a positive connection has been made with the Electronic Ignition module( C12).
- Page 39 MODEL G48101 ASSEMBLY INSTRUCTIONS ASSEMBLY MANUAL 1-833-454-0864...
- Page 40 MODEL G48101 ASSEMBLY INSTRUCTIONS ASSEMBLY MANUAL 1-833-454-0864...
- Page 41 MODEL G48101 ASSEMBLY INSTRUCTIONS ASSEMBLY MANUAL 1-833-454-0864...
- Page 42 MODEL G48101 ASSEMBLY INSTRUCTIONS ASSEMBLY MANUAL 1-833-454-0864...
- Page 43 MODEL G48101 ASSEMBLY INSTRUCTIONS ASSEMBLY MANUAL 1-833-454-0864...
- Page 44 MODEL G48101 ASSEMBLY INSTRUCTIONS ASSEMBLY MANUAL 1-833-454-0864...
- Page 45 MODEL G48101 ASSEMBLY INSTRUCTIONS ASSEMBLY MANUAL 1-833-454-0864...
- Page 46 MODEL G48101 ASSEMBLY INSTRUCTIONS ASSEMBLY MANUAL 1-833-454-0864...
- Page 47 MODEL G48101 ASSEMBLY INSTRUCTIONS ASSEMBLY MANUAL 1-833-454-0864...
- Page 48 MODEL G48101 ASSEMBLY INSTRUCTIONS PERFORM A LEAK TEST. Proceed to page 9, for instructions Leaking Test Video Scan this QR code. ASSEMBLY MANUAL 1-833-454-0864...
-
Page 49: Warranty And Service
MODEL G48101 ASSEMBLY INSTRUCTIONS WARRANTY AND SERVICE This product is covered by the Sam's Club Member Satisfaction Guarantee. Please visit samsclub.com for more information. BEFORE YOU CALL FOR SERVICE, have the following information available: 1. Serial Number: The serial number is located on the front of this manual and on the rating label located inside your grill cart. -
Page 50: Limitation And Exclusions
MODEL G48101 ASSEMBLY INSTRUCTIONS WARRANTY AND SERVICE LIMITATION AND EXCLUSIONS Winners Products has the following limitations to its warranty: 1. This limited warranty is non-transferable and becomes void if used for commercial or rental purposes. Which includes (but not limited to): Restaurants, hotels, resorts, time shares or rental properties. - Page 51 MODEL G48101 NOTE ASSEMBLY MANUAL 1-833-454-0864...
- Page 52 Distributed by Sam’s West lnc. QUESTIONS OR COMMENTS? We would love to hear about your Member's 2101 SE Simple Savings Dr.Bentonville, Mark experience! Visit us at: Arkansas 72716-0745 samsclub.com/membersmarkhelp Made In China linktr.ee/member's.mark Winners Products Engineering Ltd 27/F, Cofco Tower, 262 Gloucester Road, CONTACT US: 1-833-454-0864 Causeway Bay, Hong Kong...
Need help?
Do you have a question about the G48101 and is the answer not in the manual?
Questions and answers
Can this be converted to natural gas?
No, the Member's Mark G48101 grill should not be converted to natural gas. The manual warns against attempting to alter or retrofit the hose, regulator, or valve assembly for any type of conversion.
This answer is automatically generated
Step 18 assembly
can this be converted to natural gas