Table of Contents
Advertisement
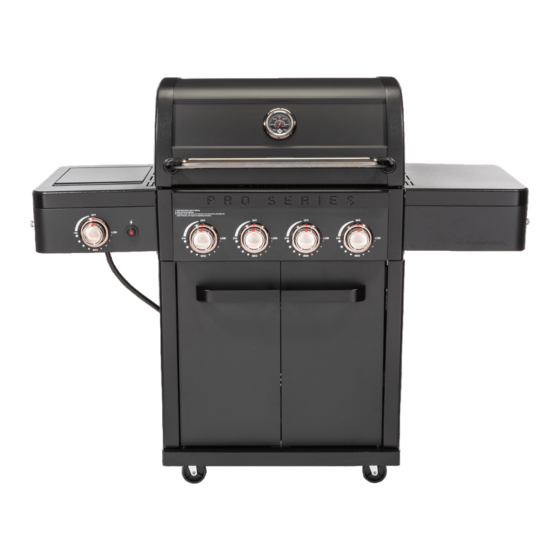
PRO SERIES
4 BURNER GAS GRILL
Assembly Instructions & User Manual
Model G54502 / G54502-1
STOP
Do not return this product to the store. If you need help or require parts, call the Customer Care Hotline
1-833-454-0864
This manual must remain with the product at all times.
FOR OUTDOOR USE ONLY.
Manual Revision #: 10.19.2021
Advertisement
Table of Contents

Subscribe to Our Youtube Channel
Related Manuals for Member's Mark G54502


Summary of Contents for Member's Mark G54502
- Page 1 PRO SERIES 4 BURNER GAS GRILL Assembly Instructions & User Manual Model G54502 / G54502-1 STOP Do not return this product to the store. If you need help or require parts, call the Customer Care Hotline 1-833-454-0864 This manual must remain with the product at all times.
- Page 2 IMPORTANT SAFETY WARNINGS WE WANT YOU TO ASSEMBLE AND USE YOUR GRILL AS SAFELY AS POSSIBLE. THE PURPOSE OF THIS SAFETY ALERT SYMBOL IS TO ATTRACT YOUR ATTENTION TO POSSIBLE HAZARDS AS YOU ASSEMBLE AND USE YOUR GRILL. WHEN YOU SEE THE SAFETY ALERT SYMBOL PAY CLOSE ATTENTION TO THE INFORMATION WHICH FOLLOWS! READ ALL SAFETY WARNINGS AND INSTRUCTIONS CAREFULLY BEFORE ASSEMBLING AND OPERATING YOUR GRILL.
-
Page 3: Table Of Contents
TABLE OF CONTENTS: General Warnings ....................4-5 LP Gas Cylinder (Tank) Specifications and Installation ........5-7 Hose & Regulator Specifications and Installation ..........7-9 Leak Testing ....................... 9-10 Pre-start Check List ....................11 Lighting Instructions ..................11-12 Operating the Grill ....................13 Using Other Features of the Grill ................ -
Page 4: General Warnings
GENERAL WARNINGS: WARNING • Maintain a minimum clearance of 36 inches (91 cm) between back and all sides of grill, deck railings, walls or other combustible material. Not adhering to these clearances may prevent proper ventilation and can increase risk of a fire and/or property damage, which could also result in personal injury. DO NOT use grill under overhead combustible construction. -
Page 5: Lp Gas Cylinder (Tank) Specifications And Installation
• Grill is hot when in use. To avoid burns: • DO NOT attempt to move the grill while hot or in use. • Wear protective gloves or oven mitts. • DO NOT touch any hot grill surfaces. • DO NOT wear loose clothing or allow hair to come in contact with grill. •... - Page 6 LP GAS CYLINDER (TANK) SPECIFICATIONS: LP gas cylinder (not supplied with this grill) The LP (Liquid Propane) gas cylinder is designed to be used with this grill must be 12" (30.5 cm) diameter x 18" (45.7 cm) tall and have a 20 lb. (9.1 kg) capacity incorporating a Type 1 cylinder valve and an over-filling protection device (OPD).
-
Page 7: Hose & Regulator Specifications And Installation
LP GAS CYLINDER (TANK) RUBBER SEAL INSPECTION: • Inspect propane tank valve rubber seal for cracks, wear or deterioration prior to use. A damaged rubber seal can cause a gas leak, possibly resulting in an explosion, fire or severe bodily harm. •... - Page 8 HOSE AND REGULATOR: Your grill is equipped with a Type 1 connection device with the following features: 1. The system will not allow gas flow from cylinder until a positive connection to valve has been made. NOTE: The cylinder valve and all grill burner knobs must be turned OFF before any connection is made or removed.
-
Page 9: Leak Testing
REGULATOR RESET PROCEDURE: If you are experiencing any of the following performance issues, you may have activated the flow limiting feature in your regulator: • Burners not getting hot enough. • Low or incomplete burner flames. • Low gas pressure. •... - Page 10 DANGER To prevent fire or explosion hazard: • DO NOT smoke or permit ignition sources in the area while conducting a leak test. • Perform test OUTDOORS in a well ventilated area that is protected from the wind. • Never perform a leak test with a match or open flame. •...
-
Page 11: Pre-Start Check List
PRE-START CHECK LIST: DANGER Property damage, bodily harm, severe burns, and death could result from failure to follow these safety steps. These steps should be performed after the grill has been assembled and prior to each use. DO NOT operate this grill until you have read and understand ALL of the warnings and instructions in this manual. - Page 12 MATCH LIGHTING THE MAIN BURNER: 1. Open lid before lighting burner. 2. Make sure all control knobs and LP Cylinder shut-off valve are "OFF". 3. SLOWLY, turn the LP cylinder shut-off valve counter clockwise to open. Wait 30 seconds for pressure to stabilize. 4.
-
Page 13: Operating The Grill
TURNING OFF THE GRILL: 1. Push in and turn each control knob clockwise to the "OFF" position. 2. Turn LP cylinder shut-off valve clockwise to close. TURN SHUT−OFF VALVE CLOCKWISE CAUTION: The cylinder valve should always be in the "OFF", or TO CLOSE closed position when grill is not in use. -
Page 14: Using Other Features Of The Grill
ROTISSERIE COOKING: • Your grill is pre-drilled with mounting holes for a universal rotisserie. (sold separately). • Read and follow all instructions provided with the rotisserie kit. Save instructions for future reference. USING OTHER FEATURES OF THE GRILL: THE SIDE BURNER: •... -
Page 15: Proper Care And Maintenance
PROPER CARE & MAINTENANCE ATTENTION: If you are experiencing any of the following performance or safety issues: 1) barbecue not reaching temperature potential, 2) yellow burner flames, 3) the smell gas, 4) popping noises, 5) delayed burner ignition, 6) uneven heat, 7) flash fires, or 8) grease fires, TURN OFF YOUR GRILL immediately and perform the following maintenance regime. -
Page 16: Blocked Burner Venturi
BLOCKED BURNER VENTURI Blockages in the burner venturi caused by spiders, insects and nests can cause a FLASHBACK FIRE. A flashback fire occurs when a blockage in the venturi tubes caused by spiders, insects and nests blocks the flow of gas, forcing it back towards the control panel and control knob. The ignited gas, if not detected, can cause a fire to burn in this area. - Page 17 Seasoning: After performing a burn off and brushing with a grill brush, allow the grates to complete cool. Using rubber gloves spread VEGETABLE SHORTENING over the entire grate surface. Be thorough. Vegetable oil or canola oil are also good options. Do not use salted fats such as butter or margarine. Position the seasoned grates into the grill.
-
Page 18: Transporting And Storage
TRANSPORTING AND STORAGE: WARNING • Never move a grill when hot or in use. • Make sure that cylinder valve is closed and burner knobs are in the off position. • DO NOT store a spare LP gas cylinder (filled or empty) under or near the grill. •... -
Page 19: Troubleshooting
TROUBLE SHOOTING: PROBLEM IDENTIFYING THE CAUSE: • Positive connection has not been made between the tank and the regulator. • Low or out of propane. Burners will not light (with igniter or match) • Gas supply valve is turned off. •... - Page 20 PROBLEM IDENTIFYING THE CAUSE: • Your BBQ’s Gas supply hose and regulator contains a thermal element that will shut off the flow of gas to the tank when the temperature of the hose reaches between 240-300°F. The supply hose will melt, essentially disconnecting from the LP cylinder.
-
Page 21: Grill Cooking Tips
GRILL COOKING TIPS: WARNING TO ENSURE THAT IT IS SAFE TO EAT, FOOD MUST BE COOKED TO THE MINIMUM INTERNAL TEMPERATURES LISTED IN THE TABLE BELOW. USDA SAFE MINIMUM INTERNAL TEMPERATURES Fish 145° F (63° C) Pork 160° F (71° C) Egg Dishes 160°... -
Page 22: Hot Surface Warning
WARNING HOT SURFACES WARNING: EXTERIOR SURFACES WILL BECOME VERY HOT. TO PREVENT BURNS, ALWAYS WEAR INSULATED PROTECTIVE BARBECUE MITTS WHEN WORKING AT THE BARBECUE. • KEEP AWAY FROM COMBUSTIBLE MATERIALS. • KEEP CHILDREN AND PETS AWAY FROM THIS GAS-FIRED BARBECUE. •... - Page 24 HARDWARE PACK Description Picture Description Picture Φ6.5 Washer 1/4"-20UNC x18 Screw Sideburner Valve Clip 1/4"-20UNC x 13 Screw NO.10-24UNC x13 Screw Fiber Washer Φ5 Washer NO.8-32UNC X10 Screw ST4.8X10 Tapping Screw 1/4"-20UNC x38 Screw NO.5-40 X 10 Screw M4-Wingnut Bezel, Knob Knob AA Battery Caster Pin...
- Page 25 EXPLODED DIAGRAM FOR G54502 HARDWARE PACK B11 B12 1-833-454-0864...
- Page 26 PARTS LIST FOR G54502 Key Qty Description Part No. Key Qty Description Part No. TOP LID G545-0018-C1 SHELF SIDE SUPPORT, RIGHT G545-1300-C1 HANDLE, TOP LID G545-0021-C1 SHELF FASCIA, RIGHT G545-1200-C1 TEMPERATURE GAUGE G545-0024-C1 REAR SHELF BRACE, RIGHT G545-0039-C1 BEZEL, F/ TEMPERATURE GAUGE...
-
Page 27: Assembly Instructions
ASSEMBLY INSTRUCTIONS 1-833-454-0864... - Page 28 ASSEMBLY INSTRUCTIONS 1-833-454-0864...
- Page 29 ASSEMBLY INSTRUCTIONS Back view 1-833-454-0864...
- Page 30 ASSEMBLY INSTRUCTIONS ATTENTION: Use of a tarp is recommended to avoid damage to parts. 1-833-454-0864...
- Page 31 ASSEMBLY INSTRUCTIONS The wire sleeve should remain in place ATTENTION: and only the twist tie be removed. Remove the twist tie! 1-833-454-0864...
- Page 32 ASSEMBLY INSTRUCTIONS Back view Front view 1-833-454-0864...
- Page 33 ASSEMBLY INSTRUCTIONS 1-833-454-0864...
- Page 34 ASSEMBLY INSTRUCTIONS 1-833-454-0864...
- Page 35 ASSEMBLY INSTRUCTIONS 1-833-454-0864...
- Page 36 ASSEMBLY INSTRUCTIONS Tighten the screws 1-833-454-0864...
- Page 37 ASSEMBLY INSTRUCTIONS Tighten the screws 1-833-454-0864...
- Page 38 ASSEMBLY INSTRUCTIONS 1-833-454-0864...
- Page 39 ASSEMBLY INSTRUCTIONS 1-833-454-0864...
- Page 40 ASSEMBLY INSTRUCTIONS 1-833-454-0864...
- Page 41 ASSEMBLY INSTRUCTIONS 1-833-454-0864...
- Page 42 ASSEMBLY INSTRUCTIONS 1-833-454-0864...
- Page 43 ASSEMBLY INSTRUCTIONS Large - 2 Small - 5 Push in Firmly. NOTE: 1-833-454-0864...
- Page 44 ASSEMBLY INSTRUCTIONS 1-833-454-0864...
- Page 45 ASSEMBLY INSTRUCTIONS PERFORM A LEAK TEST. PROCEED TO PAGE 10, FOR INSTRUCTIONS 1-833-454-0864...
-
Page 46: Warranty Information
WARRANTY AND SERVICE ASSEMBLY INSTRUCTIONS This product is covered by the Sam's Club Member Satisfaction Guarantee. Please visit samsclub.com for more information. BEFORE YOU CALL FOR SERVICE, have the following information available: 1. Serial Number: The serial number is located on the front of this manual and on the rating label located inside your BBQ cart. 2. - Page 47 WARRANTY AND SERVICE 8. Winners Products Engineering Ltd. does not authorize any person or company to assume for it any other obligation or liability in connection with the sale, installation, use, removal, return, or replacement of its equipment; and no such representations are binding on Winners Products Engineering Ltd.
- Page 48 Arkansas 72716-0745 Made In China Winners Products Engineering Ltd 25/F., Cofco Tower, 262 Gloucester Road Causeway Bay, Hong Kong Questions or Comments? We would love to hear about your linktr.ee/member's.mark Member's Mark experience! Visit us at: samsclub.com/membersmarkhelp CONTACT US: 1-833-454-0864...
Need help?
Do you have a question about the G54502 and is the answer not in the manual?
Questions and answers
Looking to replace the firebox