Table of Contents
Advertisement
Assembly Instructions & User's Manual
PRO SERIES 36" WOOD PELLET GRILL
Item Number:
990321414
Model Number: SMK4036AS
Customer Assistance (spare/replacement parts): 1-855-735-9922
or Email: Help@fairgameus.com
WARNING
NOTICE TO INSTALLER:
PLEASE READ THIS ENTIRE MANUAL BEFORE
INSTALLATION AND USE OF THIS PELLET FUEL-
LEAVE THESE
BURNING APPLIANCE. FAILURE TO FOLLOW THESE
INSTRUCTIONS WITH
INSTRUCTIONS COULD RESULT IN PROPERTY DAMAGE,
BODILY INJURY OR EVEN DEATH. CONTACT LOCAL
THE GRILL OWNER FOR
BUILDING OR FIRE OFFICIALS ABOUT RESTRICTIONS
FUTURE REFERENCE .
AND INSTALLATION INSPECTION REQUIREMENTS IN
YOUR AREA. SAVE THESE INSTRUCTIONS.
THIS ASSEMBLY MANUAL CONTAINS IMPORTANT SAFETY INFORMATION.
PLEASE READ AND KEEP FOR FUTURE REFERENCE.
Advertisement
Table of Contents

Related Manuals for Member's Mark PRO SMK4036AS


Summary of Contents for Member's Mark PRO SMK4036AS
- Page 1 Assembly Instructions & User’s Manual PRO SERIES 36” WOOD PELLET GRILL Item Number: 990321414 Model Number: SMK4036AS Customer Assistance (spare/replacement parts): 1-855-735-9922 or Email: Help@fairgameus.com WARNING NOTICE TO INSTALLER: PLEASE READ THIS ENTIRE MANUAL BEFORE INSTALLATION AND USE OF THIS PELLET FUEL- LEAVE THESE BURNING APPLIANCE.
- Page 2 Assembly Instructions & User’s Manual IMPORTANT SAFETY WARNINGS WE WANT YOU TO ASSEMBLE AND USE YOUR GRILL AS SAFELY AS POSSIBLE. THE PURPOSE OF THIS SAFETY ALERT SYMBOL IS TO ATTRACT YOUR ATTENTION TO POSSIBLE HAZARDS AS YOU ASSEMBLE AND USE YOUR GRILL. WHEN YOU SEE THE SAFETY ALERT SYMBOL, PAY CLOSE ATTENTION TO THE INFORMATION WHICH FOLLOWS! READ ALL SAFETY WARNINGS AND INSTRUCTIONS CAREFULLY...
-
Page 3: Table Of Contents
Assembly Instructions & User’s Manual Table of Contents Quality Statement..........3 Important Safety Information . -
Page 4: Quality Statement
Assembly Instructions & User’s Manual Quality Statement Question or Comments? We would love to hear about your Member’s Mark experience! Visit us at: Samsclub.com/membersmarkhelp Important Safety Information • Please read all instructions carefully before assembling this product. • Where applicable, and for your safety, assembly by an adult is strongly recommended. •... -
Page 5: Package Contents
Assembly Instructions & User’s Manual Package Contents WE RECOMMEND TWO PEOPLE WORK TOGETHER WHEN AS SEM BLING THIS UNIT. -
Page 6: Components
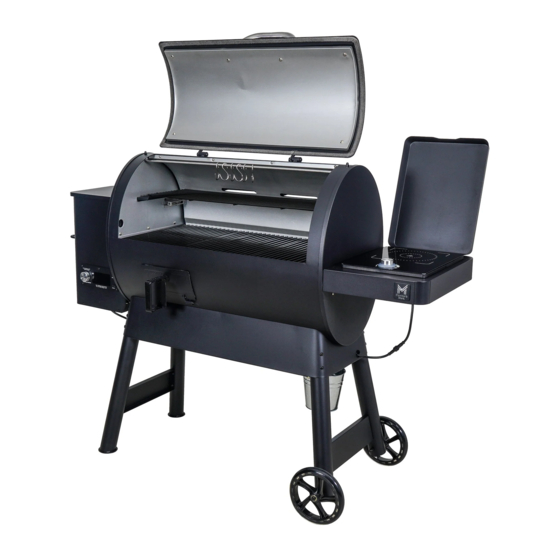
Assembly Instructions & User’s Manual Components Part Description Qty. Part Description Qty. Grill Body Grease Channel Part # 4036-600-4036-FBA Part # 4036-601-4036-5 Lid Handle Bezel Warming Rack Part # 4036-601-4036-0 Part # 4036-600-4036-1 Cooking Grate Lid Handle Part # 4036-600-4036-0 Part # 4036-601-4036-1 Hopper Assembly Grease Bucket... -
Page 7: Hardware
Assembly Instructions & User’s Manual Hardware Part Description Qty. Part Description Qty. M6 x 80 mm Bolt M6 x 15 mm Hex Bolt Part # 3046-602-3046-5A Part # 3046-602-3046-5I M6 Nut M8 x 130 mm Hex Bolt Part # 3046-602-3046-5B Part # 3046-602-3046-5J M6 Spring Washer M8 Washer... -
Page 8: Step 1 - Step 17
Assembly Instructions & User’s Manual Step 1 • Place grill body on its back in packing material as illustrated. • Attach right legs to grill body using four M6 x 80 mm bolts and M6 nuts spring washers • Attach left legs to grill body using four M6 x 80 mm bolts... - Page 9 Assembly Instructions & User’s Manual Step 3 • Attach wheels to right legs using two M8 x 130 mm bolts four M8 washers two M8 nuts • Set grill upright and fully tighten the bolts from Step 1. Step 4 •...
- Page 10 Assembly Instructions & User’s Manual Step 5 • Insert thermocouple through hole in side of grill body and secure using two M4 x 12 mm bolts • Attach side handle pellet hopper using four M6 x 12 mm bolts Step 6 •...
- Page 11 Assembly Instructions & User’s Manual Step 7 • Attach heat baffl e over fi repot using two M6 x 15 mm hex bolts Step 8 1 st • Lift heat baffl e • Attach smoker box to inside of grill body using two M6 x 12 mm hex bolts 2 nd...
- Page 12 Assembly Instructions & User’s Manual Step 9 • Turn smoker box door handle counter-clockwise to unlatch. Slide door hinge pins into hinges on front of grill body • Attach smoker door using one M5 x 12 mm bolt and M5 washer Step 10 •...
- Page 13 Assembly Instructions & User’s Manual Step 11 • Attach induction cooktop assembly to grill body using four M6 x 25 mm bolts Step 12 • Attach warming rack supports to grill body using four M6 x 12 mm bolts...
- Page 14 Assembly Instructions & User’s Manual Step 13 • Attach lid handle two lid handle bezels using two M6 x 30 mm bolts Step 14 • Attach cord wrap rear of induction cooktop assembly using two M6 x 12 mm bolts...
- Page 15 Assembly Instructions & User’s Manual Step 15 • Hang grease bucket on hook at bottom of grease tube. • Attach S-hooks on bar inside grill body Step 16 • Insert heat plate cooking grates warming rack...
- Page 16 Assembly Instructions & User’s Manual Step 17 • Run pellet hopper wire under grill body and connect to wire on induction cooktop Secure wire with lock ties under grill body • Insert food probes into holes on front of control panel.
-
Page 17: Warnings
Assembly Instructions & User’s Manual Warning When using electric appliances, basic safety precautions should always be followed including the following: • Operate only per manufacturers instructions. • Do not use this appliance for anything other than its intended use. • Keep all combustible materials at least 60 inches (152.4 cm) away from the grill at all times. -
Page 18: Danger
Assembly Instructions & User’s Manual CAUTION - To reduce the risk of electric shock, keep extension cord connection dry and off the ground. • Do not operate this product in rain or wet conditions. Do not allow this product to come in contact with water. -
Page 19: Trouble Shooting
Assembly Instructions & User’s Manual Trouble Shooting PROBLEM CAUSE CORRECTION 1. Make sure the grill is plugged into a working power source. Check LCD screen will not 1. Grill is not plugged in. and make sure wire connections are properly connected. 2. -
Page 20: Use Instructions
Assembly Instructions & User’s Manual Use Instructions WARNING Read and follow all warnings and instructions contained in the preceding sections of this manual. BREAKING IN YOUR GRILL: • In manufacturing and preserving the components of your grill, oil residue may be present on the cooking surfaces of your grill. - Page 21 Assembly Instructions & User’s Manual Temperature Step 3 Plug power cord into a GFCI (grounded) outdoor electrical outlet. Control Dial Use only a (GFCI) protected circuit with this pellet grill; Never remove the grounding plug or use with an adapter of 2 prongs; and Use only extension cords with a 3 prong grounding plug, rated for For Assistance, Call 1-855-735-9922...
- Page 22 Assembly Instructions & User’s Manual Follow these steps If the grill does not ignite or if the fire in the firepot goes out while cooking: Step 1 Turn the grill off and unplug. Open the lid and remove all food, cooking grates, heat plate and lift baffle.
- Page 23 Assembly Instructions & User’s Manual COOKING: • Set temperature controller to desired level and allow temperature to be reached. • Place food on cooking grill. • With lid closed, cook until desired internal food temperature is reached. • Use caution when removing food from pellet grill. All surfaces are HOT and may cause burns. Use protective gloves or long, sturdy cooking tools to remove food.
- Page 24 Assembly Instructions & User’s Manual COOK MODE: • The temperature can be changed at any time to increase or decrease the cooking temperature of the grill. • The 200°F to 300°F temperature settings are for slow cooking/smoking. • The 350°F to 450°F temperature settings are for grilling. •...
- Page 25 Assembly Instructions & User’s Manual INDUCTION COOKTOP: CAUTION: Do not break glass cooktop. • Do not drop cookware or heavy object on cooktop. • Do not slide cookware across cooktop surface. • Do not leave an empty pan on an operating cooktop for more than two minutes. •...
-
Page 26: Storage Instructions
Assembly Instructions & User’s Manual Storage Instructions WARNING: • Never move a grill when it is hot or when objects are on the cooking surfaces. • Never store flammable liquids or spray canisters under or near the grill. • DO NOT extinguish grease fires using water. BEFORE STORING YOUR GRILL: Use a soft, clean cloth that will not scratch the surface when cleaning. -
Page 27: Technical Data
Assembly Instructions & User’s Manual • Remove the cooking grates, from inside your grill. Use a brush with hot water and detergent to remove excess residue. NEVER use a commercial oven cleaner. Rinse completely with water. Towel dry and lightly coat cooking grates and grill interior with vegetable oil or vegetable oil spray, replace all components as described in the assembly instructions. -
Page 28: Limited Warranty Information
Assembly Instructions & User’s Manual Limited Warranty Information The Boltz Group warrants to the original purchaser that the Pro Series 36” Wood Pellet Grill is free from defects due to workmanship or materials for: One-year: frame, housing, cart, cooking grates, electric heating elements, temperature controller and other related parts The Boltz Group obligations under this warranty are limited to the following guidelines: •...
Need help?
Do you have a question about the PRO SMK4036AS and is the answer not in the manual?
Questions and answers
Where is the fuse? There is no display.
The exact location of the fuse in the Member's Mark PRO SMK4036AS is not specified in the provided context.
This answer is automatically generated
Screen is not coming on. I’ve plugged it into different outlets and the screen will not come on.
Our induction burner flashes red and blue and beeps then shuts off. It is only the second time we have used the burner.