Table of Contents
Advertisement
Advertisement
Table of Contents

Subscribe to Our Youtube Channel
Related Manuals for FLIR Thermosight PRO


Summary of Contents for FLIR Thermosight PRO
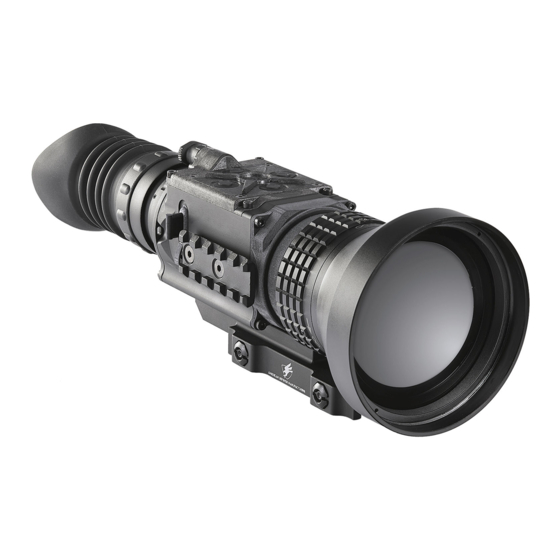
- Page 1 THERMOSIGHT FLIR ® Thermal Imaging Weapon Sight U S E R M A N U A L...
- Page 2 © 2018 FLIR Systems, Inc. All rights reserved worldwide. No parts Note 1: This equipment has been tested and found to comply with the of this manual, in whole or in part, may be copied, photocopied, limits for a Class B digital device, pursuant to Part 15 of the FCC rules.
-
Page 3: Table Of Contents
Page Safety Statement 1. Introduction 2. Getting Started 3. Operating the System 4. Main Menu 5. Display Indication 6. Maintenance 7. Warranty 8. Specifications THERMOSIGHT PRO FLIR U S E R M A N U A L - Rev 1... -
Page 4: Safety Statement
Give special attention to this warning when shooting uphill and/or from a prone position. These shooting conditions can dramatically The ThermoSight Pro thermal imaging weapon sight is used as a scope reduce eye relief. PLEASE maintain maximum eye relief when shooting or a viewer, and it has the ability to save an image or a video clip. -
Page 5: Introduction
• Onboard picture capture (internal storage) 1.2 INTRODUCTION • USB-C connectivity The ThermoSight Pro is intended for use on a variety of hunting and • High resolution FLCOS display sporting weapons equipped with a Picatinny/Weaver rail. Displaying • Multiple palettes... - Page 6 VERSUS IMAGE INTENSIFIED IDENTIFICATION NIGHT VISION The ThermoSight Pro makes images from heat, not light, a feat impossible for the naked eye or image intensified (I ) night vision devices. This allows you to see clearly without any visible light. People, animals, and objects all generate or reflect heat and are clearly seen by the ThermoSight Pro in even the most adverse conditions.
-
Page 7: Getting Started
SECTION 2. GETTING STARTED 2.1 UNPACKING AND INSPECTING 2.2 BATTERY The FLIR ThermoSight Pro scope is available with the features, options, The FLIR ThermoSight Pro scope is equipped with a sophisticated and accessories described in this manual. Refer to the packing list... -
Page 8: Operating The System
Most commonly used palette. Hot objects appear white. Good for scenes with either high or low contrast. NOTE: The focusing ring is not available on the ThermoSight Pro PTS233 model. 3.1.3 TURN-PULL SWITCH The Turn-Pull Switch performs the following functions: •... - Page 9 It assumes that the target is hotter than its surroundings. THERMOSIGHT PRO FLIR U S E R M A N U A L - Rev 1...
- Page 10 Crossdash uses FLIR’s Patent Pending HVT (High Visiblitiy Technology). 3.1.4.3 DIGITAL ZOOM CONTROL FLIR’s Patent Pending HVT makes the CROSSDASH reticle clearly ► button to switch the camera between no zoom (full resolution), visible under all conditions with no adjustments ever required. For best 2x &...
- Page 11 ● pushing the central button on the control panel during the 5 second position of your ThermoSight Pro by an extra 1.5 inches backwards. countdown which appears at the bottom of the display. The shutter will not interrupt viewing. 3.1.4.8 SNAPSHOT The snapshot function is used to capture images and to record video.
- Page 12 LOCKED MOUNT UNLOCKED MOUNT so that the point of aim coincides with the desired Point of Impact (POI). NOTE: The ThermoSight Pro must be zeroed each time it is mounted to Stop a new weapon. Since this unit is a thermal camera, it will be necessary to adjust the Stop zero while observing a target with some level of thermal contrast.
- Page 13 Moving the reticle in the positive direction (up) will move the point of impact down. Moving the To power the ThermoSight Pro from an external source plug the cable reticle in the negative direction (down) will move the point of impact into any standard USB power source.
-
Page 14: Main Menu
<> DEFAULT CONTRAST <> 100 SHARPNESS <> 90 SMART SCENE <> 20 Contrast 50 Contrast 200 GAIN <> 138 CONTRAST AGC SPEED <> 85 THERMOSIGHT PRO FLIR U S E R M A N U A L - Rev 1... - Page 15 ▼ button. PALETTE > EXIT WHITE HOT BLACK HOT RAINBOW_HC IRONBOW Smart Scene 0 Smart Scene 100 SEPIA SMART SCENE OPTIMIZATION ARCTIC OUTDOOR ALLERT THERMOSIGHT PRO FLIR U S E R M A N U A L - Rev 1...
- Page 16 Puts the system in shot training mode and displays the shot training submenu. Hold down button combo (◄+►) to reset to zero Windage and Elevation. The reticle will shift to the center of the display. THERMOSIGHT PRO FLIR U S E R M A N U A L - Rev 1...
- Page 17 (e.g. +25). the threshold to 25-27 to be sure that all shots will be recorded. TRAINING Trigger UP/DOW N Exit CENTE R S:0/1 THERMOSIGHT PRO FLIR U S E R M A N U A L - Rev 1...
- Page 18 Displays the System software version and the thermal camera software all directions for best calibration results. version. LEFT MARGIN Shifts the screen left to right. THERMOSIGHT PRO FLIR U S E R M A N U A L - Rev 1...
-
Page 19: Display Indication
SECTION 5. DISPLAY INDICATION Information on the current operating state (battery status, active function, the reticle running coordinate in the display etc.) is continuously displayed, making field operation of the FLIR ThermoSight Pro simple and convenient. (0.21) REC / ARM INDICATOR... -
Page 20: Maintenance
30 seconds before connecting the USB. Wipe the housing with a damp cloth as needed. 5. Connect the ThermoSight Pro to your computer using the USB cable. CAUTION: Do not use abrasives or solvents to clean the housing, lens, 6. -
Page 21: Warranty
4. Check to make sure the unit has a fully green battery indicator for > No approximately 30 seconds before connecting the USB. 5. Connect the ThermoSight Pro to your computer using the USB cable. 6. Copy or Drag the OTS_CORE_Vxxx.x.bin file into the root directory of the FLIR USB drive folder. -
Page 22: Specifications
Item THERMOSIGHT PRO PTS233 THERMOSIGHT PRO PTS536 THERMOSIGHT PRO PTS736 SENSOR SPECIFICATIONS Detector Type FLIR BOSON 12um 320 x 256 VOx Microbolometer Video Refresh Rate 60 Hz Image Processing FLIR Proprietary Digital Detail Enhancement ™ SYSTEM SPECIFICATIONS Lens System 19 mm;... - Page 23 SPECIFICATIONS TABLE CONTINUED THERMOSIGHT PRO PTS233 THERMOSIGHT PRO PTS536 THERMOSIGHT PRO PTS736 USER INTERFACE Operation Switch On/ Off/ Standby Mode Configures Operational Settings: • Display Brightness Control • Image Palette Control • Digital Zoom Control Control Panel Buttons • Reticle Pattern Control •...
- Page 24 Equipment described herein is subject to US export regulations and may require a license prior to export. Diversion contrary to US law is prohibited. Imagery for illustration purposes only. Specifications are subject to change without notice. ©2017 FLIR Systems, Inc. All rights reserved. 01/23/2018 18-0135-OTS...
Need help?
Do you have a question about the Thermosight PRO and is the answer not in the manual?
Questions and answers