Table of Contents
Advertisement
Quick Links
Model No. : PFICVRW70114.0
Serial No ___________
Serial number decal
Write the serial number in the
space above for reference.
QUESTIONS ?
If you have questions, or if there are
missing parts, please contact us:
UK
Call: 08457 089 009
From Ireland: 053 92 36102
Website: www.iconsupport.eu
E-mail: csuk@iconeurope.com
CAUTION
Read all precautions and instruc-
tions in this manual before using
this equipment. Keep this manual
for future reference.
USERʼS MANUAL
Visit our website
www.iconsupport.eu
Advertisement
Table of Contents

Related Manuals for Pro-Form PFICVRW70114.0


Summary of Contents for Pro-Form PFICVRW70114.0
- Page 1 USERʼS MANUAL Model No. : PFICVRW70114.0 Serial No ___________ Serial number decal Write the serial number in the space above for reference. QUESTIONS ? If you have questions, or if there are missing parts, please contact us: Call: 08457 089 009 From Ireland: 053 92 36102 Website: www.iconsupport.eu...
-
Page 2: Table Of Contents
TABLE OF CONTENTS IMPORTANT PRECAUTIONS..............3 BEFORE YOU BEGIN . -
Page 3: Important Precautions
IMPORTANT PRECAUTIONS WARNING : To reduce the risk of serious injury, read all important precautions and instructions in this manual and all warnings on your bike before using it. ICON assumes no responsibility for personal injury or property damage sustained by or through the use of this product. -
Page 4: Before You Begin
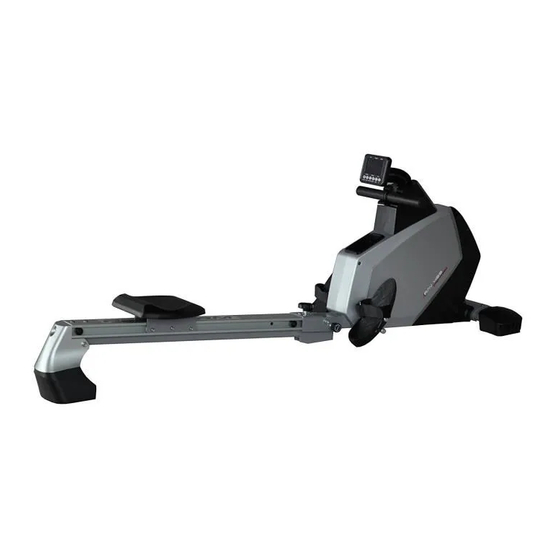
BEFORE YOU BEGIN Thank you for buying the ProForm® Wave 500 you, note the product model number and serial Rower. The rower machine provides an array of number before contacting us. The model number features designed to make your workouts at home is PFICVRW70114 and the location of the serial more effective and enjoyable. -
Page 5: Assembly
ASSEMBLY Assembly requires two persons. Place all parts of the elliptical exerciser in a cleared area and re- move the packing materials. Do not dispose of the packing materials until assembly is completed. In addition to the included tool(s), assembly requires a Phillips screwdriver an adjustable wrench. - Page 6 STEP 1 Attach the front foot (2) to the main structure (1) us- ing bolts (4) and washers (5) . STEP 2 Attach the connecting cables (46) and (37) then attach the main frame (1) to the structure (6) using a hex head bolt (8), washers (9) and a nut (10).Tighten the knob (32) between the main frame (1) and the structure (6).
- Page 7 STEP 3 Attach the Axle for limiting base (16), the limiting base (15), a flat washer (17) and a bolt (18) . Then attach the glide saddle post ( 27) onto the guide rail (6). STEP 4 Attach the tail boom ( 24) to the guide rail (6) using a bolt (22) and a nut (10). Position the pedals( 34) to the main frame (1) by using a long bolt (33) .
-
Page 8: How To Fold The Rowing Machine
STEP 5 Take the sensor extended wire ( 37) into the combination of the console braket (45) and posotion the com- bination of the console braket (45) to the console braket (42) by using a bolt (43) and a knob ( 44). Connect the ac wire ( 49) and the extended wire ( 37) to the console cables (38) and tighten the console ( 38) to the console braket on the main frame ( 1) by using a screw ( 39). - Page 9 HOW TO USE THE ROWING MACHINE Sit on the seat, facing the pedals. Place your feet in the pedals and adjust the straps to fit your feet. Hold 3. The third phase is the finish. Your legs should be the handle with an overhand grip. Correct rowing almost extended, straight.
- Page 10 CONSOLE FEATURES HOW TO USE THE CONSOLE 1. Turn on the console To turn on the console, press any button on the console or simply start to pull on the arm. 2. Use the buttons RESET: Press this button to clear the value entered in the console.
- Page 11 Note that the programs automatically change the Performing pulse recovery test: resistance. This function evaluates the user’s pulse recovery For more details on choosing a program please look ability on a scale from F1 to F6, with F1 being at the curve that will indicate the maximum level the best value and F6 the worst.
- Page 12 3. Follow your progress on the screen. The console displays the elapsed time and distance traveled. It also displays your speed (in SPM or time / 500m), the calories you have burned and your heart rate when you use the heart belt. 4.
-
Page 13: How To Measure Heart Rate
HOW TO MEASURE HEART RATE You can measure your heart rate with the heart belt. Do not put the heart rate monitor in a plastic bag or When your pulse is detected, your heart rate will other container that holds moisture. be displayed on the console. - Page 14 MAINTENANCE AND TROUBLESHOOTING Inspect and tighten all parts of the exercice rower REPLACING BATTERIES regularly. If the console display becomes dim, the batteries Replace any worn parts immediately. need to be replaced; most console problems are To clean the elliptical, use a damp cloth and a caused by batteries.
- Page 15 SUGGESTED STRETCHES The correct form for several basic stretches is shown at the right. Move slowly as you stretch—never bounce. 1. Toe Touch Stretch Stand with your knees bent slightly and slowly bend forward from your hips. Allow your back and shoulders to relax as you reach down toward your toes as far as possible.
-
Page 16: Exercise Guidelines
EXERCISE GUIDELINES Burning Fat—To burn fat effectively, you must exer- WARNING: cise at a low intensity level for a sustained period of time. During the first few minutes of exercise, your Before beginning this or any exercise pro- body uses carbohydrate calories for energy. Only af- gram, consult your physician. - Page 17 EXPLODED DRAWING—Model No. PFICVRW70114.0...
- Page 18 EXPLODED DRAWING—Model No. PFICVRW70114.0...
-
Page 19: Part List
PART LIST—Model No. PFICVRW70114.0 Key No. Qty. Description Key No. Qty. Description MAIN FRAME PHILIPS PAN HEAD SCREW FRONT BOTTOM TUBE DC LINE FRONT END CAP L NYLON NUT M12 FRONT END CAP R EXTENSIBLE COVER INNER HEX BOLT M8X75 U SHAPED WASHER FLAT WASHER D8X1.5... -
Page 20: Ordering Replacement Parts
ORDERING REPLACEMENT PARTS To order replacement parts, please see the front cover of this manual. To help us assist you, be prepared to provide the following information when contacting us: • the model number and serial number of the product (see the front cover of this manual) •...
Need help?
Do you have a question about the PFICVRW70114.0 and is the answer not in the manual?
Questions and answers