Table of Contents
Advertisement
How to use this Manual
To get
the full functionality of this manual we
recommend to use Adobe
®
Acrobat
Reader
®
5 or higher.
It is availabe at:
http://www.adobe.com
Once you have open this manual in
Acrobat Reader choose the tab "Book-
mark" at the left to see the Table of
Contents.
These headlines are linked with the
corresponding chapters of the manual.
Just click on a headline to see the
chapter in the main window.
Sometimes you'll find phrases in the
text
marked
red. These will guide you
to additional information. To go back to
the manual use this arrow button in the
upper bar of Acrobat Reader.
1
Advertisement
Table of Contents

Related Manuals for RayTek MX6


Summary of Contents for RayTek MX6
- Page 1 How to use this Manual To get the full functionality of this manual we recommend to use Adobe ® Acrobat Reader ® 5 or higher. It is availabe at: http://www.adobe.com Once you have open this manual in Acrobat Reader choose the tab “Book- mark”...
- Page 2 Basic Mode This chapter is dedicated to explore the unit and the software and to get fami- lar with its basic functions. It helps to get first results fast and easy. It explains the software installation and how to use the unit with factory defaults.
-
Page 3: Before Starting
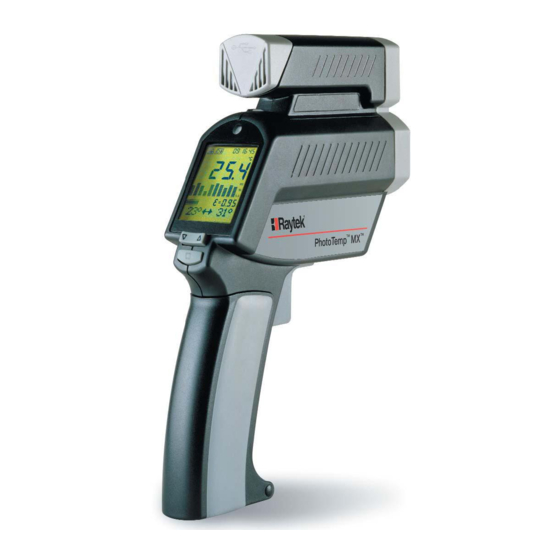
Before Starting Requirements To use the unit and the software you need a Windows compatible PC with a minimal config- uration: • 200 Mhz processor (400 Mhz recommended) • CD/DVD drive • USB 1.1 - port • 15 MByte free diskspace on the hard drive The software works with Windows ®... - Page 4 Signs and Icons in the Manual Introduction We hope that you enjoy using your photographic infrared thermometer! If you see this icon, use the unit to follow the steps described. It measures the amount of infrared energy emit- ted by a target object, and calculates the temperature of that object´s surface.
-
Page 5: Installing The Software
Configuration of the PC Installing the software Hardware Setup Software Setup Connect the unit to the PC via USB. 1. Insert the CD into your CD drive. 2. Double click on setup.exe. New hardware will be found. You have to 3. -
Page 6: Configure Date And Time
Configure Date and Time Configure Date and Time 4. Enable the checkbox to the right of the val- Set Date and Time of the unit ues. To get the right date and time stamp in your picture, proceed with the following steps: 1. -
Page 7: Basic Mode
Basic Mode Basic Mode Laser ON and OFF How to focus the camera Simply turn the lens focus ring depending on the distance of your target. Between Between 0.2 m 0.5 m (19 in) (8 in) and and infinity The laser circle shows the 0.3 m adjust the spot size that includes the... - Page 8 Basic Mode Basic Mode 1. To switch on the unit, pull the trigger. 9. Start the software on your PC. After a few seconds, the data download begins. Click on 2. Press the “Enter” button to activate the “OK” if a message about logger file and unit camera while the display is active.
- Page 9 Basic Mode Basic Mode Additional software features If you choose “Paint circle” the following window appears. Once you have downloaded all data from the unit to the PC, save the data as library.lgg file. With the distance slider you could adjust the size of the laser circle drawing corresponding to the original size of the real laser circle.
- Page 10 Expert Mode Expert Mode In the “Basic Mode” chapter you have seen how easy it is to use this unit and to store photos and data. A special file has been created automatically by This chapter is dedicated the unit, based on the factory defaults. This file is called “Logger”...
-
Page 11: Expert Mode
Expert Mode Expert Mode How to create a logger file? In the “Low” resolution mode, you can take more than 100 photos. The camera memory- Note! The following operation will can store up to 106 photos. This could be hel- change the current settings in the pful, if you want to repeat a photo at a previous unit! - Page 12 Expert Mode Expert Mode Examples Now you can set up which data fields should be inserted in the photos after you have taken them. All columns you choose here will be inclu- ded in the final photo. You can’t delete any infor- mation from the photo itself.
- Page 13 Expert Mode Expert Mode Take your photos and data as described above and save them by pressing disc buttoninto the The photos and data appear in a thumbnail pre- same file as before. view. To see the table click here. The number of inspections is shown in the bot- tom line of the window To see changes of the temperature over time,...
- Page 14 Expert Mode Expert mode The following dialog appears: The result.will look as follows: The routing graph Now select in the curves menu up to five objects measured and set up their appearance in the graph. Then choose the time frame of the measure- ment.
- Page 15 Expert Mode How to create or edit a material table? This function enables you to easily create customized material / emissivity tables that meet your requirements.You can then transfer the table, online, to your thermometer. Proceed as follows: Choose the item DEVICE MATERIAL TABLE from the menu SETUP.
- Page 16 Expert Mode Expert Mode Temperature Monitoring mode The “min. interval(s)” setting means that the unit Using the software, the unit can monitor only checks after this interval for the alarm val- temperature and take photos automatically. ues exceeded. This happens when the temperature exceeds the preset values for high or low alarm.
- Page 17 Expert Mode After taking the snapshot, you can see the photos by clicking on the square markers in the graph.
-
Page 18: Appendix A - Unit Functions
Appendix A - Unit functions Appendix A - Unit functions The DIP switches Selecting a function Some functions of the unit be changed by using the DIP switches. These switches are located in To switch on the unit pull and release the Battery compartement of the unit. - Page 19 Appendix A - Unit functions Appendix A - Unit functions The Display button The Data button Press Data once to activate the log Press Display once to see how mode of the thermometer and the many photos are already taken. camera.
- Page 20 Appendix A - Unit functions Appendix A - Unit functions The Setup button - HiAL, LoAL, Time..Date, Offset, Clear Images Change the date using the Up and Down High alarm (HiAl) keys.Then press ENTER for each date seg- generates an audible and visual ment to activate this date setting.
- Page 21 Appendix A - Unit functions Appendix A - Unit functions The Mode button - MINMAX, Material, MAX..MIN, DIF, AVG, To activate the MIN mode, press MODE until the MIN symbol appears. The measured minimum temperature is displayed as long as the trigger is pulled or locked on.The real time temperature is To show the minimum and maxi-...
- Page 22 Appendix A - Unit functions Appendix A - Unit functions The Emiss. button The Mode button - Thermocouple Settings Lock °C/°F Buzzer Backlight Open the battery compart- Set Default ment and set the switches Ltd. Access To adjust the emissivity value, ON or Off according to the Laserflash press EMISS., when not in LOG...
- Page 23 Appendix B Appendix B Unknown Emissivity Value Emissivity explained The amount of infrared energy radiated by an To adjust the unit’s emissivity value for a object depends on its emissivity and its material with unknown emissivity, plug in the probe. temperature.
- Page 24 Appendix B Appendix B Optical Resolution (Infrared Thermometer) Optical Resolution (Infrared Themometer) Close Focus Model Standard Focus Model STANDARD MODEL CLOSE FOCUS MODEL Optical Chart Optical Chart DISTANCE: SENSOR TO OBJECT (IN) DISTANCE: SENSOR TO OBJECT (IN) 7.9 9.8 0.76 IN @ 46 IN 0.24 IN @ 11.8 IN 2.81 1.85...
- Page 25 Appendix B Appendix B Table of emissivity values of common materials DIP switch settings - Factory Defaults Aluminum* 0.30 The DIP-switches are located in the battery compartment (8). In the beginning we recom- Asbestos 0.95 mend you use the default DIP-switch settings. Asphalt 0.95 Basalt...
-
Page 26: Troubleshooting
Troubleshooting Troubleshooting Sometimes a long beep and the red LED above the display shines to indicate a problem, check Symptom your display to find out which problem has Display Code Problem Action occured. Photo quality Light is sufficient for photo Use Photoflash diminished with without flash... -
Page 27: Maintenance
Maintenance Lens Cleaning: Blow off loose parti- cles using clean compressed air. Brush remaining debris away with a camel’s hair brush. Wipe the surface with a moist cotton swab. The swab may be moistened with water or a water based glass cleaner. NOTE: DO NOT use solvents to clean the plas- tic lens. -
Page 28: Important Hints
Important Hints CE Confirmity Don’t leave the unit on or near objects of high temperature. This instrument conforms to the following standards: Avoid static electricity, arc welders, and induction EMC: - EN 61326-1 heaters. Keep away from very strong EMF (electromagnetic fields). - Page 29 Secifications (Thermometer) Secifications (Camera) Temp. Range (Standard Model) - 30 to 900°C (- 25 to 1600°F) Maximum Picture Number 640x480 Pixels (VGA) Temp. Range (Sub Zero Model) - 50 to 500°C (-58 to 932°F) Maximum Picture Number Display Resolution 0.1°C (0.2°F) 320x240 Pixels (1/4 VGA) Accuracy (Infrared, Standard Model) ±...
- Page 30 Batteries To open the battery compartment, press gently on the top part of the handle to release the catch and pivot the grip as shown in the figure on the cover of the printed manual. Position the batteries [two alkaline R6 (AA, UM3)], as shown on the housing.
Need help?
Do you have a question about the MX6 and is the answer not in the manual?
Questions and answers