Advertisement
Table of Contents
INTERFACE FEATURES
• Provides accessory power (12-volt 10-amp)
• Retains R.A.P. (retained accessory power)
• Provides NAV outputs (parking brake, reverse, speed sense)
• Retains chimes
• Pre-wired AXSWC harness (AXSWC sold separately)
• Retains OnStar / OE Bluetooth
† Excluding 2018 trucks
APPLICATIONS
CHEVROLET
Colorado
2017-2018
(with IOB radio)
Cruze
2016-2018
(with IOA radio)
Cruze Hatchback
2016-2018
(with IOA radio)
The IOA/IOB code, if applicable, can be found in the Service Parts Identification label located:
Glovebox: Canyon/Colorado/Cruze/Equinox/Silverado/Sierra – Rear Compartment Floor: Malibu
AxxessInterfaces.com
GM Data Interface
Visit
AxxessInterfaces.com
specific applications
• Retains the factory backup camera†
• Adjustable chime/OnStar level
• Can be used in both amplified and non-amplified models (excluding Bose)
• Retains balance and fade
• Micro-B USB updatable
Equinox
(with IOB radio)
Malibu
2016-2018
(with IOA radio)
Silverado
2016-2018
(with IOB radio)
© COPYRIGHT 2020 METRA ELECTRONICS CORPORATION
2016-2018
for more detailed information about the product and up-to-date vehicle
GMC
2018
Canyon
(with IOB radio)
Sierra
(with IOB radio)
AXGMLN-10
I N S TA L L AT I O N I N S T R U C T I O N S
TABLE OF CONTENTS
Connections ............................................................2
Installation .............................................................3
Programming .........................................................3
Adjustments ...........................................................3
Troubleshooting .....................................................3
INTERFACE COMPONENTS
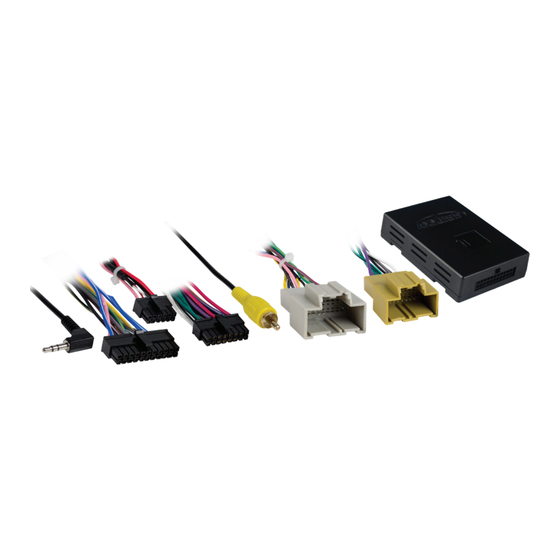
• AXGMLN-10 interface • AXGMLN-10 harness
• 16-pin harness with stripped leads
OPTIONAL ACCESSORIES
Extension Harness: AXEXH-GM10
Steering Wheel Control Interface: AXSWC
TOOLS REQUIRED
• Crimping tool and connectors, or solder gun,
solder, and heat shrink • Tape • Wire cutter
• Zip ties • Small flat-blade screwdriver
Attention!
Let the vehicle sit with the key
2017-2018
out of the ignition for a few minutes before
2016-2018
removing the factory radio. When testing the
aftermarket equipment, ensure that all factory
equipment is connected before cycling the
key to ignition.
REV. 1/22/20 INSTAXGMLN-10
(sold separately)
Advertisement
Table of Contents

Subscribe to Our Youtube Channel
Summary of Contents for Axxess AXGMLN-10
- Page 1 Programming ............3 Adjustments ............3 Troubleshooting .............3 INTERFACE COMPONENTS • AXGMLN-10 interface • AXGMLN-10 harness INTERFACE FEATURES • 16-pin harness with stripped leads • Provides accessory power (12-volt 10-amp) • Retains the factory backup camera† • Retains R.A.P. (retained accessory power) •...
- Page 2 • Connect the Light Green wire to the parking brake wire. Note: The relay attached to the AXGMLN-10 harness is only for audible turn signal clicks. No extra • Tape off and disregard the following (4) wires, they will not be used in this application.
- Page 3 2. Wait 10 seconds, and then with a small flat-blade screwdriver, turn the potentiometer 2. If an AXSWC (sold separately) will be used, do not connect it until the AXGMLN-10 is clockwise to raise the chime level; counterclockwise to lower the chime level.
- Page 4 Have the vehicle apart and ready to perform troubleshooting steps before contacting Metra/Axxess Tech Support. ® NOWLEDGE IS OWER Enhance your installation and fabrication skills by enrolling in the most recognized and respected mobile electronics school in our industry.


Need help?
Do you have a question about the AXGMLN-10 and is the answer not in the manual?
Questions and answers