Advertisement
Quick Links
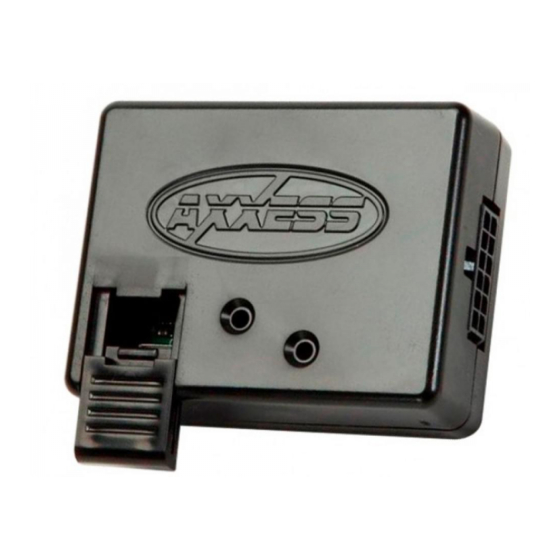
INTERFACE COMPONENTS
• AXSWC Interface
• AXSWC harness (12-pin harness with male 3.5mm jack)
• 3.5mm adapter
AxxessInterfaces.com
AXSWC GENERAL INSTRUCTIONS
AXSWC General Instructions
Visit
AxxessInterfaces.com
for more detailed information about the product and up-to-date
vehicle specific applications
INTERFACE FEATURES
• One interface does it all, no
• Can be manually programmed
additional interfaces needed
• Designed to be compatible
• Retains settings even after
with all major radio brands
• Auto detects vehicle type, radio
connection, and preset controls
• All connections done at the
• Ability to dual assign steering
wheel control buttons
• Micro-B USB updatable
© COPYRIGHT 2020 METRA ELECTRONICS CORPORATION
I N S TA L L AT I O N I N S T R U C T I O N S
TABLE OF CONTENTS
Installation Preparation ........................................2
Installation .............................................................2
Programming .........................................................3
Wire Description ....................................................3
for most vehicles
battery disconnection or
interface removal
TOOLS REQUIRED
radio location
• Crimping tool and connectors, or solder gun,
solder, and heat shrink • Tape • Wire cutter
• Zip ties
Attention!
out of the ignition for a few minutes before
removing the factory radio. When testing the
aftermarket equipment, ensure that all factory
equipment is connected before cycling the
key to ignition.
Let the vehicle sit with the key
REV. 2/14/20 INSTAXSWC General Instructions
Advertisement

Related Manuals for Axxess AXSWC


Summary of Contents for Axxess AXSWC
- Page 1 When testing the • AXSWC Interface aftermarket equipment, ensure that all factory • AXSWC harness (12-pin harness with male 3.5mm jack) equipment is connected before cycling the key to ignition. • 3.5mm adapter AxxessInterfaces.com...
-
Page 2: Installation Preparation
AXSWC Install Instructions, then select GET PARTS. This will take you to a page where you will be • Parrot: Follow AXSWCH-PAR (sold separately) instructions. notified if your vehicle will work or not with the AXSWC interface. If the interface is compatible, • For the radios listed below: Connect the 3.5mm adapter, to the male 3.5mm SWC jack from there will be a link under the green bar titled AXSWC **** Wiring Instructions. -
Page 3: Programming
PROGRAMMING WIRE DESCRIPTION • Program the AXSWC as noted in the AXSWC vehicle specific document. Pin Cavity Wire Color Input Description Pink CAN-HI or Serial Data White/Green Negative SWC Yellow/Green Positive SWC Green/Orange Negative SWC Gray/Red Negative SWC Black Chassis Ground Blue/Pink CAN-LO... - Page 4 AXSWC GENERAL INSTRUCTIONS I N S TA L L AT I O N I N S T R U C T I O N S If you are having difficulties with the installation of this product, contact our Tech Support line either by phone at 386-257-1187, or email at techsupport@metra-autosound.com.
- Page 5 After the AXSWC interface has been programmed and functioning properly, the button assignment for the steering wheel controls may be reassigned. For example, Seek Down may be preferred to be Mute instead. This feature can be performed by either following the steps below, through a Windows based computer using the Axxess Updater, or through the Axxess Updater app available from the Android/Apple mobile devices app store.
- Page 6 Dual Assignment (long button press) The AXSWC interface has the capability to assign (2) functions to a single button except for Volume Up and Volume Down, after the interface has been programmed and is fully functional. This feature can be performed by either following the steps below, through a Windows based computer using the Axxess Updater, or through the Axxess Updater app available from the Android/Apple mobile devices app store.
- Page 7 Changing Radio Type If the AXSWC inteface detected the vehicle properly, yet the sequence of light flashes do not match the radio installed, then the radio must be manually assigned to the interface. This feature can be performed by either following the steps below, through a Windows based computer using the Axxess Updater, or through the Axxess Updater app available from the Android/Apple mobile devices app store.
- Page 8 Radio Troubleshooting If the auto detect feature was used and at the end of the programming sequence the light in the AXSWC interface turned solid Red, yet fails to function, follow the steps below to trace down where the problem may lie. If any of the following steps are performed, reset and reprogram the interface according to the vehicle specific document. Scroll down to the end of the document for a physical layout of the interface showing the reset button location.
- Page 9 AXSWC Vehicle Troubleshooting If the auto detect feature was used and at the end of the programming sequence the light in the AXSWC interface flashes Red/Green instead of turning solid Red, this means the interface didn’t detect the vehicle. Follow the steps below to trace down where the problem may lie. If any of the following steps are performed, reset and reprogram the interface according to the vehicle specific document.
- Page 10 AXSWC Technical Document #100B Steering Wheel Controls With New JVC & Kenwood Radios Locate the main connector on the back of the radio. These radios use an ISO/EURO (1784 shell) radio connector. • (Figure A) The SWC wire from the radio can be found in the bundle of wires above the main connector, labeled REMOTE •...
- Page 11 1. Connect one end of the resistor to the Blue/Yellow wire from the radio. Connect the other end of the resistor to the Brown wire from 3.5mm adapter included with the AXSWC. (Figure A) 2. Proceed with programing the steering wheel controls. Once the AXSWC interface shows the correct radio (5 LED flashes), remove the resistor.
- Page 12 Manual Program As an alternative, the radio can also be manually programmed to the AXSWC interface. 1. Program the interface to the vehicle following the vehicle specific document. 2. Turn the radio off. 3. Cycle the key off, then back on.
- Page 13 SONY Tech Tip Radio type can be set using the Axxess Updater, available from www.axxessupdater.com, if you do not have a PC or mobile device you may use the steps below. Step 1.) Program the interface to the vehicle. Step 2.) Turn the ignition on, push and hold volume down on the wheel, until you get a solid light on the interface.
- Page 14 Step 1.) Connect the interface to your device, then click “Remap SWC”. Step 2.) Click on the drop down arrow. Step 4.) If successful you should see “ASWC Settings Saved” at the bottom of the app. Step 3.) Select Axxera from the drop down menu.
- Page 15 Note: Vehicle specific instructions are available from www.axxesssupdater.com or from the Axxess Updater Mobile App. Step 6.) With the interface programmed to the vehicle, Go in to the General Settings on the radio, find the Steering Wheel Control menu, and change it from “Preset”...
- Page 16 Note: Vehicle specific instructions are available from www.axxesssupdater.com or from the Axxess Updater Mobile App. Step 6.) With the interface programmed to the vehicle, Go in to the General Settings on the radio, find the Steering Wheel Control menu, and change it from “Preset”...
Need help?
Do you have a question about the AXSWC and is the answer not in the manual?
Questions and answers