Table of Contents
Advertisement
Quick Links
Warranty
Thanks for choosing OWON product, in the coming days, really hope you'll enjoy the time that
OWON product accompanies you.
OWON product, created and made by Lilliput.
Since the delivery date, OWON product been granted 36 natural months' warranty for device,
and 12 months' warranty for attached parts / accessories.
*
The delivery date here means the one written onto formal shipping documents given to first-hand buying
party.
Within warranty period of OWON product, provided any non-outside force defects appear,
Lilliput provides 3 options for first-hand buying party -
option 1. to return defective product only;
option 2. to replace the defective product;
option 3. to repair the defective product.
To assure first-hand buying party receive timely service within warranty period of OWON
product, the first-hand buying party should notify Lilliput of the non-outside force defects in no
time, in written form.
Lilliput recommends OWON product users to register your product online via "Support &
Service" column from official English website
www.owon.com.cn
, so as to get timely
after-sales service.
This warranty shall not apply to any defect, damage caused by improper operation, or
improper / inadequate maintenance towards OWON product. Lilliput shall not be obligated to
under this warranty -
a). to repair damages resulted from attempts by personnel other than those from Lilliput, or
authorized one by Lilliput to repair or service OWON product;
b). to repair damages resulted from improper operation, or improper connection to
incompatible equipment towards OWON product;
c). to service OWON product that has been modified or integrated with other products,
provided the effect of such modification or integration increases the difficulty of servicing
non-original OWON product.
Lilliput / 16 April 2020
*
Lilliput mentioned hereinbefore is the original equipment manufacturer of OWON product - Fujian Lilliput
Optoelectronics Technology Co., Ltd., with location in Zhangzhou, P.R. China.
Advertisement
Table of Contents

Related Manuals for Owon VDS6000 Series


Summary of Contents for Owon VDS6000 Series
- Page 1 Warranty Thanks for choosing OWON product, in the coming days, really hope you’ll enjoy the time that OWON product accompanies you. OWON product, created and made by Lilliput. Since the delivery date, OWON product been granted 36 natural months’ warranty for device, and 12 months’...
-
Page 2: Table Of Contents
Table of Contents 1. General Safety Requirements....................- 1 - 2. Safety Terms and Signs......................- 2 - 3. Communication Interface Introduction...................- 5 - 4. Device General Checking......................- 6 - 5. How to Communicate Device with PC..................- 7 - i. -
Page 3: General Safety Requirements
1. General Safety Requirements ! Before using the device, Lilliput strongly recommend to browse “Safety Warnings” carefully and completely, so as to avoid any possible body injury, or any damages to the device, or its accessories, or communicated facility. ! Safety Warnings i. -
Page 4: Safety Terms And Signs
2. Safety Terms and Signs Safety Terms Terms in this quick guide. It covers, Warning It indicates the condition or practice that could cause body injury or permanent life loss. Caution It indicates the condition or practice that could lead to device damage, or its accessory damage, or communicated facility damage. - Page 5 To avoid body injury, and to avoid device damage, its accessory or communicated facility damage, before working the device, Lilliput strongly recommend to read the following safety information. Warning To avoid any potential short circuit or electric shock, DO use original local standard, or manufacturer’s recommended power adapter.
- Page 6 Warning When the device input is getting through 42+ Vp-p (30Vrms), or on circuit of 4800+VA, to avoid any potential short circuit or electric shock - i. DO use only probes and adapter from original device accessories, or manufacturer’s recommended ones. ii.
-
Page 7: Communication Interface Introduction
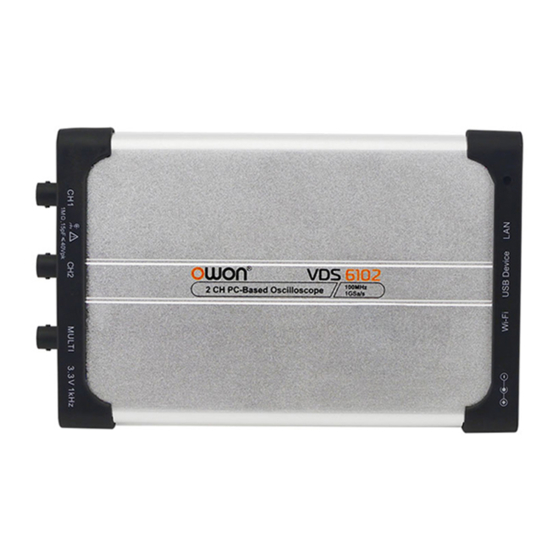
3. Communication Interface Introduction Figure 3- 1. Communication Interface of the Device i. power input: for AC-DC adapter ii. USB host: for Wi-Fi extension iii. USB device (type-C): for PC communication Note: when the device powered by PC USB connection cable (via USB communication interface of PC, with PC powered by AC power source), without adapter connection, the input current should reach 1.5A or above. -
Page 8: Device General Checking
4. Device General Checking Before working the device, Lilliput highly recommend to check the device as per following steps: i. to check any package deformation, breakage exists Provided any deformation, breakage of package appears, firstly, take photos about the package for good records; secondly, open the package, to check whether device in good shape, if not, take photos for good records, then back to your direct buying source, or back to Lilliput so as to get timely solution. -
Page 9: How To Communicate Device With Pc
5. How to Communicate Device with PC to communicate the device with PC, it’s a must to install software firstly. i. software installation guide i). full installation Target users: general PC oscilloscope users, and programmers get secondary development need Installation solution - On the basis that NI-VISA driver or similar VISA driver already worked normally onto ... -
Page 10: To Install Ni-Visa Driver Onto The Target Pc
ii. to install NI-VISA driver onto the target PC to run PC software normally, and smoothly, NI-VISA driver is a must. Note: On condition that NI-VISA driver, or similar VISA driver already worked normally onto the target PC, step ii could be skipped. To run from accompanying CD which comes along with device, to start driver installation,... - Page 11 another “Next”, enters into NI Package Manager processing window, then this window, - 9 -...
- Page 12 later, when following window appears, to select additional items you may wish to install, via scroll bar, to select more necessary options, - 10 -...
- Page 13 from here, dot-tick "I accept the above 2 license agreements", again "Next", until this window, dot-tick "I accept the above 2 license agreements" for another time, and another "Next", - 11 -...
- Page 14 welcomes “Review” window, via “Next”, get access to NI-VISA installation, one more “Next”, - 12 -...
-
Page 15: To Install Pc Software
To run “VDS6000Series_PC_Software.exe” from accompanying CD which comes along with device directly, to install PC software accordingly. iv. to work PC Software Via short-cut to PC software from the desktop of target PC, double-click “VDS6000 Series PC - 13 -... -
Page 16: To Communicate The Device With Pc
DSO” to start the software. v. to communicate the device with PC The users could communicate the device with PC, either through USB communication port, or through LAN port. to communicate the device with PC through USB communication port After powering the device via AC-DC adapter, its status indicator lights red for seconds. Via USB connection cable (type-C), through matching communication interface, to connect the device with PC. -
Page 17: Device Function Checking
6. Device Function Checking To verify whether the device in normal working status, better to do a fast function check. After communicating device with PC successfully, please follow up following steps - i. From PC software operation interface, mouse-click to restore the device to factory settings. -
Page 18: Probe Compensation
7. Probe Compensation Before working the probe with either of input channels (Channel 1 / Channel 2), better to adjust its compensation, to assure ideal measurement effect. Since the probe in non-compensated, or improperly-compensated (overcompensated / under-compensated) status always possibly cause error or mistake of measurement result. Following operation steps to adjust probe compensation - i. -
Page 19: How To Use The Probe Safely
8. How to Use the Probe Safely The safety guard ring around the probe body protects human finger from any electric shock, its location as Figure 8- 1. Figure 8- 1 Finger Guard Location Warning: To avoid electric shock, when working the probe, always keep human finger behind the safety guard ring. -
Page 20: Appendix
9. Appendix Appendix I. Device Accessory List Accessories - 2 x passive probe 1 x type-C cable 1 x hard copy quick guide 1 x AC-DC adapter 1 x BNC/Q9 cable 1 x PC software / user manual CD ... -
Page 21: Appendix Ii. Device Maintenance
After device surface cleaning, before working the device for next time, please confirm that the device surface in a relative dry condition, so as to avoid any short circuit risk, or possible body injury caused by electric conduction from the wet surface. Lilliput (OWON) 04/2020 ISSUE. - 19 -...
Need help?
Do you have a question about the VDS6000 Series and is the answer not in the manual?
Questions and answers