FireClass FC503 Quick Start Setup Manual
Addressable fire control panels
Hide thumbs
Also See for FC503:
- User manual (88 pages) ,
- Installation manual (72 pages) ,
- Programming manual (26 pages)

Related Manuals for FireClass FC503


Summary of Contents for FireClass FC503
- Page 1 FC503 & FC506 FIRECLASS Addressable Fire Control Panels Quick-Start Setup Guide Doc. Version 1.0 06 June 2019 www.fireclass.net...
-
Page 2: Table Of Contents
Table of Contents Important notes ................................. 3 Box contents..................................5 Cable requirements ................................5 Cable types ..................................5 Earthing ..................................5 Screening ..................................5 Cable routing ..................................5 RS485 networking ................................5 Mains supply ..................................5 Installation ..................................6 Installing the control panel ............................. 6 Pre-commissioning checks ............................... -
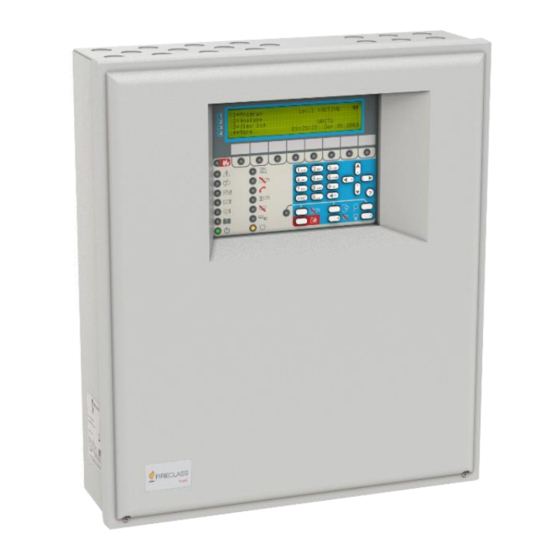
Page 3: Important Notes
The FC503 and FC506 fire control panels follow Johnson Controls’ highest standards of quality and performance. FC503 is an analogue addressable fire control panel with one main loop (three sub loops), that can support up to 250 addressable devices and 32 zones. Loop lengths are to be a maximum of 2 km (dependent on device types, quantities connected, and cable type). - Page 4 Figure: 1 Schematic diagram for typical system layout Addressable detector DET* Conventional detector Isolator base Call point Detector input module Relay interface module Contact input module Line isolator...
-
Page 5: Box Contents
•The Quick-Start Setup Guide. •A transparent plastic bag containing a USB consisting To facilitate local isolation during maintenance, of installation manuals, user manuals, and the FireClass suitable means should be provided for double pole software console to manage the panel, the KST thermal isolation of the low voltage supply circuit that serves probe, two 3.9 kOhm resistors, a 320 mm red and a... -
Page 6: Installation
11. Insert the installation cables into the cabinet using described in the Installing the FC500IP board section the cable entry knockouts at the top of the in the FC503 & 506 Addressable Fire Control Panels cabinet. Use the knockouts for all the cables and Installation Manual. - Page 7 Figure 2: Chassis mounting details Mounting studs Mounting slots...
-
Page 8: Pre-Commissioning Checks
Figure 3: Cabinet dimension details Note: All dimensions are in mm. Mounting holes Pre-commissioning checks Create temporary connections to test the wiring for CAUTION Do not wire in any isolator bases and continuity and insulation. modules or fit the detectors until pre- Complete the following steps for pre-commissioning commissioning checks are complete. -
Page 9: Installing The Batteries
BAT+ on the main board. Observe the battery polarity. The suitable batteries for the FC503 and FC506 control panels are two 12 V/17 Ah or two 12 V/ 38 Ah 4. Connect the KST thermal probe to the batteries. -
Page 10: Help Key
Right key: increases the contrast of the procedure is part of the loop devices enroll process in LCD display. the FC503 panel. Refer to the Quick Start Procedure Left key: decreases the contrast of the section in the FC503 & FC506 Addressable Fire LCD display. -
Page 11: Auto-Addressing Notes
The control panel is ready to work, at this time, with know where it is. the default basic programming. 5. Examine the sounders, the beacons, and the If you want to set the system addresses differently, output devices. Locate the devices by proceed as follows: scanning the list of auto-addressed devices. -
Page 12: Programming Devices Addresses Using The Programmer
Figure 4: Programming option AUTO 3. Press F1, F2, F1, F2, F3, and F4 to enter the Programming devices addresses using password when prompted. the programmer Use the FC490ST service tool to program devices on a 4. Press F2 to enter the address program. The loop as an alternative to auto-addressing. -
Page 13: Adding Text And Zone Information Without Software
2. After the test, press the SILENCE/RESOUND Adding text and zone information without key and then press the RESET key. software Complete the following steps to add text and zone Note: Be aware of the possible nuisance caused information without software: by the alarms and take any required measures. -
Page 14: Useful Menu Options
6. To return to the MAIN screen, press the ESC Useful menu options key. Accessing the event log Disabling points Complete the following steps to access the event log: Complete the following steps to disable a point: 1. Press the 1 key to select the Analyze option on 1. - Page 15 be overwritten. The default second language is Italian The available second language files are contained in a and can be overwritten with another language at the folder on a USB stick connected to the control panel first panel power-up or at the end of the FW upgrade before the first power up.
-
Page 16: Cpr Information
The exception should only be used if you wish to combine FreeRTOS with a proprietary product and you comply with the terms stated in the exception itself.” DoP-2018-4260 (FC503/ FC506 with optional LwIP LICENSING: FC500IP module) "lwIP is licenced under the BSD licence:...
Need help?
Do you have a question about the FC503 and is the answer not in the manual?
Questions and answers