Table of Contents
Advertisement
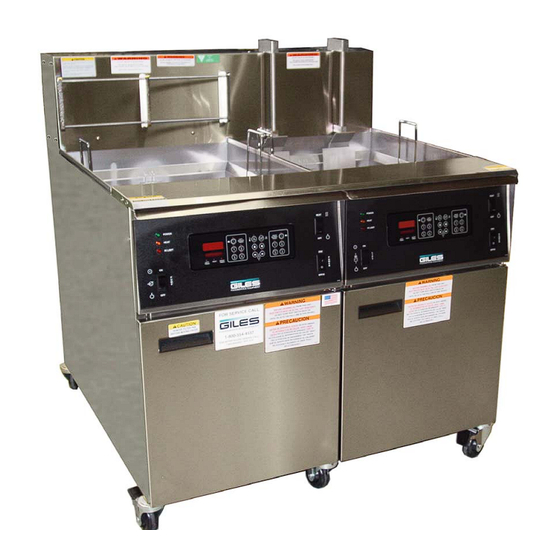
Operations & Service Manual
EOF-20/20
Giles Enterprises, Inc.
2750 Gunter Park Drive West • Montgomery, AL 36109 USA
Fax: (334) 272-3561 • Internet: www.gilesent.com
Service Hotline (Toll Free): 1-800-554-4537 (USA & Canada Only)
FOODSERVICE EQUIPMENT
Form No. 60347 (Release date: 11/99)(Revision date: 11/06/07)(Rev. B)
Advertisement
Table of Contents

Related Manuals for GILES EOF-20/20


Summary of Contents for GILES EOF-20/20
- Page 1 Operations & Service Manual EOF-20/20 Giles Enterprises, Inc. 2750 Gunter Park Drive West • Montgomery, AL 36109 USA Fax: (334) 272-3561 • Internet: www.gilesent.com Service Hotline (Toll Free): 1-800-554-4537 (USA & Canada Only) FOODSERVICE EQUIPMENT Form No. 60347 (Release date: 11/99)(Revision date: 11/06/07)(Rev. B)
- Page 3 Giles Enterprises, Inc., represen- tative. • Giles Enterprises, Inc. reserves the right to change or improve its equipment and parts in any way without obligation to alter such equipment or parts previously manufactured. •...
-
Page 5: Table Of Contents
Table Of Contents EOF 20/20 Safety ............vii Safety Overview . - Page 6 Wiring Diagram EOF-20/20 Right Fryer 208-240/60/3 Computer ..... 82 9-03. Wiring Diagram EOF-20/20 Left Fryer 480/60/3 Computerr ......84 9-04.
- Page 7 Table Of Contents EOF 20/20...
- Page 8 Table Of Contents EOF 20/20 Notes:...
-
Page 9: Safety
Safety EOF 20/20 Safety Safety Overview The instructions contained in this manual have been prepared to aid you in learning the proper procedures for installing and servicing your unit. Throughout this manual, safety precautions are identified through the use of the safety alert symbol and three signal words: DANGER, WARNING, and CAUTION. -
Page 10: Specific Safety Precautions
Safety EOF 20/20 Specific Safety Precautions For your safety, please observe the following precautions when operating or servicing this unit. Read the following important safety information to avoid personal injury and/or damage to the equipment. DANGER • Turn off the unit and unplug the power cord before cleaning or performing maintenance. •... - Page 11 • Giles Electric Fryers are available from the factory wired for various voltages, phase and hertz. Check the rating plate on the front of the fryer to determine the correct power supply.
- Page 12 Safety EOF 20/20 NOTE: • If the crate in which the unit is shipped is damaged upon receipt, immediately inspect the unit and notify the car- rier of any damage to the unit. • To aid the electrician, an electrical wiring diagram is contained in this manual. Refer to the wiring diagram during installation or servicing.
-
Page 13: Introduction
EOF 20/20 1. Introduction Congratulations on the purchase of your new Giles equipment, Model EOF-20/20 manufactured by Giles Enterprises, Inc., Montgomery, Alabama (USA), hereafter referred to as "Giles". Every unit is thoroughly inspected and tested prior to shipment. Proper care and maintenance will ensure years of trouble-free service. -
Page 14: Specifications
Introduction EOF 20/20 1-04. Specifications 1-04.1. Overall Dimensions for EOF 20/20 INCHES [MILLIMETERS]... -
Page 15: 1-04.2. Regulatory Listings
Introduction EOF 20/20 1-04.2. Regulatory Listings UL (US and Canada) UL Sanitation 1-04.3. Basket Size Basket Size Volume Model Height Length Width cubic inch cubic meter EOF-20 9.00 228.6 18.50 469.9 139.7 0.013 1-04.4. Vat Size and Capacity Height Width Liquid Shortening Capacity Length (Top of element to oil... - Page 16 Introduction EOF 20/20 Notes:...
-
Page 17: Installation
Control, and Fire Protection of Commercial Cooking Operations, NFPA 96-1994. Compliance with the above steps will help to ensure safe and proper installation of your fryer. If you have any questions concerning these procedures, contact your local Giles distributor or other qualified service person. -
Page 18: Unpacking
3. Carefully remove the fryer from the shipping platform. Your new fryer is extremely heavy, the uncrat- ed weight for the EOF-20/20 is 584 lbs (265 kg), only use a fork lift when lifting this equipment, refer to 2-03. -
Page 19: Electrical Requirements
The EOF-20/20 is available from the factory in the voltages and phases listed below. Check the rating plate on the rear of the fryer to determine the correct power supply. -
Page 20: 2-04.1. Electrical Connections Diagram
EOF-20/20 EOF-20/20 2-04.1. Electrical Connections Diagram Flexible Conduit Flexible Conduit Service Box Terminal Blocks Service Box Cover Service Box Cover Ground Lug Terminal Blocks Service Box Power Wires from Quick- Power Wires from Quick- Disconnect Box Disconnect Box 2-05. Ventilation of Fryer NOTE: •... -
Page 21: Overview
Overview EOF-20/20 3. Overview The following section provides a brief overview of the components, functions, and accessories of the unit. Please review this section carefully before proceeding any further. EOF-20 Baskets EOF-20 Baskets and Basket Lift and Basket Figure 3-04. -
Page 22: Basket Elevator And Baskets
Overview EOF-20/20 3-01. EOF-20 Basket Elevator and Baskets... - Page 23 Overview EOF-20/20 CAUTION • Always use Oven Mitts when using any of these parts. Parts will become very hot during nor- mal use. 3-01. Basket Elevator (Optional) and Baskets Item Description Function Used to hold the basket in the correct position when the Basket Carrier (2) basket is lifted or lower by the elevator.
-
Page 24: Control Panel
Overview EOF-20/20 3-02. EOF-20 Control Panel... - Page 25 Overview EOF 20/20 3-02. EOF-20 Control Panel Item Description Function The Power Switch is used to turn power ON or OFF to the Power Switch unit. The Heat Switch is used to turn the power to the elements ON or OFF . Place the Heat Switch in the OFF position when Heat Switch programming the controller or shutting down the unit.
-
Page 26: Left Lower Cabinet Area
Overview EOF-20/20 3-03. EOF 20 Left Lower Cabinet Area... - Page 27 Overview EOF 20/20 3-03. EOF-20 Left Lower Cabinet Area Item Description Function Used to drain the Fry Pot. Always ensure the Handle is closed and locked prior to adding cooking oil or boil out solu- tion. Your fryer will not heat if this Drain Valve Handle is not completely closed and locked.
-
Page 28: Right Lower Cabinet Area
Overview EOF 20/20 3-04. EOF 20 Right Lower Cabinet Area... - Page 29 Overview EOF 20/20 3-04. EOF-20 Left Lower Cabinet Area Item Description Function Used to drain the Fry Pot. Always ensure the Handle is closed and locked prior to adding cooking oil or boil out solu- tion. Your fryer will not heat if this Drain Valve Handle is not completely closed and locked.
-
Page 30: Basket Elevator And Baskets
Overview EOF 20/20 3-05. EOF-20 Basket Hanger and Baskets... - Page 31 Overview EOF 20/20 CAUTION • Always use Oven Mitts when using any of these parts. Parts will become very hot during nor- mal use. 3-05. EOF-20 Basket Hanger and Baskets Item Description Function Used to hold the basket(s) while excess oil is drained from Basket Hanger the product.
-
Page 32: Filter Pan Assembly
Overview EOF-20/20 3-06. Filter Pan Assembly... - Page 33 Overview EOF 20/20 WARNING • Never remove the Filter Pan with Liquid Shortening in the pan. This could cause oil to spill. Please see section 5-4. Removal of Liquid Shortening. CAUTION • Always use Oven Mitts when using any of these parts. Parts will become very hot during nor- mal use.
-
Page 34: Accessories (Included)
Overview EOF-20/20 3-07. Accessories (Included) Description/Part Part Function Number Kettle Drain Brush Used for cleaning the Fry Pot. P/N: 71025 Drain Brush, Small Used for cleaning the FFLT drain P/N: 73235 Stir Paddle Used for stirring Hot Oil and P/N: 77775 Product being cooked. - Page 35 Overview EOF 20/20 3-07. Accessories (Included) Description/Part Part Function Number L - Shaped Brush Used for cleaning between P/N: 73233 elements. Vat Drain Clean Out Used to clear excessive sediment P/N: 36577 build up from the Vat Drain. Used for removing liquid shortening from unit.
- Page 36 Overview EOF-20/20 3-07. Accessories (Included) Description/Part Part Function Number (1) EOF-20 Fry Basket Used for cooking product in the (Blue Handle) EOF-10-10 or the EOF-20. P/N: 70420 (1) EOF-20 Fry Basket Used for cooking product in the (Yellow Handle) EOF-10-10 or the EOF-20.
-
Page 37: Accessories (Not Included)
Overview EOF 20/20 3-08. Accessories (Not Included) Description/Part Part Function Number Filter Paper Used to filter the cooking oil. P/N:60709 Filter Powder Used to help clean the cooking oil. P/N: 72004 Fryer Boil-Out Used to help clean the fry pot. P/N: 72003... - Page 38 Overview EOF-20/20 3-08. Accessories (Not Included) Description/Part Part Function Number A portable oil disposal container with a capacity of 80lbs of Giles Oil Caddy liquid shortening. P/N: 79187 Note: For use with filtered, warm oil only. No crumbs or debris.
-
Page 39: Unit Preparation
4. Unit Preparation We at Giles Enterprises, Inc. take pride in the quality of our workmanship. Every effort has been made to ensure that your unit is in good operating condition when you receive it. Each unit must pass a rigorous quality control test prior to shipment. - Page 40 3. Open the Left EOF-20 Cabinet Door and remove the Filter Pan. 4. Ensure the Drain Valve Handle on each unit is in the CLOSED and Locked position. 5. Ensure the Oil Diverter Valve is in the TO FRYER position. 6. Remove Crumb Screen(s) and Baskets. EOF-20/20...
-
Page 41: Power Test
Unit Preparation EOF 20/20 4-02. Power test The following test will ensure the unit has power. Perform this test on each unit. 1. Follow steps shown in Section 4-1. 2. Ensure the main circuit breaker powering the unit is ON. If a Quick Disconnect Box is used, ensure it is ON. -
Page 42: Heating Element Test
Unit Preparation EOF 20/20 4-03. Heating Element test The following test will ensure the Heating Element is being powered. Perform this test on each Fry Pot. DANGER • DO NOT touch the Heating Elements. The Heating Elements are very hot and skin contact with the Heating Elements may result in severe burns. -
Page 43: Filter Pump Test
Unit Preparation EOF 20/20 4-03. Heating Element test (Continued from previous page) 8. Press the Heat Switch to the OFF position 9. The wet element should quickly dry within 15 seconds. Proceed to Section 4-4. If the Heating Element does not dry within 15-30 sec- EOF-20 onds, refer to the Troubleshooting procedure in Section 7-1. -
Page 44: Perform Boil Out Procedure
Unit Preparation EOF 20/20 4-05. Perform Boil Out Procedure Perform a Boil Out Procedure to remove any particles or debris that may have been left due to shipping. Follow Section 6-1 Boil Out Procedure. After performing the Boil Out Procedure proceed to Section 4-6. 4-06. -
Page 45: Fryer Operation
Fryer Operation EOF 20/20 5. Fryer Operation This section describes how to operate the unit. DANGER • Turn off the unit and turn off the fryer’s circuit breaker in the main circuit breaker box before cleaning or performing maintenance. • DO NOT hose down the unit’s interior or exterior with water. -
Page 46: Cooking Controller
Fryer Operation EOF 20/20 5-01. Cooking Controller The following section describes the functions, features and programming of the Cooking Controller. EOF-20 TEMPERATURE & TIMER ADJUST- MENT & ELEVATOR UP OR DOWN SET TEMPERATURE LEFT TIMER SELECT BUTTONS BUTTON BUTTON SCROLL DISPLAY DISPLAY ALARM RESET BUTTON... -
Page 47: Buttons And Functions
Fryer Operation EOF 20/20 5-01.1. Buttons and Functions Used to set and display cooking temperature. Used to increase or decrease cooking time and temperature. Used to set and recall cooking times. Used to silence alarm. EOF-20: Used to select Left or Right Basket Elevator. (Basket Elevator Option Only) Used to select the Left Basket Timer. -
Page 48: 5-01.2. Programming The Cooking Temperature
Fryer Operation EOF 20/20 5-01.2. Programming the Cooking Temperature EOF-20 Ensure Heat Switch is in the OFF position Press Power Switch to ON Press Adjust temperature Press to set... -
Page 49: 5-01.3. Programming A Cooking Time
Fryer Operation EOF 20/20 5-01.3. Programming a Cooking Time EOF-20 Ensure Heat Switch is in the OFF position Press Power Switch to ON Press and hold both the desired Basket Timer (left or right) and the desired Menu Key for 5 seconds Adjust the time Press the desired Basket Timer again to set... -
Page 50: Start A Cooking Time
Fryer Operation EOF 20/20 5-01.4. Start a cooking time Press the desired Basket Timer. Press the desired menu button twice to start timer. 5-01.5. Cancel the currently running cooking time Press the desired Basket Timer twice to cancel. (Basket Elevator Option Only) If cancelled and the Basket Elevator has been lowered, the Basket Elevator will raise when cancelled. -
Page 51: 5-01.7. Displaying Remaining Cooking Time
Fryer Operation EOF 20/20 5-01.7. Displaying remaining cooking time Active Menu (LED lit) Press the active (LED lit) Timer The time is displayed and the Left Menu button or Right LED is lit to identify the Basket time being displayed. 5-01.8. -
Page 52: Cooking Procedure
Fryer Operation EOF 20/20 5-02. Cooking Procedure This section describes the cooking process for the unit. 1. Program the Controller to the desired tempera- ture, See Section 5-1.2. 2. Ensure the Power Switch is in the OFF position. EOF-20 3. Ensure the Heat Switch is in the OFF posi- tion. - Page 53 Fryer Operation EOF 20/20 5-02. Cooking Procedure (Continued from previous page) 6. Press the Power Switch to the ON posi- tion. The Power Light will come on. If the unit is equipped with the Basket Elevator Option, and you want to engage this option, press the Basket Elevator Switch to the ON position.
- Page 54 Fryer Operation EOF 20/20 5-02. Cooking Procedure (Continued from previous page) NOTE: • The following step will help remove any cold area in the Liquid Shortening which will allow the product to be cooked more evenly. 8. Once the oil has reached it’s first preheat, an alarm will sound and the Scroll Display will read “Stir Oil and Push Reset”...
- Page 55 Fryer Operation EOF 20/20 5-02. Cooking Procedure (Continued from previous page) 13. We recommend placing uncooked product into the Cooking Basket with the basket in the up position, then lowering the basket into the oil. However, uncooked product may be placed into the Cooking Basket after the Cooking Basket has been lowered.
- Page 56 Fryer Operation EOF 20/20 5-02. Cooking Procedure (Continued from previous page) 16. After 60% of the cooking time has elapsed from the selected cooking time, the stir cycle alarm will sound and the Scroll Display will read “Stir Product” . Using the Stir Paddle and wearing Oven Mitts stir the product, then press the Alarm Reset Button...
-
Page 57: Filtering Liquid Shortening
4. Ensure the Filter Pan has (2) sheets of Filter Paper installed correctly. 5. Add one package (4.8 ounces) of Giles Filter Powder (Part No. EOF-20 72004) into the Filter Pan. 6. Ensure the Filter Pan Cover is in place, then reposition the... - Page 58 Fryer Operation EOF 20/20 5-03. Filtering Liquid Shortening (Continued from previous page) 7 . On the unit to be filtered, ensure the Heat Switch is in the OFF position. On the Right EOF-20, ensure the Oil Diverter Valve is in the TO FRYPOT position.
- Page 59 Fryer Operation EOF 20/20 5-03. Filtering Liquid Shortening (Continued from previous page) 12. After the Fry Pot has refilled, press the Pump Switch to the OFF position. 13. Turn the Pump Oil Return on the unit being fil- tered to the CLOSE position.
-
Page 60: Removal Of Liquid Shortening
This section describes how to remove Liquid Shortening from the unit. Liquid Shortening must be removed from the fryer before a Boil Out is performed. In this section a Giles Oil Caddy (not included) is used to dispose the used Liquid Shortening. - Page 61 5-04. Removal of Liquid Shortening (Continued from previous page) 6. Connect the Discharge Hose to the Discharge Hose Coupling 7 . Place the discharge end into a Hot Oil Disposal Container (Giles Oil Caddy shown). 8. Turn the Oil Diverter Valve to the TO DISCHARGE HOSE position. WARNING •...
- Page 62 Fryer Operation EOF 20/20 5-04. Removal of Liquid Shortening (Continued from previous page) 11. Press the Power Switch to the OFF position. 12. Push and lock the Drain Valve to the CLOSED position. EOF-20 13. Turn the Oil Diverter Valve handle to the TO FRY- position.
-
Page 63: Normal Shut-Down
Fryer Operation EOF 20/20 5-05. Normal Shut-Down This section explains the process of shutting the unit down. 1. Press the Heat Switch to the OFF position. 2. Press the Power Switch to the OFF posi- tion, the Power Light will go off. EOF-20 3. - Page 64 Fryer Operation EOF 20/20 Notes:...
-
Page 65: Cleaning
Cleaning EOF 20/20 6. Cleaning This section describes the cleaning operations for the EOF-20/20. The unit should be cleaned on a daily basis. DANGER • DO NOT hose down the unit’s interior or exterior with water. • Failure to comply with these DANGER notices will result in death or serious injury, equipment/property damage, and void the warranty. - Page 66 Cleaning EOF 20/20 6-01. Boil Out Procedure (Continued) 5. Press the Power Switch to the ON position. 6. Set the Cooking Temperature to 200°F (93°C) See Section 5-1.2. 7 . Press the Heat Switch to the HEAT position. 8. The Boil Out Solution will heat to 200°F (93°C). See EOF-20 directions on Boil Out container for suggested cycle time.
- Page 67 Cleaning EOF 20/20 6-01. Boil Out Procedure (Continued) 13. Rinse and flush the Fry Pot thoroughly with tap water. 14. Dry fry pot with a clean dry towel. 15. Push and lock in the Drain Valve Handle to the CLOSE position.
-
Page 68: Cleaning The Filter Pan And Replacing Filter Paper After Boil Out
Cleaning EOF 20/20 6-02. Cleaning the Filter Pan and replacing Filter Paper after Boil Out This section explains the process for cleaning the Filter Pan and the replacement of the Filter Paper. This process should be carried out each time you perform a Boil Out Procedure (Section 5-5). CAUTION •... -
Page 69: Cleaning The Filter Pan And Replacing The Filter Paper Daily
Cleaning EOF 20/20 6-03. Cleaning the Filter Pan and replacing the Filter Paper daily This section explains the process for cleaning the Filter Pan and the replacement of the Filter Paper daily. This process should be carried out daily. CAUTION •... - Page 70 Cleaning EOF 20/20 Notes:...
-
Page 71: Troubleshooting
Troubleshooting EOF 20/20 7. Troubleshooting This section describes troubleshooting procedures for the unit. Refer to the wiring diagrams in Section 9 for more detailed analysis. 7-01. Temperature Control System Problem Probable Cause Repair Procedure FRYER WILL NOT TURN ON: A. Not connected to power A. - Page 72 Troubleshooting EOF 20/20 7-01. Temperature Control System (Continued) Problem Probable Cause Repair Procedure FRYER HEATING SLOW: (slow A. Incorrect Cooking procedures. A. Consult Operations Manual for recovery) Heat light stays on. proper Cooking procedure. B. Replace bad Element. B. Element failing. C.
-
Page 73: Oil Filtration System
Troubleshooting EOF 20/20 7-01. Temperature Control System (Continued) Problem Probable Cause Repair Procedure FRYER WILL NOT HEAT: A. Power surge. A. Turn Power Switch off for 5 Power light on. Heat Switch seconds. in Heat position. High Limit light B. Replace Contactor. B. -
Page 74: Basket Elevator System (Basket Elevator Option Only)
Troubleshooting EOF 20/20 7-03. Basket Elevator System (Basket Elevator Option Only) Problem Probable Cause Repair Procedure BASKET WILL NOT GO UP OR A. Power not on. A. Press Power Switch to ON DOWN position. B. Replace Cooking Controller. B. Cooking Controller faulty. C. -
Page 75: Parts List
Please visit our website on the world wide web at: www.gilesent.com. The goal of the Giles team of professionals is to provide you with the highest quality of service and assis- tance. You can help us accomplish this by obtaining the following information and having it readily avail- able when calling. -
Page 76: Left Control Panel & Front Header
Parts List EOF 20/20 8-02. Right Side EOF-20 Left Control Panel & Front Header * -Not shown REF #: 60221-01... - Page 77 Parts List EOF 20/20 8-02. EOF-20 Control Panel & Front Header Item Part No. Qty. Description 23755 THERMOSTAT, SAFETY, WATLOW, 450DEG 20315 THERMOCOUPLE,13.5",STRAIGHT,J TYPE, (REQUIRES P/N 45111 FERRULE) 20315 THERMOCOUPLE,13.5",STRAIGHT,J TYPE, (REQUIRES P/N 45111 FERRULE) 23751 TERMINAL BLOCK, MA106,6 POLE 24222 THERMOCOUPLE, VARIABLE, SINGLE, (REQUIRES P/N 45111...
-
Page 78: Left Front Lower Cabinet
Parts List EOF 20/20 8-03. EOF-20 Left Front Lower Cabinet * -Not shown REF #: 60221-02... - Page 79 Parts List EOF 20/20 8-03. EOF-20 Front Lower Cabinet Item Part No. Qty. Description 21164 POWER DIST,TERMINAL BLOCK 21051 LUG, 1/0-2/0 COPPER TERMINAL 125A 1/4" BOLT HOLE 35151 WELD ASSY., DOOR FINAL 45755 VALVE, 3-WAY, 1/2NPT 39258 HANDLE,DRAIN PULL,WELD ASSY 40818 VALVE,BALL,1-1/4",DRAIN,SINGLE THREADEND 21157...
-
Page 80: Left Rear Lower Cabinet
Parts List EOF 20/20 8-04. EOF-20 Left Rear Lower Cabinet * -Not shown REF #: 60221-03... - Page 81 Parts List EOF 20/20 8-04. EOF-20 Left Rear Lower Cabinet Item Part No. Qty. Description 32260 CONTACTOR,ASSY,4 POLE,40A,W/QUENCH 20003 ELEMENT, 6000W, 208V, EOF-20 20004 ELEMENT, 6000W 240V, EOF-20 24257 ELEMENT, 6000W 480V, EOF-20 20513 BREAKER, CIRCUIT,277V,50A,6 POLE 21900 FUSE, 15-AMP , SC-15 21950 HOLDER, FUSE, 300V, 15A 70912...
-
Page 82: Right Control Panel & Front Header
Parts List EOF 20/20 8-05. EOF-20 Right Control Panel & Front Header * -Not shown REF #: 60221-04... - Page 83 Parts List EOF 20/20 8-05. EOF-24 Control Panel & Front Header Item Part No. Qty. Description 23755 THERMOSTAT, SAFETY, WATLOW, 450DEG 20315 THERMOCOUPLE,13.5",STRAIGHT,J TYPE, (REQUIRES P/N 45111 FERRULE) 24222 THERMOCOUPLE, VARIABLE, SINGLE, WOG-D, (REQUIRES P/N 45111 FERRULE) 20315 THERMOCOUPLE,13.5",STRAIGHT,J TYPE, (REQUIRES P/N 45111 FERRULE) 23751...
-
Page 84: Right Front Lower Cabinet
Parts List EOF 20/20 8-06. EOF-20 Right Front Lower Cabinet * -Not shown REF #: 60221-05... - Page 85 Parts List EOF 20/20 8-06. EOF-24 Front Lower Cabinet Item Part No. Qty. Description 21051 LUG, 1/0-2/0 COPPER TERMINAL 125A 1/4" BOLT HOLE 21164 POWER DIST,TERMINAL BLOCK 35151 DOOR FINAL, WELD ASSY 41699 COUPLING, QUICK DISCONNECT, FEMALE 35236 COVER, SERVICE CONNECTION 40818 VALVE,BALL,1-1/4",DRAIN,SINGLE THREADEND 39260...
-
Page 86: Right Rear Lower Cabinet
Parts List EOF 20/20 8-07. EOF-24 Rear Lower Cabinet * -Not shown REF #: 60221-06... - Page 87 Parts List EOF 20/20 8-07. EOF-20 Right Rear Lower Cabinet Item Part No. Qty. Description 32260 CONTACTOR,ASSY,4 POLE,40A,W/QUENCH 20003 ELEMENT, 6000W, 208V, EOF-20 20004 ELEMENT, 6000W 240V, EOF-20 24257 ELEMENT, 6000W 480V, EOF-20 32158 ELEV MOTOR & QUENCHARC, ASSY 208/240 22878 SWITCH, 250V, 10A, DOUBLE SNAP ACTION 36457...
-
Page 88: Filter Pan
Parts List EOF 20/20 8-08. Filter Pan * -Complete assembly REF #: 60221-09... - Page 89 54526 CASTING, LEVER,FILTER PAN,HOLDDOWN FRAME 60709 PAPER, FILTER, GFSE, 15-3/8 X 32-3/8 36213 CRUMB SCREEN, WELD ASSY, FILTER PAN 43302 HOSE, 1/2 NPT X 18.000, STEEL BRAIDED 35813 FILTER PAN, FINAL, ASSY, EOF-20/20, (P/N 36213 NOT INCLUDED) * -Complete assembly...
- Page 90 Parts List EOF 20/20 Notes:...
-
Page 91: Wiring Diagram
Wiring Diagram EOF 20/20 9. Wiring Diagram The following section contains various Wiring Diagrams for the unit. Please check the Serial Plate on the rear of each unit, as shown below, for the units Model Name, Voltage, Hertz, and Phase. Left Right EOF-20... -
Page 92: Wiring Diagram Eof-20/20 Left Fryer 208-240/60/3 Computer
Wiring Diagram EOF 20/20 9-01. Wiring Diagram EOF 20/20 Left Fryer 208-240/60/3 WIRING DIAGRAM P/N:39391-D... - Page 93 Wiring Diagram EOF 20/20 9-01. BOM for Wiring Diagram EOF 20/20 Left Fryer 208-240/60/3 Item Part No. Qty. Description 21102 RELAY, 8 PIN, 240V, 10A 21101 SOCKET, RELAY, 8 PIN, 300V, 10A 21900 FUSE, 15-AMP , SC-15 21950 HOLDER, FUSE 20004 ELEMENT, ROUND, 6000W, 240V, 20003...
-
Page 94: Wiring Diagram Eof-20/20 Right Fryer 208-240/60/3 Computer
Wiring Diagram EOF 20/20 9-02. Wiring Diagram EOF 20/20 Right Fryer 208-240/60/3 WIRING DIAGRAM P/N:39392-D... - Page 95 Wiring Diagram EOF 20/20 9-02. BOM for Wiring Diagram EOF 20/20 Right Fryer 208-240/60/3 Item Part No. Qty. Description 21102 RELAY, 8 PIN, 240V, 10A 21101 SOCKET, RELAY, 8 PIN, 300V, 10A 21900 FUSE, 15-AMP , SC-15 21950 HOLDER, FUSE 20004 ELEMENT, ROUND, 6000W, 240V, 20003...
-
Page 96: Wiring Diagram Eof-20/20 Left Fryer 480/60/3 Computerr
Wiring Diagram EOF 20/20 9-03. Wiring Diagram EOF 20/20 Left Fryer 480/60/3 WIRING DIAGRAM P/N:39292-A... - Page 97 Wiring Diagram EOF 20/20 9-03. BOM for Wiring Diagram EOF 20/20 Left Fryer 480/60/3 Item Part No. Qty. Description 21102 RELAY, 8 PIN, 240V, 10A 21101 SOCKET, RELAY, 8 PIN, 300V, 10A 21900 FUSE, 15-AMP , SC-15 21950 HOLDER, FUSE 24257 ELEMENT, ROUND, 6000W, 480V 23782...
-
Page 98: Wiring Diagram Eof-20/20 Right Fryer 480/60/3 Computer
Wiring Diagram EOF 20/20 9-04. Wiring Diagram EOF 20/20 Right Fryer 480/60/3 WIRING DIAGRAM P/N: 39293-A... - Page 99 Wiring Diagram EOF 20/20 9-04. BOM for Wiring Diagram EOF 20/20 Right Fryer 480/60/3 Item Part No. Qty. Description 21102 RELAY, 8 PIN, 240V, 10A 21101 SOCKET, RELAY, 8 PIN, 300V, 10A 21900 FUSE, 15-AMP , SC-15 21950 HOLDER, FUSE 24257 ELEMENT, ROUND, 6000W, 480V 23782...
- Page 100 Wiring Diagram EOF 20/20 Notes:...
- Page 102 FOODSERVICE EQUIPMENT Giles Enterprises, Inc. 2750 Gunter Park Drive West • Montgomery, Al 36109 USA (334) 272-1457 • Service Hotline 1-800-554-4537 (USA & Canada Only) • FAX (334) 272-3561 • www.gilesent.com Form No. 60437 (Release date: 11/99)(Revision date: 11/06/07)(Rev B)
Need help?
Do you have a question about the EOF-20/20 and is the answer not in the manual?
Questions and answers