Table of Contents
Advertisement
Quick Links
Advertisement
Table of Contents

Related Manuals for Isenberg 160.1168


Summary of Contents for Isenberg 160.1168
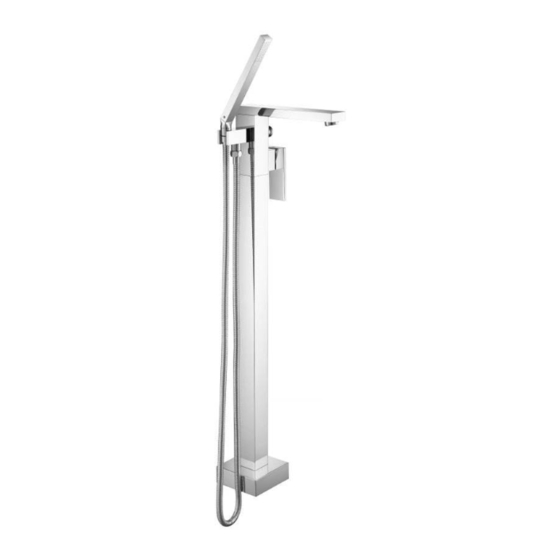
- Page 1 Installation Manual Floor Mount Tub Filler BEFORE YOU BEGIN • You must observe all local plumbing laws and codes. • Do not install this item if it does not meet local plumbing codes. • Shut off the main water supply. Ver. 2.54 www.isenbergfaucets.com...
-
Page 2: Table Of Contents
. . . . . . . • Replacing The C artridge . . . . . . . • Replacing The Diverter Mechanism - 160.1168. . . . . 9 • Replacing The Diverter Mechanism - 150.1165 / 160.1167 . . . • Cartridge Maintenance . . . . . ... -
Page 3: Operating Specifications
This valve meets or exceeds ANSI A112.18.1 and ASSE 1016 This product is certified by IAPMO CUT OUT DIMENSIONS FLOOR CUT-OUT DIMENSIONS Isenberg’s oor mount valves come with escutcheon plates to cover the hole in the tile / oor. It is essential to review the cut-out dimensions mentioned here so that the cut-out in the oor is not accidentally bigger than the size of the escutcheon plate. -
Page 4: Rough In Specification
ROUGH IN SPECIFICATION The distance between the center point of valve inlet (hot, cold) to the 18mm [0.708”] nished tile surface should be Finished Tile ideally 18mm [0.708”]. Level the valve before securing into the oor. Ensure valve is straight and do not install at an angle. The connections for Hot &... -
Page 5: Faucet Placement
FAUCET PLACEMENT min. 6” www.isenbergfaucets.com... -
Page 6: Securing Valve To The Floor
SECURING VALVE TO THE FLOOR Mark holes for floor bolt installation Install valve using floor bolts Ensure valve is perfectly level www.isenbergfaucets.com... -
Page 7: Valve Position With Respect To The Tub
VALVE POSITION WITH RESPECT TO TUB This illustration highlights the placement of the valve. Note: Direction of valve w.r.t. tub & spout is shown here. USING THE WATER PLUGS The supplied plugs should be used to block water output during installation. Insert plugs and use connector and screws to hold in place. www.isenbergfaucets.com... -
Page 8: Installing The Trim
INSTALLING THE TRIM - SIZE AND SHAPE MAY VARY - ILLUSTRATION ONLY Install connector and tighten screws on bottom Ensure double o-rings are undamaged and greased of trim Ensure that all screws are tight Insert trim onto valve. Tighten screws (x3) www.isenbergfaucets.com... - Page 9 INSTALLING THE TRIM - SIZE AND SHAPE MAY VARY - ILLUSTRATION ONLY Push down floor cover Screw on hand held and hose www.isenbergfaucets.com...
-
Page 10: Replacing The Cartridge
REPLACING THE CARTRIDGE In order to remove or service the cartridge follow the procedure below: 1) Remove handle. Cover button and hex screw on handle will need to be removed. 2) Unscrew cartridge bezel and retaining nut. 3) Pull out cartridge/ www.isenbergfaucets.com... -
Page 11: Replacing The Diverter Mechanism - 160.1168
REPLACING THE DIVERTER MECHANISM - FOR 160.1168 1) Remove holder by removing hex screw and pulling out. 2) Remove rectangluar knob 3) Remove brass connector with o-rings by turning 4) Pull out diverter www.isenbergfaucets.com... -
Page 12: Replacing The Diverter Mechanism - 150.1165 / 160.1167
REPLACING THE DIVERTER MECHANISM - 150.1165 / 160.1167 Remove hand shower and hose Remove holder by loosening two hex screws below Remove holder screws Remove water outlet piece & knob by twisting www.isenbergfaucets.com... - Page 13 REPLACING THE DIVERTER MECHANISM - 150.1165 / 160.1167 Remove push pull rod www.isenbergfaucets.com...
-
Page 14: Cartridge Maintenance
CARTRIDGE CLEANING & MAINTENANCE Check For Dirt Inspect Rubber Seal Check For Dirt www.isenbergfaucets.com...
Need help?
Do you have a question about the 160.1168 and is the answer not in the manual?
Questions and answers