Table of Contents
Advertisement
Quick Links
WIDOS
Einsteinstr. 5
Wilhelm Dommer Söhne
D-71254 Ditzingen-Heimerdingen
GmbH
Website: www.widos.de
Working Instructions
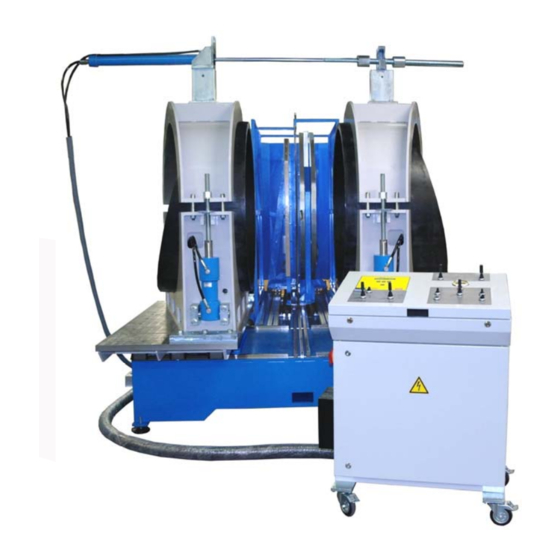
Heating Element Butt Welding Machine
OD 1200 mm; T-90° with additional cylinder
Headquarters: D-71254 Ditzingen-Heimerdingen Country Court Stuttgart HRB 200973 Managing directors: Jürgen Dommer, Dr. Kai Dombrowski
Translation
WIDOS 8000 WM SPA
Keep for further use!
Phone
+49 71 52 99 39 0
Fax
+49 71 52 99 39 40
Email:
info@widos.de
Advertisement
Table of Contents

Related Manuals for widos 8000 WM SPA


Summary of Contents for widos 8000 WM SPA
- Page 1 Email: info@widos.de Working Instructions Translation Heating Element Butt Welding Machine WIDOS 8000 WM SPA OD 1200 mm; T-90° with additional cylinder Keep for further use! Headquarters: D-71254 Ditzingen-Heimerdingen Country Court Stuttgart HRB 200973 Managing directors: Jürgen Dommer, Dr. Kai Dombrowski...
- Page 2 Manufacturer’s address: WIDOS W. Dommer Söhne GmbH Einsteinstr. 5 D-71254 Ditzingen-Heimerdingen Phone: +49 71 52 99 39 0 Fax: +49 71 52 99 39 40 E-mail: info@widos.de Website: www.widos.de 09.06.15 Working Instructions WIDOS 8000 WM SPA page 2 of 108...
- Page 3 6/9/2015 WIDOS W. Dommer Söhne GmbH Einsteinstraße 5 D-71254 Ditzingen-Heimerdingen All rights reserved Reprinting only allowed with permission of the corporation. Any changes are subject to technical innovations. 09.06.15 Working Instructions WIDOS 8000 WM SPA page 3 of 108...
-
Page 4: Table Of Contents
4.3.1.1. Service unit ................................ 22 4.4. Hydraulic aggregate ...........................23 4.5. Horizontal adjustment (mismatch compensation) ................24 4.6. Additional cylinder (optional) ......................24 4.7. Clamping tools with 15° / 22,5° (optional) ....................25 09.06.15 Working Instructions WIDOS 8000 WM SPA page 4 of 108... - Page 5 How to copy internal data on SD card and deleting internal data (RAM) ............59 6.2.13. How to read out the welding data ..........................60 6.3. Welding process without SPA 600.......................61 6.3.1. Drag pressure measurement ............................. 61 09.06.15 Working Instructions WIDOS 8000 WM SPA page 5 of 108...
- Page 6 How to check the hydraulic oil level / refilling ..................74 8.7. Protect machine parts against corrosion ....................74 8.8. Disposal .............................74 WIRING DIAGRAMS ........................... 75 DECLARATION OF CONFORMITY ..................... 108 09.06.15 Working Instructions WIDOS 8000 WM SPA page 6 of 108...
-
Page 7: Description Of Product
Application and intended use The WIDOS 8000 WM SPA is a workshop machine for the heating element butt welding of pipes and T-pieces 90° out of PE and PP from OD = 500 mm up to OD = 1200 mm. -
Page 8: Technical Data
240 bar 1.4.1.3. Heating element Power: 31,046 kW Voltage: 380 V – 400 V Current: 135 A / phase Frequency: 50 Hz - 60 Hz Surface: anti-stick coating 09.06.15 Working Instructions WIDOS 8000 WM SPA page 8 of 108... -
Page 9: Planer
Heating cartridge Ø 16 x 1375 L / 440 V / 2800 W on request Heating cartridge Ø 16 x 1270 L / 440 V / 2600 W on request PTFE foil for heating plate 1475F708 Hydraulic oil HLDP35 09.06.15 Working Instructions WIDOS 8000 WM SPA page 9 of 108... -
Page 10: Equipment (Optional)
Pan-head screw M 16 x 130 DIN 912 Washer M 16 DIN 9021 Hexagon nut M 16 DIN 934 Order numbers and spare parts can be ordered at WIDOS. 09.06.15 Working Instructions WIDOS 8000 WM SPA page 10 of 108... -
Page 11: Tools And Accessories
Spanner wrench size 24 Combination spanner size 30 Ratchet tightener with nut size 24 Hexagon socket wrench size 46 each 1 Allan key with T-grip, size 10 / 14 Torx-screw driver TX10 09.06.15 Working Instructions WIDOS 8000 WM SPA page 11 of 108... -
Page 12: Safety Rules
T h e r e g u l a t i o n s f o r t h e p r e v e n t i o n o f a c c i d e n t s a r e v a l i d ( U V V ) . 09.06.15 Working Instructions WIDOS 8000 WM SPA page 12 of 108... -
Page 13: Obligations Of The Owner
It must be clearly defined who is responsible for transport, mounting and dismounting, and starting the operation. A person who is being trained may only work at the machine under supervision of an experienced person. 09.06.15 Working Instructions WIDOS 8000 WM SPA page 13 of 108... -
Page 14: Dangers While Handling The Machine
2.7. Dangers while handling the machine The machine WIDOS 8000 WM is constructed according to the latest technical standard and the acknowledged technical safety rules. However, dangers for the operator or other persons standing nearby may occur. Also material damages are possible. -
Page 15: Risk Of Injury By Noise
Machine parts which are not in a perfect condition are to be immediately replaced. Only use original WIDOS spare and wear parts. In case of purchase orders please always indicate the machine number! 09.06.15... -
Page 16: Warranty And Liability
structural changes at the machine without permission unsatisfactory checking of machine parts which are worn out repairs performed in an inexpert way catastrophes by external influence and Acts of God. 09.06.15 Working Instructions WIDOS 8000 WM SPA page 16 of 108... -
Page 17: Functional Description
The welding connection can now be unclamped: the welding process is completed. Heating element heats the pipes up to welding temperature Completed welding joint with in- and outside bead 09.06.15 Working Instructions WIDOS 8000 WM SPA page 17 of 108... -
Page 18: Operating And Indicating Elements
T90°- clamping tool T90°- clamping tools (large part) (small parts) Protective cover Block for pipe Hydraulic aggregate Couplings for cylinders Service unit and Pneumatic valves Holder for additional cylinder (including cylinder) 09.06.15 Working Instructions WIDOS 8000 WM SPA page 18 of 108... -
Page 19: Operator Console
Heat sink Guide roller, lockable 4.2.1. Operator panel Denomination Function Display (optional) to display the necessary parameters (for welding and programming). Two values can be displayed at the same time. 09.06.15 Working Instructions WIDOS 8000 WM SPA page 19 of 108... - Page 20 - To close tables for joining / cooling - To close tables for planing Pressure controller - Adjust welding pressure (Reading: on pressure gauge) Pressure controller - Adjust planing pressure (Reading: on pressure gauge) 09.06.15 Working Instructions WIDOS 8000 WM SPA page 20 of 108...
-
Page 21: Switch Cupboard
Protective motor switch hydraulic pump 7 – 10A FC40 Protective motor switch planer 4,5 – 6,3A QA10 Contactor hydraulic pump QA40 Soft starting planer Switching power supply 24V Switching power supply SPA 09.06.15 Working Instructions WIDOS 8000 WM SPA page 21 of 108... -
Page 22: Service Unit And Pneumatic Valves
The input pressure must be at least 1 bar higher than the output pressure. Press the pressure setting button downwards (towards the housing) to secure it against unintentional turning. 09.06.15 Working Instructions WIDOS 8000 WM SPA page 22 of 108... -
Page 23: Hydraulic Aggregate
To open right clamping tool QM62* To close right clamping tool QM67* To release clamping cylinder QM68* To clamp left clamping cylinder QM80 Pressure changing valve * For optional clamping tools with 15°. 09.06.15 Working Instructions WIDOS 8000 WM SPA page 23 of 108... -
Page 24: Horizontal Adjustment (Mismatch Compensation)
Storing the additional cylinder on its holder resp. removing it should be done if possible with closed tables. 09.06.15 Working Instructions WIDOS 8000 WM SPA page 24 of 108... -
Page 25: Clamping Tools With 15° / 22,5° (Optional)
In case the clamping tools are removed from the machine, the hydraulic hoses must be unplugged at the plug-in connectors. The plug-in connectors to open and shut or to clamp and release the clamping tools are behind the machine tables. 09.06.15 Working Instructions WIDOS 8000 WM SPA page 25 of 108... -
Page 26: How To Mount Clamping Tools On Machine Tables
Rear scale, for exchanged clamping tools on turning point „2“ Front scale, for non-exchanged clamping tools on turning point „2“ Front scale, for non-exchanged clamping tools on turning point „1“ 09.06.15 Working Instructions WIDOS 8000 WM SPA page 26 of 108... -
Page 27: Structure Of 15° / 22,5°-Clamping Tools (Optional)
Center bolt (here on turning point „1“) Read off angle Read off angle on rear scale on rear scale Large clamping claws for fixing the clamping tools 09.06.15 Working Instructions WIDOS 8000 WM SPA page 27 of 108... -
Page 28: Structure 15° / 22,5-Clamping Tools For Other Angles
Put the upper reducer inserts onto the spacer directly above the lower parts. Insert spacer here Afterwards shut the clamping tools by putting the joysticks onto: < >. Fix the reducer inserts with the pan-head screws. 09.06.15 Working Instructions WIDOS 8000 WM SPA page 28 of 108... -
Page 29: Clamping Tools For T-Piece 90° (Optional)
Mount the small clamping tools on the right machine table each with eight hexagon-head screws. Mount the large clamping tool on the left machine table with fourteen hexagon-head screws. Illustration: tables from above, (fixing holes are marked) 09.06.15 Working Instructions WIDOS 8000 WM SPA page 29 of 108... -
Page 30: Clamping Tools For T-45° Welding (Optional)
Front view: Cut from above; fixing holes marked in black: Do not use any turning point; mount the clamping tools according to the marked fixing holes onto the machine tables. 09.06.15 Working Instructions WIDOS 8000 WM SPA page 30 of 108... - Page 31 Front view: Cut from above; fixing holes marked in black: Do not use any turning point; mount the clamping tools according to the marked fixing holes onto the machine tables. 09.06.15 Working Instructions WIDOS 8000 WM SPA page 31 of 108...
- Page 32 Put the left 22.5° clamping tool onto the marked turning point (3) and fix it with the clamping jaws. 09.06.15 Working Instructions WIDOS 8000 WM SPA page 32 of 108...
-
Page 33: Clamping Tools For T-60° Welding (Optional)
Front view: Cut from above; fixing holes marked in black: Do not use any turning point; mount the clamping tools according to the marked fixing holes onto the machine tables. 09.06.15 Working Instructions WIDOS 8000 WM SPA page 33 of 108... - Page 34 Front view: Cut from above; fixing holes marked in black: Do not use any turning point; mount the clamping tools according to the marked fixing holes onto the machine tables. 09.06.15 Working Instructions WIDOS 8000 WM SPA page 34 of 108...
- Page 35 Put the left 22.5° clamping tool onto the marked turning point (4), adjust the clamping tool onto the angle 7.5° with an angle meter and fix it with the clamping jaws. 09.06.15 Working Instructions WIDOS 8000 WM SPA page 35 of 108...
-
Page 36: Reduction Inserts For T-Clamping Tools (Optional)
Hinge the small upper parts to the three ring bolts using a lifting device and lift the upper parts down. Lifting eye bolts Clamping tool upper part small 09.06.15 Working Instructions WIDOS 8000 WM SPA page 36 of 108... -
Page 37: How To Support The Pipes (Optional)
The limit stops keep the pipes in axial direction even at higher pressures. You can displace the limit stops to the outside with longer pan-head screws and counternuts. Limit stop for pipe 09.06.15 Working Instructions WIDOS 8000 WM SPA page 37 of 108... -
Page 38: Beam For Unilateral Planing (Optional)
Insert the centering bolt into the drill hole in the center of the planer. Now you may plane in opposite side of the beam. Remove the beam after the planing again. 09.06.15 Working Instructions WIDOS 8000 WM SPA page 38 of 108... -
Page 39: Stub End Holder (Optional)
Turn the hexagon nuts and clamp the end cap / cap / flange with the clamping jaws. After welding first release the spindles at the stub end holder. 09.06.15 Working Instructions WIDOS 8000 WM SPA page 39 of 108... -
Page 40: Starting And Operating
Take the machine at the front e. g. by a forklift and bring it to its destination. Fix the six supporting feet (packed in cardboard) into the machine feet. 09.06.15 Working Instructions WIDOS 8000 WM SPA page 40 of 108... -
Page 41: How To Adjust The Heating Element Temperature
The standard value for heating element temperature is 210°C +/- 10°C (410 °F ± 50 °F) *. PVDF The standard value for heating element temperature is 240°C +/- 8°C (464 °F ± 46 °F) *. * The smaller the pipe wall the higher the temperature. 09.06.15 Working Instructions WIDOS 8000 WM SPA page 41 of 108... -
Page 42: Sd Card And Drive (Optional)
The card can be read out with a WICON program (optional). The card may not be bent, opened, overheated and become wet! Please only use SD cards purchased from WIDOS. We will not be liable for any cards from other manufactures! 5.5. -
Page 43: How To Switch On The Machine
The pipe data can also be read from the pipe data card with the bar code reading pen. Setting the machine type and printing the welding data by pressing simultaneously <-> and <Enter>. Diagnosis menu by pressing simultaneously <+> and <Enter>. 09.06.15 Working Instructions WIDOS 8000 WM SPA page 43 of 108... -
Page 44: How To Set The Machine Type
- Prefabrication under workshop conditions - Low additional pressure at unclamp - No additional pressure during further cooling down - Load onto the workpieces only after being completely cooled down 09.06.15 Working Instructions WIDOS 8000 WM SPA page 44 of 108... -
Page 45: How To Set Language, Time And Date
Next menu by pressing button<Enter> lang. English Display: Language German or English is selectable 2nd line: Select the language with buttons <+> and <-> Next menu by pressing button <Enter> 09.06.15 Working Instructions WIDOS 8000 WM SPA page 45 of 108... -
Page 46: How To Set The Pipe Data
Select Y – yes in case the peaks of the pipes have 00.00° line: been cut prior to welding By <+> and <-> you may select YES or NO, confirmed by <Enter> thus jumping to the next parameter. 09.06.15 Working Instructions WIDOS 8000 WM SPA page 46 of 108... - Page 47 <Enter> number of joint Display: 0000 2nd line: By <+> and <> the weld number is changed, (after each welding process without error, the weld number automatically steps forward), 09.06.15 Working Instructions WIDOS 8000 WM SPA page 47 of 108...
-
Page 48: Lab Program For The Pipe And Welding Parameters
Pressing <+> and <-> changes the material. Confirm by <Enter> and go to next parameter. diam wall Display: 00.0 line: Adjusted diameter is indicated by <Enter> go to next parameter. 09.06.15 Working Instructions WIDOS 8000 WM SPA page 48 of 108... - Page 49 Confirm by <Enter> and go to next parameter. t-bead SWP-bead Display: line: Indication of current bead up pressure Adjust bead up pressure by <+/->. Confirm by <Enter> and go to next parameter. 09.06.15 Working Instructions WIDOS 8000 WM SPA page 49 of 108...
- Page 50 Confirm by <Enter> and go to next parameter. t-cool SWP-cool Display: 0.00 line: Indication of current cooling pressure Adjust cooling pressure by <+/->. Confirm by <Enter> and go to next parameter. 09.06.15 Working Instructions WIDOS 8000 WM SPA page 50 of 108...
- Page 51 Starting and operating Chapter 5 parameter Display: line: Press <Enter> and wait until the basic menu appears automatically after a few seconds. WIDOS 8-1 SPA Display: Basic menu 09:43 03.05.2014 line: 09.06.15 Working Instructions WIDOS 8000 WM SPA page 51 of 108...
-
Page 52: Welding Process
It is indispensable that both pipes are clamped with a constant overhang. Put the upper clamping parts on the pipes. Tighten clamping tools with the spindles, pressure discs and clamping nuts. 09.06.15 Working Instructions WIDOS 8000 WM SPA page 52 of 108... -
Page 53: Welding Process With Spa 600
Pi=4 2nd line: P0 = desired pressure; Pi = actual pressure When pressing <Enter>, the actual pressure is taken over as drag pressure. Open tables with <joystick 13> on: 09.06.15 Working Instructions WIDOS 8000 WM SPA page 53 of 108... -
Page 54: Dimension
Simultaneously pres all buttons <+ / - / Enter>. Then manually enter barcode of 2 pipe: Select first digit with <+/-> and jump to the next digit with <Enter>. 09.06.15 Working Instructions WIDOS 8000 WM SPA page 54 of 108... -
Page 55: Planing
Pi=12 2nd line: heating element temperature and actual pressure Release pressure, press <button 17, >. alignment Display: Display of: T=210°C Pi=12 2nd line: heating element temperature and actual pressure 09.06.15 Working Instructions WIDOS 8000 WM SPA page 55 of 108... -
Page 56: Bead Up
Do not touch the surfaces of the heating element. Take enough safety distance to inflammable materials. Do wear safety gloves. The travelling area of the heating element must be clear! 09.06.15 Working Instructions WIDOS 8000 WM SPA page 56 of 108... -
Page 57: Heating Up
Hold the <joystick 13> just for about 10 s on: in order that the hydraulic accumulator may fill up. ramp Display: Display of: t=2s Pi=6 2nd line: Heating element temperature and actual pressure 09.06.15 Working Instructions WIDOS 8000 WM SPA page 57 of 108... -
Page 58: Joining / Cooling
> In case welding has been carried out with additional pressure, then now remove the additional cylinder and place on its holder at the left side of the machine. 09.06.15 Working Instructions WIDOS 8000 WM SPA page 58 of 108... -
Page 59: Signification Of Error Codes
Only displayed if no card is in the drive: error SD card Display: Message appears if there is no SD card in the drive 2nd line: Confirm the error message by pressing <Enter>. 09.06.15 Working Instructions WIDOS 8000 WM SPA page 59 of 108... -
Page 60: How To Read Out The Welding Data
Make sure not to go over this quantity (in the display the error message "memory full“ appears) because otherwise the first stored welding (001) will be overwritten (if necessary, copy welding data on the SD card and read it out in time). 09.06.15 Working Instructions WIDOS 8000 WM SPA page 60 of 108... -
Page 61: Welding Process Without Spa 600
In case the mismatch is too large, align the pipes horizontally at the right table with the ratchet tightener, resp. readjust the pipe ends within the clamping tools. As soon as mismatch compensation is effected, the pipes have to be planed again. 09.06.15 Working Instructions WIDOS 8000 WM SPA page 61 of 108... -
Page 62: Aligning
Important! Switch off table limitation by <switch 16, > the switch extinguishes. During the cooling readjust pressure if necessary. After the cooling time has elapsed, release pressure, press <button 17, >. 09.06.15 Working Instructions WIDOS 8000 WM SPA page 62 of 108... -
Page 63: End Of Welding
Example 1: bend of 90° 4 segments (6 welding surfaces) 90° sawing angle = ----- = 15° Example 2: bend of 45° in 3 segments (4 welding surfaces) 45° sawing angle = ----- = 11,25° 09.06.15 Working Instructions WIDOS 8000 WM SPA page 63 of 108... -
Page 64: Factors For The Welding Of Angle And T-Piece
The calculated value for the first welding of T-pieces is to be cut in halves if the pipe ends were cut off (chapter: 6.6). As usual add drag pressure. All other parameters can remain the same. 6.6. How to prepare the pipes for T–pieces 09.06.15 Working Instructions WIDOS 8000 WM SPA page 64 of 108... - Page 65 Welding process Chapter 6 09.06.15 Working Instructions WIDOS 8000 WM SPA page 65 of 108...
-
Page 66: Welding Log And Tables
) * 3,141592654 / 4 * 0,10 / 232+1 ( for welding without additional cylinder) - DI ) * 3,141592654 / 4 * 0,10 / 348+1 (for welding with additional cylinder) 09.06.15 Working Instructions WIDOS 8000 WM SPA page 66 of 108... - Page 67 Welding log and tables Chapter 7 09.06.15 Working Instructions WIDOS 8000 WM SPA page 67 of 108...
- Page 68 [min] 12,3 15,3 19,1 23,9 28,4 17,6 29,7 45,4 68,3 13,7 17,2 21,4 26,7 31,7 17,6 33,2 50,8 15,4 19,3 24,1 30,0 35,7 17,6 37,4 57,2 09.06.2015 Working instructions WIDOS 8000 WM SPA Page 68 / 1 of 108...
- Page 69 [min] 17,4 21,8 27,2 33,9 40,2 17,6 42,1 64,5 19,6 24,5 30,6 38,1 45,3 17,6 47,4 72,7 22,0 27,6 34,4 42,9 51,0 17,6 53,3 81,8 09.06.2015 Working instructions WIDOS 8000 WM SPA Page 68 / 2 of 108...
- Page 70 • no additional pressure during further cooling down • load onto the workpieces only after being completely cooled down • Join parts with wall thickness ≥15 mm 09.06.2015 Working instructions WIDOS 8000 WM SPA Page 68 / 3 of 108...
- Page 71 [min] 12,3 15,3 19,1 28,4 17,6 13,7 17,2 21,4 31,7 17,6 15,4 19,3 24,1 35,7 17,6 17,4 21,8 27,2 40,2 17,6 19,6 24,5 30,6 45,3 17,6 09.06.2015 Working instructions WIDOS 8000 WM SPA Page 69 / 1 of 108...
-
Page 72: Equipment Care / Maintenance / Repair
• no additional pressure during further cooling down • load onto the workpieces only after being completely cooled down • Join parts with wall thickness ≥15 mm 09.06.2015 Working instructions WIDOS 8000 WM SPA Page 69 / 2 of 108... - Page 73 15,3 19,1 23,9 28,4 17,6 29,7 45,4 68,3 13,7 17,2 21,4 26,7 31,7 17,6 33,2 50,8 15,4 19,3 24,1 30,0 35,7 17,6 37,4 57,2 09.06.2015 Working instructions WIDOS 8000 WM SPA (with 2. cylinder) Page 70 / 1 of 108...
- Page 74 17,4 21,8 27,2 33,9 40,2 17,6 42,1 64,5 19,6 24,5 30,6 38,1 45,3 17,6 47,4 72,7 22,0 27,6 34,4 42,9 51,0 17,6 53,3 81,8 09.06.2015 Working instructions WIDOS 8000 WM SPA (with 2. cylinder) Page 70 / 2 of 108...
- Page 75 • load onto the workpieces only after being completely cooled down • Join parts with wall thickness ≥15 mm 09.06.2015 Working instructions WIDOS 8000 WM SPA (with 2. cylinder) Page 70 / 3 of 108...
- Page 76 12,3 15,3 19,1 28,4 17,6 13,7 17,2 21,4 31,7 17,6 15,4 19,3 24,1 35,7 17,6 17,4 21,8 27,2 40,2 17,6 19,6 24,5 30,6 45,3 17,6 09.06.2015 Working instructions WIDOS 8000 WM SPA (with 2. cylinder) Page 71/ 1 of 108...
- Page 77 • load onto the workpieces only after being completely cooled down • Join parts with wall thickness ≥15 mm 09.06.2015 Working instructions WIDOS 8000 WM SPA (with 2. cylinder) Page 71/ 2 of 108...
-
Page 78: Maintenance And Care
For machines with an especially high usage percentage the testing cycle should be shortened to 1000 welds. The work has to be performed at the WIDOS GmbH company or by an authorized partner. In general, take care for cleanness! ... -
Page 79: Transport
Unscrew the filter bowl in an anti-clockwise direction; Hold new filter element only at lower end; Mount parts in the reverse order from dismantling: Restarting as described in chapter “settings" (see chapter: 4.3.1.1). 09.06.15 Working Instructions WIDOS 8000 WM SPA page 73 of 108... -
Page 80: How To Check The Hydraulic Oil Level / Refilling
(e.g. AVILUB NCI 9840). 8.8. Disposal At the end of the life time, the machine has to be disposed of properly, non-polluting and in accordance with the national laws of waste disposal. 09.06.15 Working Instructions WIDOS 8000 WM SPA page 74 of 108... -
Page 81: Wiring Diagrams
WIDOS Einsteinstr. 5 Phone +49 71 52 99 39 0 Wilhelm Dommer Söhne D-71254 Ditzingen-Heimerdingen +49 71 52 99 39 40 GmbH Website: www.widos.de Email: info@widos.de 9. Wiring diagrams 09.06.15 Working Instructions WIDOS 8000 WM SPA page 75 of 108... - Page 82 Wiring diagrams Chapter 9 09.06.15 Working Instructions WIDOS 8000 WM SPA page 76 of 108...
- Page 83 Wiring diagrams Chapter 9 09.06.15 Working Instructions WIDOS 8000 WM SPA page 77 of 108...
- Page 84 Wiring diagrams Chapter 9 09.06.15 Working Instructions WIDOS 8000 WM SPA page 78 of 108...
- Page 85 Wiring diagrams Chapter 9 09.06.15 Working Instructions WIDOS 8000 WM SPA page 79 of 108...
- Page 86 Wiring diagrams Chapter 9 09.06.15 Working Instructions WIDOS 8000 WM SPA page 80 of 108...
- Page 87 Wiring diagrams Chapter 9 09.06.15 Working Instructions WIDOS 8000 WM SPA page 81 of 108...
- Page 88 Wiring diagrams Chapter 9 09.06.15 Working Instructions WIDOS 8000 WM SPA page 82 of 108...
- Page 89 Wiring diagrams Chapter 9 09.06.15 Working Instructions WIDOS 8000 WM SPA page 83 of 108...
- Page 90 Wiring diagrams Chapter 9 09.06.15 Working Instructions WIDOS 8000 WM SPA page 84 of 108...
- Page 91 Wiring diagrams Chapter 9 09.06.15 Working Instructions WIDOS 8000 WM SPA page 85 of 108...
- Page 92 Wiring diagrams Chapter 9 09.06.15 Working Instructions WIDOS 8000 WM SPA page 86 of 108...
- Page 93 Wiring diagrams Chapter 9 09.06.15 Working Instructions WIDOS 8000 WM SPA page 87 of 108...
- Page 94 Wiring diagrams Chapter 9 09.06.15 Working Instructions WIDOS 8000 WM SPA page 88 of 108...
- Page 95 Wiring diagrams Chapter 9 09.06.15 Working Instructions WIDOS 8000 WM SPA page 89 of 108...
- Page 96 Wiring diagrams Chapter 9 09.06.15 Working Instructions WIDOS 8000 WM SPA page 90 of 108...
- Page 97 Wiring diagrams Chapter 9 09.06.15 Working Instructions WIDOS 8000 WM SPA page 91 of 108...
- Page 98 Wiring diagrams Chapter 9 09.06.15 Working Instructions WIDOS 8000 WM SPA page 92 of 108...
- Page 99 Wiring diagrams Chapter 9 09.06.15 Working Instructions WIDOS 8000 WM SPA page 93 of 108...
- Page 100 Wiring diagrams Chapter 9 09.06.15 Working Instructions WIDOS 8000 WM SPA page 94 of 108...
- Page 101 Wiring diagrams Chapter 9 09.06.15 Working Instructions WIDOS 8000 WM SPA page 95 of 108...
- Page 102 Wiring diagrams Chapter 9 09.06.15 Working Instructions WIDOS 8000 WM SPA page 96 of 108...
- Page 103 Wiring diagrams Chapter 9 09.06.15 Working Instructions WIDOS 8000 WM SPA page 97 of 108...
- Page 104 Wiring diagrams Chapter 9 09.06.15 Working Instructions WIDOS 8000 WM SPA page 98 of 108...
- Page 105 Wiring diagrams Chapter 9 09.06.15 Working Instructions WIDOS 8000 WM SPA page 99 of 108...
- Page 106 Wiring diagrams Chapter 9 09.06.15 Working Instructions WIDOS 8000 WM SPA page 100 of 108...
- Page 107 Wiring diagrams Chapter 9 09.06.15 Working Instructions WIDOS 8000 WM SPA page 101 of 108...
-
Page 108: Declaration Of Conformity
Wiring diagrams Chapter 9 09.06.15 Working Instructions WIDOS 8000 WM SPA page 102 of 108... - Page 109 Wiring diagrams Chapter 9 09.06.15 Working Instructions WIDOS 8000 WM SPA page 103 of 108...
- Page 110 Wiring diagrams Chapter 9 09.06.15 Working Instructions WIDOS 8000 WM SPA page 104 of 108...
- Page 111 Wiring diagrams Chapter 9 09.06.15 Working Instructions WIDOS 8000 WM SPA page 105 of 108...
- Page 112 Wiring diagrams Chapter 9 Hydraulic diagram 09.06.15 Working Instructions WIDOS 8000 WM SPA page 106 of 108...
- Page 113 Wiring diagrams Chapter 9 09.06.15 Working Instructions WIDOS 8000 WM SPA page 107 of 108...
- Page 114 Safety regulations for fluid-technical devices and components (pneumatic) The technical documentation is completely available. The working instructions are available in the user’s language. Ditzingen-Heimerdingen, the 09.06.15 Martin Dommer (Technical director) 09.06.15 Working Instructions WIDOS 8000 WM SPA page 108 of 108...
Need help?
Do you have a question about the 8000 WM SPA and is the answer not in the manual?
Questions and answers