
Subscribe to Our Youtube Channel
Related Manuals for Shini SAL-U Series


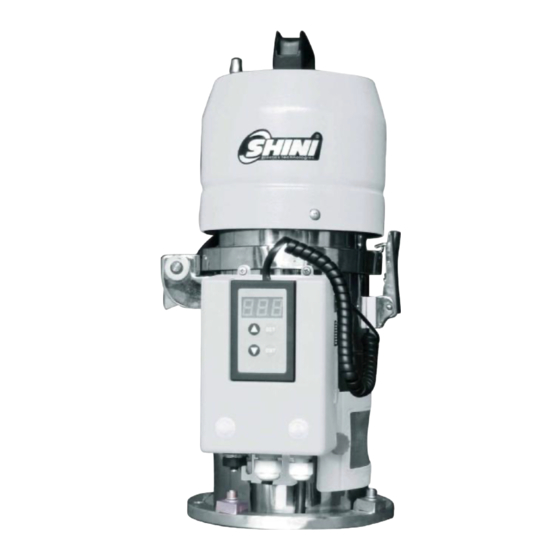
Summary of Contents for Shini SAL-U Series
- Page 1 SAL-U Series Self-contained Hopper Loader Date: Dec. 2018 Version: Ver.B (English)
-
Page 3: Table Of Contents
Contents General Description ..................7 1.1 Coding Principle ..................8 1.2 Feature ....................8 1.3 Technical Specifications ................ 10 1.3.1 SAL-U Hopper Base Installation Size .......... 11 1.3.2 Loading Capacity ................. 11 1.4 Safety Regulations ................12 1.4.1 Safety Signs and Labels .............. 12 1.5 Exemption Clause ................. - Page 4 4.3.3 Exit ....................21 4.3.4 Layer One Function List .............. 21 4.4 Function Setting ..................22 4.4.1 Enter Setting Mode ..............22 4.4.2 Edit Parameters ................22 4.4.3 Exit ....................22 4.4.4 Layer Two Function List .............. 22 4.5 Function Setting: Special Process ............24 4.5.1 Enter special process setting Mode ..........
- Page 5 Table 1-2: Hopper Base Installation Size Table ..........11 Picture Index Picture 1-1: Dimensions ..................10 Picture 1-2: Hopper Base Installation Size ............11 Picture 1-3: Loading Capacity ................11 Picture 2-1: Working Principle of SAL-U-(CA) ..........14 Picture 2-2: Working Principle of SAL-U-E(EA) ..........15 Picture 2-3: Photoelectric Switch ..............
- Page 6 6(33)
-
Page 7: General Description
Read this manual carefully before operation to prevent personal injuries or damage of the machine. SAL-U series self-contained hopper loader is suitable for conveying virgin material. It adopts stainless steel hopper to avoid material contamination. It looks nice, since its suface has been polished. In addition, it has a sound-proof blower cover to reduce noise produced in the process of operation. -
Page 8: Coding Principle
SAL-1U has an outer dia. Ф200mm/Ф7.9 inch base, transitional flange must be mounted when this series works with SHD-20U/40U. l All SAL-U series machines have cloth mesh filter and auto-spraying dust cleaner as standard equipments. For SAL-6U and above models, it is... - Page 9 Chapter 6 contains maintenance instructions for service engineers. Other chapters contain instructions for the daily operator. Any modifications of the machine must be approved by SHINI in order to avoid personal injury and damage to machine. We shall not be liable for any damage caused by unauthorized change of the machine.
-
Page 10: Technical Specifications
1.3 Technical Specifications SAL-U SAL-U-E Picture 1-1: Dimensions Table 1-1: Specifications SAL-1U SAL-3U SAL-6U SAL-12U SAL-1U-E SAL-3U-E SAL-6U-E SAL-12U-E Model Ver. Blower Type Carbon brush Blower Power (kW) 0.46 / 1.15 / 1.32 0.46 / 0.55 1.15 / 1.32 (50/60Hz) 0.55 Conveying Pipe Internal Dia. -
Page 11: Sal-U Hopper Base Installation Size
1.3.1 SAL-U Hopper Base Installation Size SAL-1U SAL-3U~12U SAL-U-E(EA) Picture 1-2: Hopper Base Installation Size Table 1-2: Hopper Base Installation Size Table Model D×D d×d SAL-1U-E 120×120 50×50 Ф40 SAL-3U-E 150×150 70×70 Ф55 SAL-6U-E 150×150 70×70 Ф55 SAL-6U-EA 150×150 70×70 Ф55 SAL-12U-E 180×180... -
Page 12: Safety Regulations
1.4 Safety Regulations Strictly abide by the following safety regulations to prevent personal injuries and damage of equipment. 1.4.1 Safety Signs and Labels All the electrical components should be installed by electrican. Turn off the main switch and control switch during maintenance. Warning! High voltage! This sign should be attached on the cover of control box! Warning! Caution! -
Page 13: Exemption Clause
The following statements clarify the responsibilities and regulations born by any buyer or user who purchases products and accessories from Shini (including employees and agents). Shini is exempted from liability for any costs, fees, claims and losses caused by reasons below: 1. Any careless or man-made installations, operation and maintenances upon machines without referring to the Manual prior to machine using. -
Page 14: Structure Characteristics And Working Principle
2. Structure Characteristics and Working Principle 2.1 Working Principle SAL-U series of self-contained Hopper Loader is suitable for conveying plastic granules. It mainly conveys materials by running the blower to produce differential pressure inside the material hopper. 2.1.1 Working Principle Diagram of SAL-U-(CA) Names of Parts:... -
Page 15: Working Principle Of Sal-U-E(Ea)
to clean the dust covering on the filter cloth and hopper inner wall. Then, the blower will start again. When lacking materials, the alarm light (9) on control box (11) will be on to sound an alarm. The equioment equipped with air acculamtor can increase air storage capacity to reinforce the dedusting efficiency of the auto dust cleaner. -
Page 16: Description Of Electrical Components
air for cleaning will flow into auto dust cleaner (12) from the air pipe connector (14) to clean the dust covering on the filter cloth and hopper inner wall. Then, the blower will start again. When lacking materials, the alarm light (9) on control box (11) will be on to sound an alarm. -
Page 17: Optional Accessories
2.3 Optional Accessories 2.3.1 Air Accumulator Air accumulator is fixed on SAL-6U/12U-(CA) which can reinforce the auto cleaning. Picture 2-5: Air Accumulator Specification of Air Accumulator: HxD=170x76mm Note: Please fix the air supply correctly. Air pressure not less than 4 bar. 17(33) -
Page 18: Installation And Debugging
3. Installation and Debugging This series of models only could be applied in working environment with good ventilation. Notice! Read this chapter carefully before installation of the machine. Install the machine by the following steps. Power supply should be fixed by qualified technicians! 3.1 Install the equipement on dryers or molding machines. -
Page 19: Installation Of Sal-U-E (A)
Note: Make sure that power supply is turned off before you connect the electrical wires. 3.1.3 Installation of SAL-U-E (A) Picture 3-2: Installation of SAL-U-E (A) Install the hopper loader (SAL-3U / 6U / 12U-E (A)) on the molding machine (refer to the above drawing) by fastening the 4 screws on the hopper base. -
Page 20: Application And Operation
4. Application and Operation 4.1 Start / Stop the Machine The start and stop of SAL-U series is controlled by start/stop switch on the control panel. 4.2 Keypad on the Control Panel Input values before selecting or canceling items. Input values before selecting or saving items. It is also used to clear the alarm when alarm occurs. -
Page 21: Exit
Press to confirm input setting and save input setting into the memory. It will switch to next item. If you did not change anything, press to enter the next item. Press to cancel input values and return to the setting screen. If you did not change anything, press to enter into next setting item. -
Page 22: Function Setting
Function Setting Enter Setting Mode 4.4.1 Start the machine, press for about 1 sec. to enter the initial setting mode. Hold both to enter parameter [F.05] in about 1 sec. The screen will alternately display [F.05] and the setting value respectively for 0.8 sec. If password [F.12] is set, the system will switch to [F.98]. - Page 23 Auto Cleaning Duration 0-99 F.07 Filter cleaning time after material suction seconds seconds Deafult 0: disable auto cleaning Action code: S.03 Para. Value Functions Note code Default/Range Frequency of auto cleaning. 1~99 F.C1 Cleaning once after several times of material suction. seconds seconds Check Discharging Time...
-
Page 24: Function Setting: Special Process
Function Setting: Special Process 4.5.1 Enter special process setting Mode Enter setting mode according to the steps descripped in 6.4. Press to choose [F.11]; then keep holding and then press for about 1 sec. to enter into the setting of [F.13]. The screen will alternately display [F.13] and the setting value respectively for 0.8 sec. -
Page 25: Special Process Function List
4.5.4 Special Process Function List Para. Value Functions Note code Default/Range Buzzer Tone Set buzzer tone F.13 0: uninterrupted sounding 1: Slow, interrupted sounding 2: Quick, interrupted sounding Buzzer Time F.14 Deafult 999: Unlimited time First carbon brush alarm When the carbon brush use [F.17] for a certain while, [F.14] will sound an alarm. -
Page 26: Description Of Operation Procedures
Note: The password can be set by youself. Please contact us, if the equipment is lockup by password. 4.6 Description of Operation Procedures 4.6.1 Operation Procedures The equipment is capable of working without keypad connected. The following is about action codes. Parameter Relative description... -
Page 27: Alarms
4.6.2 Alarms Alarm display and trouble shooting. Alarm light Code Possible reasons Solutions Remarks symbol Material shortage alarm 1. Add material. [F.9] 2. Increase material suction 1. The setting material time. suction time is too short. 3. Turn off the equipment and 2. -
Page 28: Trouble-Shooting
5. Trouble-shooting Trouble Shooting of single phase SAL-U. Failures Possible reasons Solutions 1. Failures caused by blower or 1. Replace or repair magnetic proximity switch. 2. Magnetic proximity switch/ Lacking material for a long photoelectric switch is in 2. Adjust or replace. time;... -
Page 29: Trouble Shooting Of 3-Phase Sal-U
Trouble Shooting of 3-phase SAL-U Failures Possible reasons Solutions 1. Failures caused by blower or 1. Replace or repair magnetic proximity switch. Lacking material for a 2. Magnetic proximity switch is in long time; blower does 2. Adjust or replace. poor contact or broken. -
Page 30: Maintenance And Repair
6. Maintenance and Repair Note: All the repair work should be done by professionals in order to prevent personal injuries and damage of the machine. 6.1 Cloth Filter Cloth Filter SAL-U 1. Loosen the snap hooks on the loader,uplift the hopper cover and externally rotate it along the axis, take out the filter bag and clear away the dust on it. -
Page 31: Glass Pipe
6.3 Glass Pipe Glass Tube Loosen the pipe clamp and take down the hopper; unscrew the screws of upper flange on the glass pipe. Then take out and clean the glass pipe. Note: Be careful not to break the glass pipe when cleaning. 6.4 Magentic Proximity Switch, Photoelectric Switch Magentic proximity switch When the indicator of the proximity switch doesn't work, check the switch and... - Page 32 1) Check if it’s in poor contact 2) Please replace a new switch if it’s damaged. 32(33)
-
Page 33: Maintenance Schedule
6.5 Maintenance Schedule 6.5.1 About the Machine Model Manufacture date Voltage Ф Frequency Power 6.5.2 Installation & Inspection Check if the suction pipe has been correctly connected. Check if that pipe clips is secured. is secured. Check if mounting base Electrical Installation Voltage: Fuse: One-phase:...
Need help?
Do you have a question about the SAL-U Series and is the answer not in the manual?
Questions and answers