
Related Manuals for Westfalia 900001506599


Summary of Contents for Westfalia 900001506599
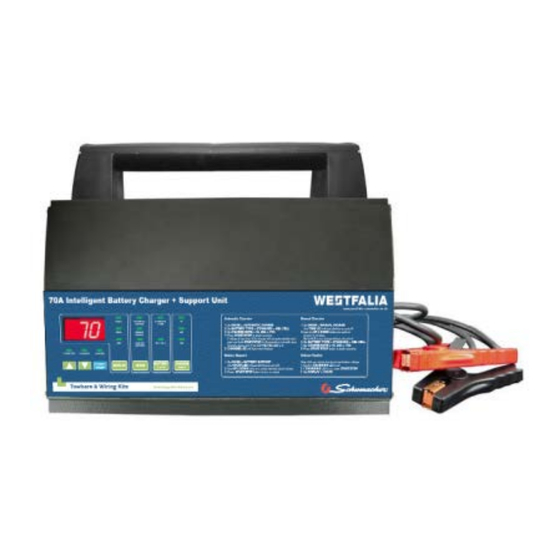
- Page 1 Owner’s Manual Part No. 900001506599 Battery Support Unit / Battery Charger 70 Amp Read the entire manual before using this product. Failure to do so can result in serious injury or death.
- Page 2 ...
-
Page 3: Table Of Contents
Contents 1. Important safety instructions .............. 4 2. Personal precautions ................. 5 3. Preparing to charge ................6 4. Charger location ................. 7 5. DC connection precautions ..............7 6. Follow these steps when battery is installed in vehicle..... 8 7. - Page 4 IMPORTANT: READ AND SAVE THIS SAFETY AND INSTRUCTION MANUAL. SAVE THESE INSTRUCTIONS – The 70 Amp BSU offers a wide range of features to accommodate your needs. This manual will show you how to use your charger safely and effectively. Please read, understand and follow these instructions and precautions carefully, as this manual contains important safety and operating instructions.
-
Page 5: Important Safety Instructions
IMPORTANT SAFETY INSTRUCTIONS Risk of electric shock or fire. Do not expose the charger to rain or snow. Use only recommended attachments. Use of an attachment not recommended or sold by Schumacher® Electric Corporation may result in a risk of fire, electric shock or injury to persons or damage to property. To reduce the risk of damage to the electric plug or lead, pull by the plug rather than the lead when disconnecting the charger. -
Page 6: Personal Precautions
Do not disassemble the charger; take it to a qualified service person when service or repair is required. Incorrect reassembly may result in a risk of fire or electric shock. (Call customer service at: +44 (0)1225 744 777.) PERSONAL PRECAUTIONS Risk of explosive Gas. -
Page 7: Preparing To Charge
PREPARING TO CHARGE Risk of contact with battery acid. Battery acid is a highly corrosive sulphuric acid. Consider having someone close enough by to come to your aid when you work near a lead-acid battery. Have plenty of fresh water and soap nearby in case battery acid contacts your skin, clothing or eyes. -
Page 8: Charger Location
3.10 Determine the voltage of the battery by referring to the vehicle owner’s manual and make sure that the output voltage selector switch is set to the correct voltage. If the charger has an adjustable charge rate, charge the battery in the lowest rate first. 3.11 Make sure that the charger cable clips make tight connections. -
Page 9: Follow These Steps When Battery Is Installed In Vehicle
FOLLOW THESE STEPS WHEN BATTERY IS INSTALLED IN VEHICLE. A spark near the battery may cause a battery explosion. To reduce the risk of spark near the battery: Position the AC and DC cables to reduce the risk of damage by the bonnet, door and moving or hot engine parts. -
Page 10: Follow These Steps When Battery Is Outside Vehicle
FOLLOW THESE STEPS WHEN BATTERY IS OUTSIDE VEHICLE. A spark near the battery may cause a battery explosion. To reduce the risk of spark near the battery: Check the polarity of the battery posts. The POSITIVE (POS, P, +) battery post usually has a larger diameter than the NEGATIVE (NEG, N, -) post. -
Page 11: Mounting Instructions
Connect the POSITIVE (RED) charger clip to the POSITIVE (POS, P, +) post of the battery. Position yourself and the free end of the cable you previously attached to the NEGATIVE (NEG, N, -) battery post as far away from the battery as possible –... -
Page 12: Control Panel
Slide all 4 brackets (Item 1) into the track on the back, from the right side, as shown above. Make sure the set screws (Item 2) are unscrewed enough so they do not scratch the surface of the housing. Measure what you are mounting the charger to before deciding where to locate the brackets (add an additional ¼... - Page 13 Digital Display The Digital Display gives a digital indication of voltage, current or time, depending on the DISPLAY function chosen. Display Button Use this button to set the function of the digital display to one of the following: • VOLTS (Voltmeter) The voltmeter indicates the voltage at the battery terminals.
- Page 14 Hold: This position defeats the timer function, allowing for continuous operation. Use when you want to charge more than 2 hours. Be sure to monitor the charging procedure and stop it when the battery is charged. Not doing so may cause damage to your battery or may cause other personal property damage or personal injury MODE Button...
- Page 15 • Set button to GEL CELL. The Gel Cell is similar to the AGM style because the electrolyte is suspended, but different because technically the AGM battery is still considered to be a wet cell. The electrolyte in a GEL cell has a silica additive that causes it to set up or stiffen. The re- charge voltages on this type of cell are lower than the other styles of lead acid battery.
-
Page 16: Operating Instructions
OPERATING INSTRUCTIONS Charger Operation NOTE: Once automatic charging or flash reprogramming has started, the buttons will not work until you turn off the output, with the exception of the Start/Stop ( ) button. (In MANUAL mode the “UP” and “DOWN” ) buttons also still operate normally.) When the display shows OFF, no buttons will work for five seconds as the charger automatically goes back to the default settings. - Page 17 Set the BATTERY TYPE to STANDARD or GEL CELL.4. Set the CHARGE RATE to 4A, 20A or 70A Press the Start/Stop ( ) button when you are ready to start charging. NOTE: Be sure to monitor the charging procedure and stop it when the battery is charged.
- Page 18 Automatic Charging Mode When an automatic charge is performed, the charger switches to the maintain mode automatically after the battery is charged. For a battery with a starting voltage under 1 volt, press and hold the START/STOP ( button for five seconds to start Automatic Charging, or use manual mode to pre-charge the battery for five minutes to get additional voltage into the battery for the charger to analyse.
- Page 19 Flash Reprogramming NOTE: Do not attempt to Flash Reprogram a vehicle that has a discharged or defective battery. Make sure that the vehicle battery is in good condition and fully charged before proceeding. Set MODE to FLASH REPROGRAM. (The VOLTS LED will start blinking.) Use “UP”...
- Page 20 Testing Sequence: There are seven basic steps required to test the battery state of charge: NOTE: The unit cannot be charging to test the battery voltage. With the charger unplugged from the AC outlet, connect the charger to the battery following the instructions given in Sections 6 and 7.
-
Page 21: Calculating Charge Time
CALCULATING CHARGE TIME Use the following table to more accurately determine the time it will take to bring a battery to full charge. First, identify where your battery fits into the chart. NR means that the charger setting is NOT RECOMMENDED. Find your battery’s rating on the chart below and note the charge time given for each charger setting. -
Page 22: Maintenance Instructions
MAINTENANCE INSTRUCTIONS 13.1. Before performing maintenance, unplug and disconnect the battery charger (see sections 6.7 and 7.6). 13.2. After use, unplug the charger and use a dry cloth to wipe all battery corrosion and other dirt or oil from the terminals, leads, and the charger case. -
Page 23: Troubleshooting
TROUBLESHOOTING PROBLEM POSSIBLE CAUSE REASON/SOLUTION No display and the LED’s Charger is not plugged in. Plug the charger into an AC are not lit. outlet. No power at the receptacle. Check for open fuse or circuit breaker supplying AC outlet. Display reads 0.0 volts. -
Page 24: Before Returning For Repairs
BEFORE RETURNING FOR REPAIRS 16.1. When a charging problem arises, make certain that the battery is capable of accepting a normal charge. Use a good battery to double check all connections, AC outlet for a full 230-volts, charger clips for correct polarity and the quality of the connections from the cables to the clips and from the clips to the battery system. - Page 25 Manufacturer does not provide any warranty for any accessories used with this product that are not manufactured by Schumacher Electric Corporation and approved for use with this product. This Limited Warranty is void if the product is misused, subjected to careless handling, repaired, or modified by anyone other than Manufacturer or if this unit is resold through an unauthorised retailer.
- Page 26 ...
- Page 27 ...
Need help?
Do you have a question about the 900001506599 and is the answer not in the manual?
Questions and answers