Table of Contents
Advertisement
Quick Links
Advertisement
Table of Contents

Subscribe to Our Youtube Channel
Related Manuals for Reolink C2


Summary of Contents for Reolink C2
-
Page 5: Table Of Contents
Chapter 1 General Introduction of the camera ............1 1.1 Product Specifications ..................1 1.2 Appearance ......................2 Chapter 2 Install Reolink Client App ................3 2.1 Connection Diagram ................... 3 2.2 Requirement for Mac ..................3 2.3 Installation ......................4 Chapter 3 Overview of client software ................ - Page 6 5.1 Basic Settings > OSD ..................38 5.2 Basic Settings > Encode .................. 38 5.3 Basic Settings > Image ..................39 Chapter 6 Advanced Settings ................... 39...
-
Page 7: Chapter 1 General Introduction Of The Camera
Chapter 1 General Introduction of the camera 1.1 Product Specifications Model Image Sensor 1/3" CMOS Sensor Display Resolution 2560 x 1440 (4.0Megapixel) Lens f=2.8-8mm Autofocus, F=1.6, With IRCUT Horizontal: 48° ~ 92° Angle of View Vertical: 27° ~ 50° Horizontal: 355° Pan/Tilt Angle Vertical: 105°... -
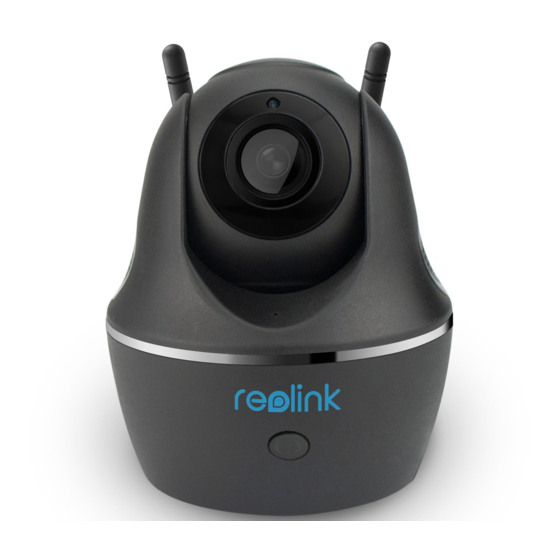
Page 8: Appearance
1.2 Appearance... -
Page 9: Chapter 2 Install Reolink Client App
For initial setup: Connect the camera to the LAN port on the router with Ethernet cable. Otherwise, Reolink Client App will not be able to find the camera. Make sure the camera and your Mac are connected to the same router. -
Page 10: Installation
Configure camera settings. In fact, Reolink Client App is so powerful that you don’t need to connect a monitor to the camera. You only need a Mac on the same local network where the Reolink camera is connected to. -
Page 11: Chapter 3 Overview Of Client Software
Chapter 3 Overview of Reolink Client App After the Reolink Client App is successfully installed on your Mac, you can use it to manage your camera. Now let’s have an overall look at the interface. 3.1 Live View Live View is the default interface you are in. Under Live View, users can view the video feed from the camera and go to configure the camera. -
Page 12: Pan/Tilt/Zoom And Preset
your network. Users can configure the cameras. For detailed configuration, please refer to Chapter 6. PTZ: The Pan/Tilt/Zoom panel. For detailed configuration, please refer to 3.1.2 Pan/Tile/Zoom and Preset. : Click to stretch the windows to full screen. Double click on the screen or hit ESC button on the keyboard to exit full screen. - Page 13 This pair of buttons are for you to adjust focus in/out. Set Preset Set - Set preset. Click the button to set a preset. Del - Delete preset. Click the button to delete the preset position if you do not need it. ...
-
Page 14: Local Settings
Cruise Path is based on Preset. 1. Click Id1 and click on Run/Stop button to start/stop your patrol. 2. Cl ick Id1 and click on Set button to go to settings of Cruise Path. 3. Name your Cruise Path under Name. Choose KeyPos from your Presets. -
Page 15: Local Settings > Local Record
3.2.1 Local Settings > Local Record Save Path: For local recording, you need to set a folder/path where the recording will be saved to. Click Browser to select an existing folder as Save Path. Or click Open to open the folder. It is advised you don’t modify the default settings. ... -
Page 16: Local Settings > Other Settings
Snap Path: Set where you would like the snapshots you take to be saved. Auto Add Device: Check this box then Reolink Client App will automatically scan the devices in LAN and display them on the Device List. Sometimes you need to click on icon to modify login password to login successfully. - Page 17 Play button. Pause button. Stop button. Alarm: Display recordings based on motion detection in timeline. Manual: Display recordings based on manual recording. Schedule: Display recordings based on schedule recording. Adjust audio volume. Watch the videos in Fluent or Clear mode. 3.
- Page 18 4. Click to take a snapshot if you would like to capture an image when playback. Click to download some clips from a camera/channel. 5. Select one or more clips and click Download to start.
-
Page 19: Chapter 4 Camera Configuration
Chapter 4 Camera Configuration Device List Device List is where the cameras/NVR will be displayed. With the five icons, you can refresh the camera, start/stop live view, configure Device Settings, edit and delete devices. This chapter will mainly introduce how to configure Device Settings/configure camera - clicking the button to enter Device Settings... -
Page 20: Device Settings > Display
Port: Media Port – If you never change this port number please leave it be default. Username: The username by default is admin. You can modify going to 4.8 Device Settings > User. Password: The password you set for the device. No password by default. You can modify password going to Modify Password. -
Page 21: Device Settings > Encode
Click Mask under Display: Enable/disable the masking function. How to set up Mask: 1. Move the cursor to where you want to cover with a mask, Left click mouse and move it to select the area. Click Clear All to clear all the areas you just selected. 2. - Page 22 Fluent Clear Stream Type: choose the stream type you want to edit. Clear (Main-Stream): the video feed that the camera will record and display. This is the higher-quality stream. Fluent (Sub-Stream): the video stream that the camera will send to remote devices via a network or the Internet.
-
Page 23: Device Settings > Network
Resolution: Choose the resolution for the selected stream type. Frame Rate (fps): Choose the frame rate for the selected stream type. Maximum Bitrate (kbps): Choose the bitrate for the selected stream type. The higher the bitrate is, the better quality the recording will be, and the more space each recording will take up on the hard disk. -
Page 24: Network Setting
4.3.2 Network Setting DHCP or Static: select how you want the camera to get an IP address. DHCP: Select this option when a DHCP server is installed on the network, an IP address will be automatically issued. This is the default way of the camera. ... -
Page 25: Email
Gateway Addr.: Enter a default gateway in dotted-decimal notation. DNS Mode-Manual: Enter a DNS address in dotted-decimal notation. DNS Mode-Auto: It will automatically assign a DNS address. 4.3.3 Email Set up the email account for the camera to send and receive image file or video file. Basic Settings Enable SSL or TLS: Whether the email server you’re using requires a secure link. - Page 26 Picture Only: When it is checked, there will be only picture sent, no subject, text or other information. Interval: The length of time that must elapse after the camera sends an email alert before it will send another. ...
-
Page 27: Ftp
Note: Click Save to save the email settings. 4.3.4 FTP The recorded file/snapshots can be uploaded to a FTP server. The FTP server can either be in local network or outside network. Basic Settings FTP server: Type in the IP address or URL for your FTP server, and input the correct port number. -
Page 28: Push
Ftp Test: Click to test whether the FTP is setup successfully. If test failed, please check your configuration and try again. Schedule Enable: Check this to enable FTP uploading. Normal: The camera will constantly record and upload to the FTP server during this time. -
Page 29: Ddns
Check Enable if you would like Push function. M.D: Stands for Motion Detection, when there is motion detected you will receive Push Notifications during this time. None: You will not receive Push Notifications even there is motion during this time. Click Save to save settings. - Page 30 Check Use DDNS to enable DDNS. Type: Choose the DDNS server type from no-ip and DynDNS. Server Domain: Enter the host name that you set up in your DDNS service. This is the address you use to access your network. ...
-
Page 31: Ntp
4.3.7 NTP NTP: Network Time Protocol. If you’ve got the camera connected to the Internet, you can have it automatically sync time with an online server. Domain or IP: The server or IP you intend to use to access the current date and time. The default server is pool.ntp.org. -
Page 32: Wi-Fi
4.3.8 Wi-Fi You can configure the Wi-Fi settings and connect your camera to a wireless network on this page. SSID: Wireless Network Name, it displays the wireless network name you are connected or intend to connect. Password: Input the Wi-Fi password of SSID you choose. ... -
Page 33: Others Setting
This ensures that the camera is always accessible when making changes. 4.3.9 Others Setting Media Port: Camera will use this port to login to the Reolink client App. The default value is 9000 and you can change it. ... - Page 34 Note: Don’t use PTZ and motion detection simultaneously. When the camera pans/tilts/zooms, the images will change. It will be taken mistakenly by camera as motion. Thus false alarms will be triggered. So it is not suggested you use PTZ and motion detection simultaneously.
- Page 35 Check the Motion Detection settings both during the day and night. In low-light conditions (or when your cameras are using infrared night vision) the Camera may be more or less sensitive to motion, depending on the circumstances. The difference might be very dramatic! ...
-
Page 36: Device Settings > Device Manage
2. Click and drag the left-click button on the mouse to select or de-select certain area you want. Click Save on the Alarm page to save and enable settings. 4.5 Device Settings > Device Manage Users can check the SD card info or initiate the SD card on this page. Note: If your camera doesn’t have a built-in SD card then you will not see this sub menu. -
Page 37: System > General
Note: Sometimes you need to check firmware version here under technical support’s instructions. 4.6.2 System > General Under General, users can set up the Video Standard and Time Settings, etc. Video Standard: Choose PAL or NTSC according to your area. If this is set incorrectly, the camera’s picture may be black and white, flickering or similar. -
Page 38: System > Dst
PAL: used in Western Europe and Australia. NTSC: used in the US, Canada and Japan. Time Zone: Choose the time zone where you are. Date Format: the format of the date you want the camera to show. ... - Page 39 Default Settings: Click it to reset the camera to factory default. How to upgrade firmware: 1. Download the firmware from Reolink official website: https://reolink.com/firmware/ 2. Go to Device Settings > System > Maintenance, click on Firmware Upgrade. 3. Click on Browser to locate the upgrading file (end with “.pak”).
-
Page 40: System > Reboot
Note: It is suggested you check Update Configure File when upgrading the firmware. By then the configurations set to the camera will be erased, you will have to need to configure the camera again. 4.6.5 System > Reboot Click the Reboot button on this page to restart the camera. 4.7 Device Settings >... -
Page 41: Device Settings > User
4.8 Device Settings > User There are three levels of users: the admin, administrators, and common users. If you log in as the admin, all users will be in the list. And you can modify all users’ access permission. ... - Page 42 Input Username, Password, and Confirm Password to add a user. Note: The maximum number of total users is 32. Modify Change the password for the users.
-
Page 43: Chapter 5 Basic Settings
Chapter 5 Basic Settings Click Basic Settings to display the sub menus including OSD, Encode and Image. 5.1 Basic Settings > OSD Please refer to 4.1 Device Settings > Display. 5.2 Basic Settings > Encode Please refer to 4.1 Device Settings > Display. - Page 44 5.3 Basic Settings > Image You can adjust the picture for live feed under this menu. Brightness: Changes how light the image appears to be. Contrast: Increases the difference between the blackest black and the whitest white in the image. ...
- Page 45 Anti-flicker: Use this feature if some devices such as TV screens and lights are flickering. 50GHz: Used for Australia and the UK. 60GHz: Used for the USA and Canada. Exposure: Select the exposure level of the camera based on pre-defined conditions. Select Manual to adjust shutter range and gain value of the camera manually.
Need help?
Do you have a question about the C2 and is the answer not in the manual?
Questions and answers