Avery Dennison Monarch ADTP2 EcoCut Instructions Manual
Hide thumbs
Also See for Monarch ADTP2 EcoCut:
- Instructions (4 pages) ,
- Operator's handbook manual (47 pages)
Advertisement
Quick Links
M O N A R C H
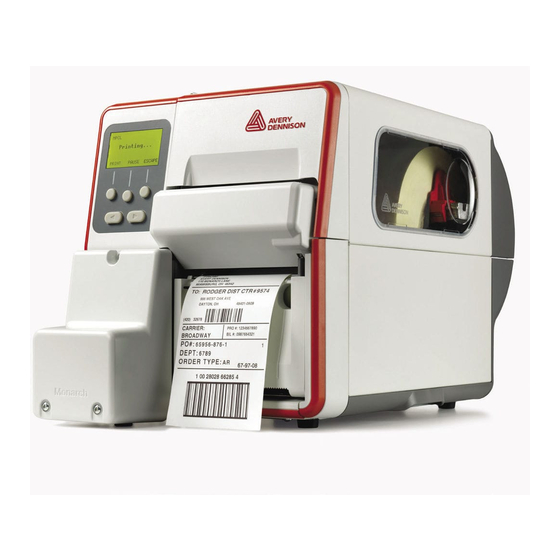
Use these instructions for the Avery Dennison® Monarch® EcoCut™ Tabletop Printer 2. EcoCut
is designed to cut through the label material, but not the liner.
EcoCut supplies do not have black marks or die cuts; set the printer's supply type to
continuous. W e recommend setting the printer's feed mode to on-demand (peel) mode or liner
take-up (peel with liner take-up) mode.
♦
The peel chute is already installed to operate in peel mode. The printer separates the label
from the liner and the liner feeds out the front of the printer.
♦
Remove the peel chute to operate in peel mode with liner take-up. The printer separates the
label from the liner and the liner is collected on a take-up reel near the supply roll.
♦
The feed length for each print job may vary, depending on the length set in the format or at
the printer's menu. See
Information in this document supersedes information in previous versions. Check our Web site
(www.printers.averydennison.com) for any updates.
CAUTION:
Do not place your fingers or any other objects into the cutter.
E c o C u t T i p s
♦
When removing printed labels, always lift up, using the cutter cover as a guide. Do not pull
the label to remove; doing so may cause the label to tear or the printer to lose registration.
♦
With 6.0 inch (or longer) labels in on-demand mode, static build-up may cause the label to
stick to the printer's peel door. Keep a finger below the printed label and lift up to remove,
using the cutter cover as a guide.
♦
Opening the printer's peel door may cause the next label to print in on-demand mode.
♦
Follow the cleaning instructions provided in this document for optimal performance.
♦
The EcoCut printer is only warranted with use of Avery Dennison-approved supplies.
♦
Standard die cut supplies (non-EcoCut) may be used with this printer, but you may need to
remove the cutter cartridge. See
EcoCut is a trademark of Avery Dennison Corporation. Classification: Avery Dennison - Public
TCADTP2ECOI Rev. AA 8/18
A D T P 2 E C O C U T
®
"Setting Supply
"Replacing the Cutter
©2018 Avery Dennison Corporation. All Rights Reserved.
I N S T R U C T I O N S
™
Options" for more information.
Cartridge" for more information.
Peel Door
Advertisement

Related Manuals for Avery Dennison Monarch ADTP2 EcoCut


Summary of Contents for Avery Dennison Monarch ADTP2 EcoCut
- Page 1 ™ ® Use these instructions for the Avery Dennison® Monarch® EcoCut™ Tabletop Printer 2. EcoCut is designed to cut through the label material, but not the liner. EcoCut supplies do not have black marks or die cuts; set the printer’s supply type to continuous.
- Page 2 O v e r v i e w Cutter Cover Motor Cover Cutter Cartridge Release Cutter Cartridge (dark gray) Cutter ‘Home’ Position Screw Cut Depth Dial (red) 2 Classification: Avery Dennison - Public...
- Page 3 203 dpi (6.0” to 16.0”) or 1800 to 4800 in 300 dpi (6.0” to 16.0”). Select Decrease the setting. Shortens the feed length. Increase the setting. Increases the feed length. Note: Press the left function button to change the amount (by 1, 10, or 100). Classification: Avery Dennison - Public 3...
- Page 4 Adjust the supply guides so they barely touch the supply. Turn the supply lever up to lock it in place. Using your fingers/thumbs, press the peel door tabs to open the printer’s peel door. 4 Classification: Avery Dennison - Public...
- Page 5 Liner Opening the printer’s peel door may cause the next label to print (if in on-demand mode). Classification: Avery Dennison - Public 5...
- Page 6 Use your fingernail or flat head screwdriver to push in on the right side of the peel chute. Slide that end out and remove the chute. Remove the Pe el Chute Pinch Roller Reattach the peel door. 6 Classification: Avery Dennison - Public...
- Page 7 Hold the supply while placing one end of the bail in a groove in the liner take-up reel. Gently rotate the bail counter-clockwise until the other end snaps into the corresponding groove. Classification: Avery Dennison - Public 7...
- Page 8 Gently pull the liner take-up bail off the liner take-up reel. Use scissors to cut the liner in front of the take-up reel. Remove the liner from the take-up reel. Reload supply and continue printing. 8 Classification: Avery Dennison - Public...
- Page 9 ♦ Using the printer’s control panel, press or . The cutter cartridge moves to the other side. If the cutter cannot be moved, contact Technical Support. Turn th e scr ew Classification: Avery Dennison - Public 9...
- Page 10 (132839) from the package. Do not touch the foam end of the wand. Use the foam end of the wand to dampen the inner edges of the supply guides, sensor, and underneath the ribbon deflector. 10 Classification: Avery Dennison - Public...
- Page 11 Using a small flat-head screwdriver, turn the cutter cartridge’s screw clockwise or counter-clockwise to move the cutter cartridge out of the way and clean the anvil’s other side. Turn th e scr ew Classification: Avery Dennison - Public 11...
- Page 12 Aft er Cleaning Ad h esive Build-up and Lab el Fragments Depth Roller Depth Roller Cutt er Blade Cutt er Blade Label Fragments Ad h esive Build-up 12 Classification: Avery Dennison - Public...
- Page 13 Press and hold the cartridge release button while pulling out the cutter cartridge. To insert a new cutter cartridge: Press and hold the cartridge release button while inserting the cutter cartridge. Classification: Avery Dennison - Public 13...
- Page 14 The limited warranty on the cutter cartridge is one (1) year from the date of shipment or one million cuts, whichever occurs first. The 1,000,000 cuts is only warranted with use of Avery Dennison-approved supplies. Contact your Avery Dennison Representative for more information about EcoCut supplies.
Need help?
Do you have a question about the Monarch ADTP2 EcoCut and is the answer not in the manual?
Questions and answers