fantastic furniture BUTTONS Manual
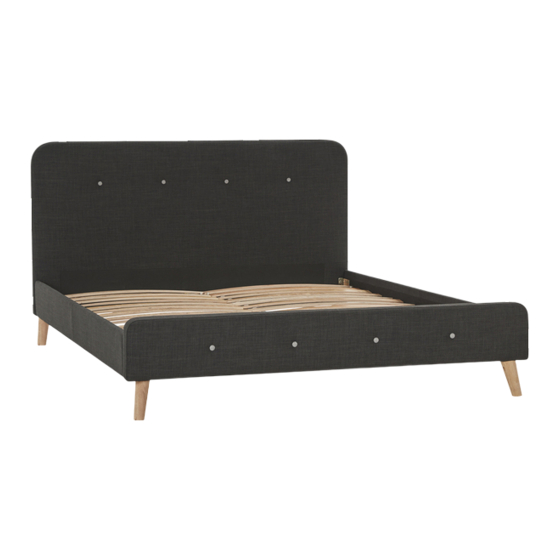
Queen bed; tallboy 5 drawer; bedside 2 drw
Hide thumbs
Also See for BUTTONS:
- Assembly instructions manual (9 pages) ,
- Quick start manual (9 pages)
Advertisement
Quick Links
Advertisement

Related Manuals for fantastic furniture BUTTONS


Summary of Contents for fantastic furniture BUTTONS
- Page 1 BUTTONS QUEEN BED...
-
Page 3: Assembly Checklist
Assembly checklist Read through the instructions carefully ad through the instructions care Make sure you have all the required tools. sure you have all the required before you begin. before you begin. Never use power tools unless instructed. r use power tools unless instruc Unless instructed, do not fully tighten screws nstructed, do not fully tighten Identify and lay out all of the components... - Page 4 Headboard (P1) Side Rail (P5) Timber Cross Rail Headboard/Footboard (P4) Leg (P3) Footboard (P2) Side Rail (P5) (P6) Bracket(P7) Headboard/Footboard Leg (P3) Bracket(P7) Support Leg (P8) Support Leg (P8) Parts list Timber Cross Rail (P4) ; Side Rail (P5) ; Center Rail (P6) ; Bracket (P7) ;...
- Page 5 8 x Washer M8 8 x Bolt 20mm Allen Key (H6) (H3) (H2) (P1) (P3) (H6) (P2) (H3) (H2) Attach legs (P3) to the bottom of headboard (P1) and footboard (P2). With 8 x Bolt 20mm (H3) and 8 x Washer (H6) by using Allen Key (H2). (H1) 8 x Bolt 18mm Allen Key...
- Page 6 (H2) (H3) 10 x Washer M8 2 x Bolt 20mm 4 x Nut M8 (H6) (H6) (H9) (H3) (P6) (P7) 1 x Spanner 4 x Bolt 40mm Allen Key (H2) (H5) (H2) (H8) (H5) Make sure the ends (H6) (P6) are aligned (H6) (P6)
- Page 7 (H6) (H3) (P6) (H2) 4 x Washer M8 4 x Bolt 20mm Allen Key (H6) (H3) (P1) (H2) (P5) (P2) Slot the Centre rail (P6) into the headboard (P1) and footboard (P2). Rotate 3/4 bolts (H3) using Allen Key (H2) to the headboard (P1) and footboard (P2).
- Page 8 (P9) (P9) First Step Second Step Third Step Side rail support wood (P6) Side rail support wood Fix slats (P9) on one end of the side rail (P5) and centre rail (P6). By using the plastic nut (H4) as stopper. Then spread out the slats and fix the slats to the other end of the side rail (P5) and centre rail (P6).
- Page 9 Step 9 PAGE 9...
- Page 10 Version 1.0 TOTO TALLBOY 5 DRAWER fantasticfurniture.com.au...
- Page 11 We’re thrilled you’ve chosen Fantastic Furniture to help create a home you’ll love Love it? Share it! Fantastic buy! Share how it looks at home for your chance to win a $250 Fantastic Furniture Gift Card! fantasticfurniture PAGE 2 fantasticfurniture.com.au...
-
Page 12: Useful Information
Assembly Checklist Read through the instructions carefully Make sure you have all the required tools. before you begin. Never use power tools unless instructed. Unless instructed, do not fully tighten Identify and lay out all of the screws until the item is fully assembled. components before you begin assembly. -
Page 13: What You Need
What you need to assemble the product Top Panel (P1) Rail (P6) DO NOT USE Right Rail Side (P5) Panel Other tools you need: Rail Phillips head screwdriver; Back Panel (P3) (P8) (P9) Parts list Back Panel Left Rail Top Panel (P1); (P9) Side (P7) - Page 14 Step 1 You will need (P1) 16 x Cam Bolts Phillips Head (H3) Screwdriver (P3) (P2) Attach 16 x Cam Bolts (H3) to Top Panel (P1), Left Side Panel (P2) and right Side Panel (P3) as shown. Tighten with a Phillips Head Screwdriver. Step 2 You will need 30 x Small...
- Page 15 Step 3 You will need (P5) (P8) (P6) 1 x Dowel 6 x Cam Nuts (H1) (H4) (P7) (P5) Phillips Head Screwdriver This is how a cam nut works..The head of the cam bolt goes into the open mouth of the cam nut. You then turn the cam nut so it tightens over the bolt.
- Page 16 Step 5 You will need (P3) (P5) 1 x Dowel 6 x Cam Nuts (H1) (H4) (P6) (P8) (P7) Phillips Head Screwdriver This is how a cam nut works..The head of the cam bolt goes into the open mouth of the cam nut. You then turn the cam nut so it tightens over the bolt.
- Page 17 Step 7 (P9) (P2) (P3) (P1) Slide Back Panel (P9) into the grooves between Panels (P2,P3) as shown. Step 8 You will need (P4) 4 x Dowels Phillips Head (H1) Screwdriver (P2) 4 x Long Screws (H2) (P3) Attach Bottom Panel (P4) to Panels (P2,P3) with 4 x Dowels (H1), and secure with 4 x Long Screws (H2).
- Page 18 Step 9 You will need 4 x Nuts Phillips Head (H10) Screwdriver (P10) 4 x Bolts (H11) (P11) Attach 2 x Legs (P11) to 2 x Rails (P10) with 4 x Cam Nuts (H10) and 4 x Bolts (H11). Tighten with a Phillips Head Screwdriver. Step 10 (P11) You will need...
- Page 19 Step 11 You will need 25 x Cam Bolts Phillips Head (H3) Screwdriver (P12) Attach 5 x Cam Bolts (H3) to Drawer Fronts (P12) as shown. Tighten with a Phillips Head Screwdriver. Step 12 You will need (P13) (P15) Phillips Head Screwdriver (P14) This is how a cam nut works..
- Page 20 Step 13 (P16) (P12) Slide the middle Drawer Base (P16) into the grooves between drawer sides as shown. Step 14 You will need 25 x Screws Phillips Head (H12) Screwdriver (P17) (P13) (P14) (P12) Attach Drawer Back (P17) to Drawer Sides (P13, P14) and Rail (P15) with 5 x Screws (H2), make sure that the groove lines up the whole way around the drawer.
- Page 21 Step 15 You will need (P14) 10 x DL 10 x DR Runners (H8) Runners (H9) 20 x Small Phillips Head (P13) Screws (H5) Screwdriver (P12) Attach 1 x DL Runner (H8) to Left Drawer Side (P13) and 1 x DR Runner (H9) to Right Drawer Side (P14) with 4 x Small Screws (H5) using a Phillips Head Screwdriver.
-
Page 22: Job Complete
Step 17 (P1) You will need (P9) 8 x Wedges 8 x Screws (H13) (H14) (P9) 1 x Safety 1 x Screw Strap (H15) (H16) 1 x Washer Phillips Head (H17) Screwdriver Attach 1 x Safety Strap (H15) to Top Panel (P1) with 1 x Screw (H16) and 1 x Washer (H17) by tightening with the Phillips Head Screwdriver. - Page 23 Version 1.0 TOTO Bedside 2 Drw www.fantasticfurniture.com.au...
- Page 24 Enjoy Your purchase from Australia’s Best Value Furniture Store www.fantasticfurniture.com.au PAGE 2...
- Page 25 Assembly checklist Read through the instructions carefully Make sure you have all the required tools. before you begin. Never use power tools unless instructed. Identify and lay out all of the components Unless instructed, do not fully tighten screws before you begin assembly. until the item is fully assembled.
- Page 26 What you need Top Panel to assemble the product (P1) DO NOT USE Other tools you need Back Panel Flat head screwdriver; Right Side (P5) Phillips head screwdriver; Panel (P3) Left Side Panel (P2) Bottom Panel (P4) 4 x Legs Right Drawer Drawer Back (P6)
- Page 27 Step 1 You will need 6 x Small 2 x CL Runner Screws (H5) Tracks (H6) (P2) Phillips head screwdriver Attach 2 x CL Runner Tracks (H6) to Left Side Panel (P2) with 6 x Small Screws (H5). Step 2 You will need 6 x Small 2 x CR Runner...
- Page 28 Step 4 You will need 4 x Cam Bolts Phillips head (H3) screwdriver (P1) Attach 4 x Cam Bolts (H3) into Top Panel (P1) using a Phillips head screwdriver. Step 5 You will need (P1) 4 x Dowels 4 x Cam Nuts (H1) (H4) (P5)
- Page 29 Step 6 You will need 4 x Wedges 4 x Medium (H10) Screws (H11) (P2) (P3) Phillips head (P5) screwdriver Secure Back Panel (P5) in place with 4 x Wedges (H10) using 4 x Medium Screws (H11). Step 7 (P6) (P6) (P6) (P4)
- Page 30 Step 8 You will need 4 x Cam Bolts Phillips head (H3) screwdriver (P7) Attach 4 x Cam Bolts (H3) to Drawer Front (P7) as shown. Step 9 (P8) You will need (P9) 4 x Cam Nuts Flat head (H4) screwdriver (P7) Insert 4 x Cam Nuts (H4) into the holes of Drawer Sides (P8, P9).
- Page 31 Step 11 You will need (P11) (P8) 4 x Long Phillips head Screws (H2) screwdriver (P9) Attach Drawer Back (P11) to Drawer Sides (P8, P9) with 4 x Long Screws (H2). Make sure that the groove lines up the whole way around the drawer. Step 12 (P9) You will need...
- Page 32 Step 13 Put the drawers into the chest. Step 14 Recommended weight capacity : 40KG. Job Complete! In the interest of our environment please dispose of all packaging thoughtfully. www.fantasticfurniture.com.au PAGE 10...
Need help?
Do you have a question about the BUTTONS and is the answer not in the manual?
Questions and answers