Table of Contents
Advertisement
Quick Links
Advertisement
Table of Contents

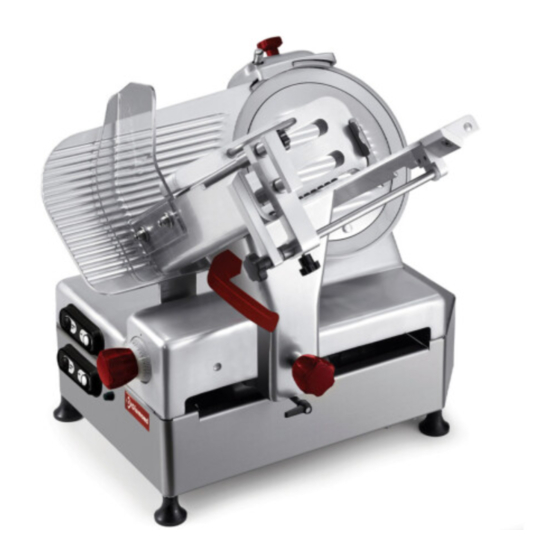
Summary of Contents for Diamond 300
- Page 1 07/2013 Mod: 350/AVV Production code: 15354C4R12VHL...
- Page 2 CE Professional Slicer SE AND MAINTENANCE MANUAL...
-
Page 3: Table Of Contents
5.1.1 - Using the controls FOREWORD - LOADING AND CUTTING THE PRODUCT - SHARPENING THE BLADE This manual is meant to provide Customers with information on the machine and its specifications, and provides all the necessary operating and CHAP. 6 - ROUTINE CLEANING page 24 maintenance instructions in order to ensure machine performance and - FOREWORD... -
Page 4: Chap. 1 - Receiving The Machine
CHAP. 1 - RECEIVING THE MACHINE Do not expose the package to humidity 1.1 - PACKAGING or rain (Fig. n°4). The slicer is shipped (Fig. n°1) on wooden pallets and packed in a cardboard box and covered in protective nylon. Packaging materials must be disposed of Fig. -
Page 5: Chap. 2 - Installation
signs of damage, open packaging and check that all parts are included. Do not 2.2 - POSITIONING overturn the package!! When handling the packed slicer, make sure the box is Position the pallet, with the slicer, on a lifted by the 4 corners (parallel to the ground). flat surface and remove (a) the cap from the slicer (Fig. -
Page 6: Electrical Connection
2.3 - ELECTRICAL CONNECTION (Fig. n°19) the position of two of the three phase wires (black, gray or Check that the specifications provided brown) in the plug. in the rating plate -serial number (Fig. n°17) and in the consignment and deliv- ery documents, correspond;... -
Page 7: Single-Phase 230 V. Tension Selection Vv
2.4.4 - Three-phase 380 V. tension selection VV 2.4.2 - Single-phase 230 V. tension selection VV Fig. n°21 Fig. n°23 2.4.3 - Three-phase 380 V. tension selection 2.5 - CONTROLS Controls of VV and Normal automatic slicer: 1. “I” blade ON push-button. 2. -
Page 8: Preliminary Check
2.6 - PRELIMINARY CHECK (see FIG.n°25) CHAP. 3 - INFORMATION ON THE MACHINE Before testing make sure the goods holder plate is well-blocked, after which test 3.1 - GENERAL SAFETY PRECAUTIONS functioning with the following procedure: The general precautions, although they appear obvious, are fundamental and must be respected when installing, using and servicing the machine and for deal- ing with possible malfunctions. -
Page 9: Construction Features
Before performing cleaning or mainte- If the slicer show signs of malfunctioning, it is recommended to turn it off and nance operations, disconnect the ma- not to use it, do not repair, but contact the “Service Centre”, details are pro- chine from the mains power supply. -
Page 10: Safety Devices Installed On The Machine
LEGEND: 4.2 - SAFETY DEVICES INSTALLED ON THE MACHINE Cap knob Knob for adjustable product holder 4.2.1 - Mechanical safety Sharpener cover Blade protection ring As far as mechanical safety is concerned, the slicer described in this manual Handguard Blade responds to: CEE 2006/42 machine directives. -
Page 11: Description Of The Machine
- A relay in the control circuit, that re- quires the machine to start up again in case of an accidental loss of electri- city (Fig. n°36). Relay in the circuit Fig. n°36 Although the professional CE slicers are equipped with standard measures for electrical and mechanical protection (for slicing and for cleaning and mainte- nance operations), RESIDUAL RISKS exist and cannot be completely elimi- nated. -
Page 12: Chap. 5 - Using The Machine
CHAP. 5 - USING THE MACHINE 5.2 - LOADING AND CUTTING THE PRODUCT WARNING: The goods to be cut are loaded on the hopper only with the gradua- 5.1 - OPERATIONAL CHECK ted hand grip at “0” and the motor stopped, being careful with the blade and the points. -
Page 13: Sharpening The Blade
5.3 - SHARPENING THE BLADE position so as to prevent parts of your body coming into contact with the blade (e.g. Fig. n°45); WARNING: Before proceeding with 11. push the “ON” pushbutton of blade; blade sharpening, evaluate RESIDUAL 12. push the hopper assembly (hopper + product pusher + stem) gently towards RISKS (chapter 4.2.2) concerning haz- the blade, without applying excessive pressure on the product with the ard of injury if the below instructions... -
Page 14: Chap. 6 - Routine Cleaning
N.B.: Blade dressing should not exceed more than 3/4 sec. to prevent damaging 6.2.2 - Cleaning the blade, the bladeguard and the ring (see FIG.n°53-54-55) the blade edge. CHAP. 6 - ROUTINE CLEANING WARNING: a pair of metal gloves must be worn when cleaning the blade (1) 6.1 - FOREWORD (Fig. -
Page 15: Cleaning The Sliceguard
6.2.3 - Cleaning the sliceguard CHAP. 7 - MAINTENANCE (Fig. n°56) To remove the sliceguard simply grasp 7.1 - FOREWORD the hand grip (1) and pull up so that the Before performing any maintenance operation: two pins unhook (2), and then extract a) Disconnect the plug from the mains to isolate the slicer from the mains power the sliceguard. -
Page 16: Putting The Machine Out Of Service
CHAP. 8 - SCRAPPING 8.1 - PUTTING THE MACHINE OUT OF SERVICE For whatever reason, you decide to put the slicer out of service, make sure nobody can use it: disconnect it from the mains and eliminate electrical connections . 8.2 - WEEE Waste of Electric and Electronic Equipment Directive 2002/95/EC, 2002/96/EC and 2003/108/EC on the restriction of the use of certain hazardous substances in electrical and electronic equipment, and waste...


