Table of Contents
Advertisement
Quick Links
Advertisement
Table of Contents

Related Manuals for Diamond 350/VCS-N


Summary of Contents for Diamond 350/VCS-N
- Page 1 07/2013 Mod: 350/VCS-N Production code: 15352502S...
- Page 2 Professional slicers CE Operating and Maintenance Manual...
- Page 3 CHAP. 6 - ROUTINE CLEANING page 23 INTRODUCTION - GENERALITIES - CLEANING THE MACHINE This manual has been re-presented to provide the Client with all the information on 6.2.1 - Cleaning the goods holder plate the machine and its safety regulations, and also the use and maintenance instructions 6.2.2 - Cleaning the blade, the bladeguard and the ring which permit using the machine in the best way and maintaining its efficiency...
- Page 4 CHAP. 1 - RECEIVING THE MACHINE Do not expose the package to humidity 1.1 - PACKAGE or rain (Fig. n°4). The slicer is shipped in a package which consists of (Fig. n°1): cardboard box, Fig. n°4 wooden pallets and protective nylon. They should be disposed of separately and according to the norms in force in the country of installation.
-
Page 5: Chap. 2 - Installation
2.2 - POSITIONING the documents, make a precise report on the damage to the machine. Do not overturn the package!! When transporting it make sure that it is firmly held Position the pallet, with the slicer, on a by the four corners (keeping it parallel to the floor). flat surface and take off (a) the cap from the slicer (Fig. -
Page 6: Electrical Connection
2.3.4 - Slicer with 230 V. three-phase motor 2.3 - ELECTRICAL CONNECTION The slicer is equipped with a feeding cable with a section area of 5x1mm²; length 1.5m and a blue 15A 3F + T CEI plug. Check that the data reported on the Connect the slicer 230 V. -
Page 7: Preliminary Check
2.5 - PRELIMINARY CHECK 2.4.1 - 115 V. tension selection Before testing make sure the goods holder plate is well-blocked, after which test functioning with the following procedure: “OFF” button Push the “ON” push-button and the “OFF” push-button Fig. n°22; check if by unscrewing the blade guard tie rod the machine stops working;... -
Page 8: Construction Features
Do not pull the slicer or the feeding cable The slicer must only be used by (Fig. n°29) to unplug it. trained personnel who know the Regularly check the state of the fee- safety norms contained in this manual ding cable;... -
Page 9: Safety Devices Installed On The Machine
LEGEND: 4.2 - SAFETY DEVICES INSTALLED ON THE MACHINE 1 - Cap 14 - Ring 4.2.1 - Mechanical safety 2 - Bladeguard tie rod hand grip 15 - Cap hand grip As far as mechanical safety is concerned, the slicer described in this manual 3 - Thickness gauge plane 16 - Goods presser hand grip responds to:... -
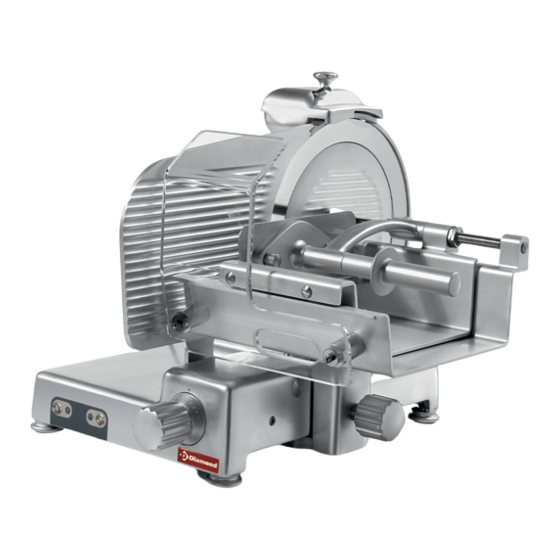
Page 10: Description Of The Machine
- A relay in the control circuit, that re- TAB. n°1 - DIMENSION MEASUREMENTS AND TECHNICAL FEATURES quires the machine to start up again in case of an accidental loss of electri- MODEL U.m. MT 300 - 330 - 350 city (Fig. - Page 11 TAB. n°2 - DIMENSION MEASUREMENTS AND TECHNICAL FEATURES TAB. n°3 - DIMENSION MEASUREMENTS AND TECHNICAL FEATURES MODEL U.m. MT 300 - 330 - 350 MODEL U.m. MT 300 - 330 - 350 Blade diameter Blade diameter 468x338 468x338 468x338 468x338 468x338 468x338 CxDxE...
-
Page 12: Operational Check
5.2 - LOADING AND CUTTING THE PRODUCT CHAP. 5 - MACHINE USE WARNING: The goods to be cut are loaded on the hopper only with the gradua- 5.1 - OPERATIONAL CHECK ted hand grip at “0” and the motor stopped, being careful with the blade and the points. -
Page 13: Sharpening The Blade
7. press the 2 push-buttons (2 and 3) or rough surface, therefore thecutting effort increases (chapter 5.3). contemporaneously for 3/4 sec. and release them in the same instant (Fig. n°46); 8. after having completed the sharpe- 5.3 - SHARPENING THE BLADE ning it is advisable to clean the grin- ders and the blade (chapter 6.2.3);... - Page 14 6.2.3 - Cleaning the sliceguard having taken off the trolley, the goods (Fig. n°52) holder plate can be carefully cleaned To remove the sliceguard simply grasp with warm water, the equipped deter- the hand grip (1) and pull up so that the gent or neutral detergent (pH 7).
-
Page 15: Chap. 7 - Maintenance
CHAP. 8 - DISMANTLING CHAP. 7 - MAINTENANCE 8.1 - OUT OF SERVICE 7.1 - GENERALITIES If for some reason it is decided to put the machine out of service, make sure that Before carrying out any maintenance operations it is necessary to: it cannot be used by anyone: detach or cut the electrical connections.
Need help?
Do you have a question about the 350/VCS-N and is the answer not in the manual?
Questions and answers