Table of Contents
Advertisement
Quick Links
Advertisement
Table of Contents

Related Manuals for Diamond VS


Summary of Contents for Diamond VS
- Page 1 02/2010 Mod: NT22G-ALZ/VV Production code: IR22 VS...
- Page 2 ÷ ÷ ÷ ÷ ÷ ÷ ÷ ÷ ÷ ÷ ÷ ÷ ÷ ÷ ÷ ÷ Reseller Stamp for Warranty...
-
Page 3: Declaration Of Conformity
In agreement with Regulation (EC) No. 1935/2004 of the European Parliament and of the Council of 27 October 2004 on materials and articles intended to come into contact with food. Type of appliance / Machine KNEADING MACHINE Trademark DIAMOND IF17-IF22-IF33-IF42–IF53 IFM7-IFM10-IFM17-IFM22-IFM33-IFM42-IFM53 IR17-IR22-IR33-IR42-IR53 Model... - Page 4 The equipment is constructed and tested in accordance with the safety regulations indicated in the reference European directives. This manual is for people who are going to install, use or service the mixers in order to make the best use of the product characteristics.
- Page 5 INDEX INTRODUCTION 1.1 SYMBOLS 1.2 INTENDED USE 1.3 PURPOSE AND CONTENT OF THE MANUAL 1.4 CONSERVATION OF THIS MANUAL 1.5 MANUAL UPDATING 1.6 GENERAL INFORMATION 1.7 RELEVANT SAFETY ACCIDENT PREVENTION REGULATIONS ADHERED TO 1.8 LEGAL WARRANTY 1.9 MANUFACTURER LIABILITY 1.10 USER CHARACTERISTICS 1.11 TECHNICAL ASSISTANCE 1.12 SPARE PARTS 1.13 IDENTIFICATION PLATE...
-
Page 6: Installation
HANDLING AND TRANSPORT PREPARATION OF THE INSTALLATION AREA 4.1 SAFETY PRECAUTIONS 4.2 MACHINE INSTALLATION LOCATION INSTALLATION 5.1 MIXER LEVELLING 5.2 EQUIPMENT HOOK-UP 5.2.1 Electrical connection 5.2.1.1 Earth connection MIXER START-UP AND USE 6.1 COMMAND PANEL DESCRIPTION 6.2 START-UP PHASE 6.3 WORKING PHASE 6.4 SAFETY DEVICES 6.5 SHUT-DOWN PHASE MAINTENANCE AND CLEANING... - Page 7 POSSIBLE FAULTS INFORMATION FOR DEMOLITION AND DISPOSAL WIRING DIAGRAM EXPLODED VIEW AND SPARE PARTS LIST TECHNICAL DATA...
-
Page 8: Intended Use
Dear customer, Above all, thank you for choosing our product and we would like to congratulate you on your selection. In order to better use your new mixer, please carefully read the information contained in this manual. INTRODUCTION The manufacturer reserves the right to change technical specifications and features and/or functions of the machine at any time without notice. -
Page 9: Purpose And Contents Of The Manual
constructed exclusively for use in food sectors for preparing dough made with grain flours, mainly for use in pizzerias, bakeries and pastry shops. The intended use described above and the machine configurations are the only uses authorized by the Manufacturer: do not use the machine in any way that does not adhere to the provided instructions. -
Page 10: Manual Updating
those responsible assembly maintenance. The User and Maintenance Manual is an integral part of the machine. Deterioration or loss: If necessary, request another copy of the manual from the manufacturer or dealer. Transfer of the mixer: If the mixer is to be transferred, the user is required to deliver this manual to the purchaser. - Page 11 number and the identification data of the machine reported on the plate. Liability: With delivery of this manual, the Manufacturer declines any and all liability, both civil and criminal, for accidents deriving from partial or total non-adherence to the specifications contained herein. The Manufacturer also declines all liability deriving from improper use of the machine or incorrect use by the user, unauthorized modifications and/or repairs,...
- Page 12 foreseen by the specific laws in the state where the machine is installed. RELEVANT SAFETY ACCIDENT PREVENTION REGULATIONS TO BE ADHERED Directive 2006/95/EC "Concerning harmonization of legislation of the member States in relation to electrical materials destined for use within certain voltage limits”. Directive 2004/108/EC "Concerning harmonization of legislation of the member States in relation to electromagnetic...
-
Page 13: Legal Warranty
Directive 2002/96/EC and 2003/108/EC “Concerning the disposal of electrical and electronic equipment (RAEE) and subsequent amendments.” Directive EN453:2000 “Machines for food industries - Mixers for food products – safety and hygiene requirements”. LEGAL WARRANTY The period of the warranty is in agreement with the European community standards and starts from the date of the invoice issued at the time of purchase. -
Page 14: Manufacturer Liability
Failure to follow the instructions contained in this manual will cause the warranty to be considered immediately null and void. MANUFACTURER LIABILITY The manufacturer declines all civil and criminal liability, either direct or indirect, due to: - installation that does not conform to local currently enforced regulations and safety directives;... -
Page 15: Technical Assistance
Be sure to keep children away from the machine while it is operating. TECHNICAL ASSISTANCE 1.11 The Manufacturer is able to resolve any problems that occur regarding use and maintenance of the machine for its entire lifespan. The central headquarters can provide information about the nearest authorized assistance centre. -
Page 16: Safety Recommendations
MIXER DELIVERY 1.14 The mixer is supplied in a wooden package bound with straps to a wooden platform that can be moved using forklifts and/or other equipment. Inside of the package, in addition to the machine, there are also instructions for use, installation and maintenance, as well as the declaration of conformity in accordance with the machines directive. - Page 17 the area must have water and heat sources at an adequate distance; ventilation and lighting must be suitable and comply with the hygiene and safety standards foreseen by current laws; the floor must be flat and compact to facilitate thorough cleaning; there must be no obstacles of any kind in the immediate vicinity of the machine that could affect the machine's normal ventilation.
-
Page 18: Handling And Transport
At the end of each working shift, before cleaning, maintenance or transfer operations, disconnect the electrical power. WARNINGS FOR THE MAINTENANCE OPERATOR - Follow the instructions indicated in this manual. Always use personal safety equipment and other protective equipment. Before starting any maintenance operations, make sure that the mixer, if it was used, has cooled down (electric motor). -
Page 19: Safety Precautions
Make certain that the lifting equipment has a load capacity that is superior to the weight of the machine to be lifted. The operator manoeuvring the lifting equipment is responsible for lifting the load. Leave a free space of approximately 50 cm around the mixer to facilitate its use, cleaning and maintenance operations. - Page 20 The user must comply with all local, national and European safety regulations. The equipment must be installed on floors with adequate load capacity. The assembly and disassembly instructions for the mixer are reserved for specialized technicians. It is always recommended that users contact our assistance service for requesting qualified technicians.
- Page 21 The minimum distance that must be respected between the mixer and the surrounding walls or other machines must be approximately 50 cm. INSTALLATION Installation must be carried out by qualified personnel in compliance with local, national and European regulations. 5.1 MIXER LEVELLING If the machine is unstable due to floor irregularity, adjust the support feet or wheels by inserting rubber pieces.
-
Page 22: Equipment Hook-Up
5.2 EQUIPMENT HOOK-UP 5.2.1 Electrical connection It is sufficient to connect the power supply cable to the electrical mains power supply. The electrical outlet must be easy to access, no moving should be necessary. To overcome the phenomenon that generate transient changes in current and in the presence of a speed variator (inverter) fit on the machine, it is necessary that the electric system is equipped... - Page 23 5.2.1.1 Earth connection DANGER It is mandatory that the electrical system is equipped with an earth connection and differential switch that comply with current laws. MIXER START-UP AND USE 6.1 COMMAND PANEL DESCRIPTION...
-
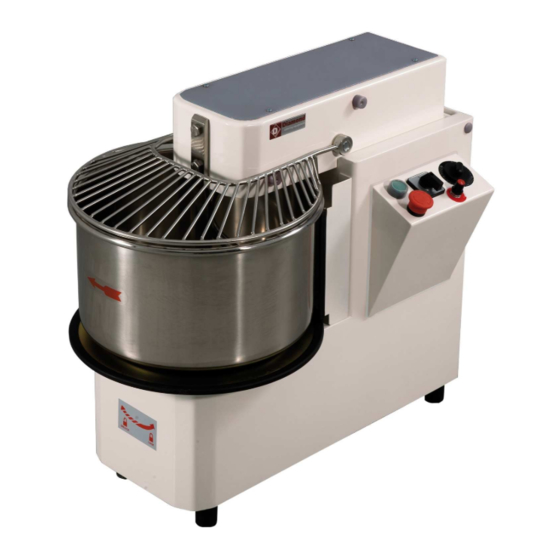
Page 24: Start-Up Phase
The panel consists of a main switch (A), a green start button (B), a timer (C), a red emergency stop button (D) and a speed adjustment knob (E). The panel is used to turn the mixer on and off, and regulates functioning and settings. - Page 25 6.3 WORKING PHASE Prior to starting each work cycle, make sure that the machine is perfectly clean, especially the surface of the bowl, the spiral and the dough breaker in contact with food products. Whenever necessary, proceed with cleaning in accordance with the description in chapter 7.
- Page 26 2) as the dough is mixed, decrease the speed (handle towards "-" ) and add any necessary water; 3) adjust the dough by adding water or flour based on your needs. The action created by the spiral, synchronized with bowl rotation, obtains a mixture of flour, water, salt, yeast and other food ingredients in order to obtain the desired dough consistency.
-
Page 27: Safety Devices
is released; lift the head using the lower piston; turn the disc located under the bowl in a clockwise direction and remove the bowl to remove the dough. After finishing machine cleaning, reassemble the bowl by following the previously described steps in the reverse order, making sure that the pins under the bowl are correctly inserted into the holes in the machine. - Page 28 - the machine stops and will not start when the bowl is removed; - when pulling the bowl and the head slightly upwards, they remain blocked in their positions. 6.5 SHUT-DOWN PHASE To shut down the mixer, press the red emergency button D and turn the main switch knob A to “0”.
- Page 29 MAINTENANCE AND CLEANING 7.1 SAFETY PRECAUTIONS Before performing any maintenance operations, including cleaning, take the following precautions: - make certain that the main switch is off; - make certain that the electrical power cannot be accidentally reactivated. Disconnect the plug from the electrical power socket;...
- Page 30 grade paper towels, and then pass over all of the aforementioned parts first and then the entire machine with a soft clean cloth soaked with a specific disinfectant for food preparation areas. It is recommended to never use chemical products which are not specific for food preparation areas, abrasives or corrosives for any reason.
- Page 31 Unscrew the screws and remove the panel over the head and the panel in the rear of the machine. Deposit a reasonable quantity of suitable grease inside of the chain and make sure to lubricate all of the chain links. Once finished, reassemble the two panel and tighten the screws.
-
Page 32: Possible Faults
POSSIBLE FAULTS Fault Cause Remedy Check the main switch, Lack of electrical energy socket, plug and power supply cable Turn the button in the The emergency stop direction indicated by the button is blocked arrow The machine does Correctly lower both the not start The protection grid and/or protective grid and the... -
Page 33: User Information
the machine is installed , and any possible necessity for registration of demolition. WARNING: All disassembly operations for demolition must take place with the machine shut-down and disconnected from the electrical power supply. - remove all electric equipment; - separate the accumulators on the electronic cards; - dispose of the machine structure through authorized entities;... - Page 34 The symbol of the crossed out bin on the equipment or its packaging indicates that at the end of its useful life cycle, the product must be collected separately from other waste. The collection of this equipment at the end of its life cycle is organised and managed by the manufacturer.
-
Page 35: Electrical System
ELECTRICAL SYSTEM... -
Page 37: Exploded View And Spare Parts List
EXPLODED VIEW AND SPARE PARTS LIST IF 17-22-33-42-53 VS... - Page 38 IR 17-22-33-42-53 VS...
- Page 39 MOD. TF17 TR17 TF22 TR22 TF33 TR33 TF42 TR42 TF53 TR53 POS. 8303000 8300000 8300010 8300010 8300020 8300020 8300030 8300030 8300040 8300040 8303050 8300050 8300060 8300060 8300070 8300070 8300080 8300080 8300090 8300090 8300100 8300100 8300100 8300100 8300100 8300140 8301760 8300150 8300160 8300170 8300180...
- Page 40 8300830 8300730 8300830 8300730 8300840 8300740 8300840 8300740 8300840 8300740 8300630 8300630 8300630 8300630 8300630 8300630 8300630 8300630 8300630 8300630 8300620 8300620 8300620 8300620 8300620 8300620 8300620 8300620 8300620 8300620 8301710 8302140 8301710 8302140 8301710 8302140 8301710 8302140 8301710 8302140 8300790 8300790 8300800...
-
Page 41: Technical Data
TECHNICAL DATA Bowl Machine Dough Bowl Mixing Model Power Voltage Weight dimension dimensions weight capacity time ø x h l x p x h IF17VS 0,75 230-400 36x67x68 73,5 32x21 IF22VS 1,1 1,5 230-400 40x69x68 35x21 IF33VS 1,1 1,5 230-400 46x80x76 40x26 IF42VS 230-400 49x83x76...
Need help?
Do you have a question about the VS and is the answer not in the manual?
Questions and answers