Table of Contents
Advertisement
Quick Links
Advertisement
Table of Contents

Related Manuals for Diamond Giotto GT110/1D


Summary of Contents for Diamond Giotto GT110/1D
- Page 1 07/2013 Mod: RED07/35 Production code: GT110/1D...
- Page 2 made in Italy Giotto Manuale installazione e uso User and installation manual Installations- und Gebrauchshandbuch...
-
Page 4: Table Of Contents
INDICE Premessa ................................. 6 Avvertenze iniziali ............................7 Dati tecnici ............................ 8 - 9 - 10 - 11 Caratteristiche generali ..........................12 Predisposizioni per l’installazione ......................13 Avvertenze per l’installatore ........................14 Scarico e trasporto / Disimballo / Estrazione Pallet ................... 15 Scorrimento / Posizionamento / Fissaggio verricello / Aggancio verricello .......... - Page 5 INDEX Introduction ..............................6 Initial instructions ............................7 Technical data ..........................8 - 9 - 10 - 11 General Specifications ..........................12 Installation requirements ..........................13 Instructions for the installer ........................14 Unloading and transport / Unpacking / Pallet extraction ................. 15 Slipping / Positioning / Winch fastening / Winch hooking ................
- Page 6 INHALTSVERZEICHNIS Vorwort ................................6 Einleitende Hinweise ............................7 Technische Daten ......................... 8 - 9 - 10 - 11 Allgemeine Eigenschaften ........................... 12 Vorbereitungen für die Installation ......................13 Hinweise für den Installateur ........................14 Entladen und Transport / Auspacken / Herausziehen der Palette ............15 Verschieben / Aufstellung / Befestigung der Winde / Einhängen der Winde ...........
-
Page 7: Premessa
Premessa Introduction Vorwort La lingua originale del presente manuale è The present manual was originally written Die Originalsprache dieser Anleitung ist l’italiano. Altre lingue sono traduzioni. in Italian. All other languages are transla- italienisch. Bei allen anderen Sprachen tions. handelt es sich um Übersetzungen. Ci complimentiamo con Lei per aver scelto un prodotto progettato e realizzato con Congratulations on selecting a product... -
Page 8: Avvertenze Iniziali
Avvertenze iniziali Initial instructions Einleitende Hinweise ATTENZIONE! ATTENTION! ACHTUNG! Il mancato rispetto di quanto descritto nel Failure to comply with what is described in Eine Nichteinhaltung der Angaben in der presente libretto, può compromettere la this handbook could jeopardise safety. vorliegenden Anleitung kann die Sicher- sicurezza. -
Page 9: Dati Tecnici
FORNO ELETTRICO ELECTRIC OVEN ELEKTRO-BACKOFEN DATI TECNICI TECHNICAL DATA TECHNISCHE DATEN GT110 GT140 Modello Model Modell Ø Diametro Cooking chamber Durchmesser der 1100 (43,3) 1400 (55,1) mm (inch) camera di cottura diameter Backkammer Altezza da terra Height of hearth Höhe der Backfläche mm (inch) 1350 (53,1) 1350 (53,1) - Page 10 CAPPA HOOD HAUBE ATTENZIONE: ATTENTION: ACHTUNG: La cappa con aspiratore (AS) non è presente The hood with extractor fan (AS) is not Die Haube mit Sauggebläse (AS) ist an der nella versione per il mercato americano. present with the version sold on the Ausführung für den amerikanischen Markt American market.
- Page 11 GIOTTO GT 110 VISTA FRONTALE VISTA LATERALE FRONT VIEW SIDE VIEW VORDERANSICHT SEITENANSICHT 1310 (in. 51,5) OPTIONAL 1684 (in. 66,2) 123 (in. 4,83) VISTA POSTERIORE PIANTA REAR VIEW PLAN VIEW RÜCKANSICHT GRUNDRISS 655 (in. 25,8) 1410 (in. 55,4) 262 (in. 10,3) 1440 (in.
- Page 12 GIOTTO GT 140 VISTA FRONTALE VISTA LATERALE FRONT VIEW SIDE VIEW VORDERANSICHT SEITENANSICHT 1610 (in. 63,39) OPTIONAL 406 (in. 15,98) 123 (in. 4,83) VISTA POSTERIORE PIANTA REAR VIEW PLAN VIEW RÜCKANSICHT GRUNDRISS 1708 (in. 67,24) 805 (in. 31,69) 264 (in. 10,41) 1719 (in.
-
Page 13: Caratteristiche Generali
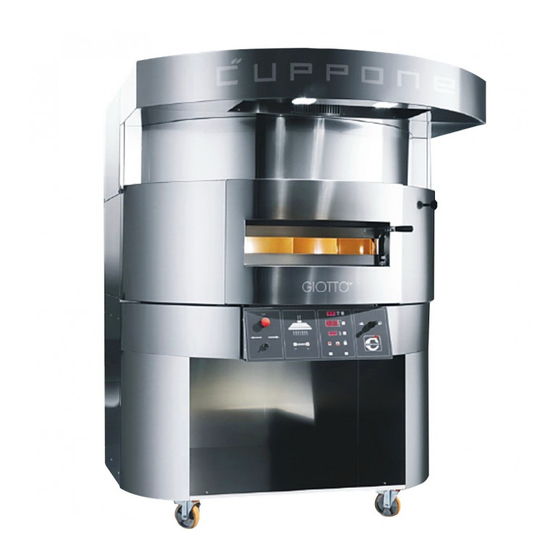
Caratteristiche generali General Specifications Allgemeine Eigenschaften 1 Cappa aspirante (optional) 1 Hood exhaust fan (optional) 1 Abzugshaube (optional) 2 Piano Girevole 2 Rotating surface 2 Drehscheibe 3 Uscita fumi 3 Fume outlet 3 Rauchgasaustritt 4 Regolatore uscita fumi 4 Fume outlet regulator 4 Regler Rauchgasaustritt 5 Porta 5 Door 5 Tür... -
Page 14: Predisposizioni Per L'installazione
Predisposizioni Installation Vorbereitungen per l’installazione requirements für die Installation Prima di procedere con l’installazione veri- Before starting the installation, check the fol- Vor dem Fortfahren mit der Installation prüfen, fìcare le seguenti condizioni necessarie per il lowing conditions that are necessary for prop- ob die nachfolgenden notwendigen Bedingun- corretto funzionamento e manutenzione del er oven operation and maintenance:... -
Page 15: Avvertenze Per L'installatore
Avvertenze per Instructions for Hinweise für l’installatore the installer den Installateur Gli impianti di gas, acqua, energia elettrica The gas, water, electrical systems and the Die Anlagen für Gas, Wasser und Strom, e i locali di installazione degli apparecchi rooms where the equipment will be in- sowie die Räume für die Installation der devono rispondere alle norme di sicurezza, stalled must comply with the safety, ac-... -
Page 16: Scarico E Trasporto / Disimballo / Estrazione Pallet
Scarico e trasporto Unloading and transport Entladen und Transport Disimballo Estrazione Pallet Unpacking Pallet extraction Auspacken Herausziehen der Palette Giotto IT - UK - DE 01-13... -
Page 17: Scorrimento / Posizionamento / Fissaggio Verricello / Aggancio Verricello
Scorrimento Posizionamento Slipping Positioning Verschieben Aufstellung Aggancio verricello Fissaggio verricello Winch hooking Winch fastening Einhängen der Winde Befestigung der Winde 1 x M10 Giotto IT - UK - DE 01-13... -
Page 18: Rotazione Forno / Fissaggio Forno Con Perni
Rotazione forno Oven rotation Drehen des Ofens 2 x M10 Fissaggio forno con perni Oven fastening with pins Befestigung des Ofens mit Stiften 2 x M10 Giotto IT - UK - DE 01-13... -
Page 19: Disimballo Rivestimenti / Fissaggio Staffe
Disimballo rivestimenti Coating unpacking Auspacken der Verkleidungen Fissaggio staffe Bracket fastening ATTENTION! Befestigung der Bügel Giotto IT - UK - DE 01-13... -
Page 20: Fissaggio Pannelli Posteriori, Laterali, Interni, Fondo
Fissaggio pannelli posteriori e laterali Rear and side panel fastening Anbringung hintere und seitliche Paneelen 16 x M?? Fissaggio pannelli interni e inserimento fondo Internal panel fastening and insertion of the bottom Befestigung der inneren Paneelen und Einlegen des Bodens 16 x M?? Giotto IT - UK - DE 01-13... -
Page 21: Fissaggio Pannelli Anteriori / Rimozione Pellicola Protettiva E Pulizia
Fissaggio pannelli anteriori Front panel fastening Befestigung der vorderen Paneelen 20 x M?? Rimozione pellicola protettiva e pulizia Removal of the protective film and cleaning Entfernen der Schutzfolie und Reinigung ATTENTION Sballare il forno e togliere con cura la pellicola Unwrap the oven and carefully remove the Den Ofen auspacken und die Schutzfolie vor- protettiva. -
Page 22: Posizionamento / Posizionamento E Collegamento Cappa (Optional)
Posizionamento Positioning Positionierung Mantenere tra il forno e le altre apparecchia- Ensure that you keep a distance of at least 50 Halten Sie zwischen dem Ofen und anderen ture o materiali infiammabili, una distanza mi- mm between the oven and other equipment Apparaten oder entzündlichen Materialien ei- nima di almeno 50 mm. -
Page 23: Allacciamento Elettrico E Posizionamento Definitivo
Allacciamento elettrico e posizionamento definitivo Electrical connection and final positioning Elektroanschluss und endgültige Aufstellung AC 3 N 400 AC 3 N400 AC 3 230 AC 3 208 US AC 3 208 US AC 3 230 Collegamento elettrico Electrical connections Elektroanschluss Il collegamento elettrico deve essere eseguito Only qualified personnel must carry out elec- Der elektrische Anschluss muss von Fachper-... -
Page 24: Scarico Fumi / Scarico Fumi Sotto Cappa A Soffitto / Con Cappa (Kgt)
Scarico fumi Fume discharge outlet Dampfablass Si consiglia inoltre di collegare il tubo di sca- We advise connecting the oven hood dis- Wir empfehlen außerdem, das Abzugsrohr rico della cappa del forno ad un condotto di charge pipe to a fume extraction duct or to der Haube des Ofens an einen Schornstein evacuazione vapori o di inserire il forno stesso place the oven itself under a hood exhaust fan. -
Page 25: Disimballo Piastre / Attivazione Alimentazione
Disimballo piastre Attivazione alimentazione Selettore senso di rotazione Unpacking Base Bricks Power supply activation piano girevole Auspacken Fliesen Aktivierung Speisung Rotating surface rotation direction selector Auswahlschalter Drehrichtung 230V Drehscheibe 400V ATTENZIONE! ATTENTION! ACHTUNG! Non spegnere mai il forno Never switch the oven off Den Ofen niemals mit der con il tasto ON/OFF (20) using the ON/OFF button... -
Page 26: Inserimento Delle Prime 5 Piastre / Piastra Centrale
Inserimento delle prime 5 piastre Insertion of the first 5 plates Einsetzen der ersten 5 Fliesen Avviare la rotazione del piano girevole Attendere 1/8 di giro. Rotate the rotating surface Turn it 1/8 of the way round. Die Rotation der Drehscheibe starten 1/8 Umdrehung warten. -
Page 27: Inserimento Ultime 3 Piastre
Inserimento ultime 3 piastre Insertion of the last 3 plates Einsetzen der letzten 3 Fliesen Avviare la rotazione del piano girevole Attendere 1/8 di giro. Rotate the rotating surface Turn it 1/8 of the way round. Die Rotation der Drehscheibe starten 1/8 Umdrehung warten. -
Page 28: Precollaudo / Quadro Comandi / Descrizione Comandi
Precollaudo Pre-test Vorabnahme Prima della consegna al cliente, il forno viene Prior to delivery to the customer, the oven is Vor der Auslieferung an den Kunden wird der collaudato presso le officine di costruzione sia tested at the manufacturer’s workshops both Ofen in den Konstruktionswerkstätten geprüft, sotto il profilo della funzionalità... -
Page 29: Vorabnahme / Bedienblende / Beschreibung Der Bedienblende
13 12 Descrizione comandi Control panel description Beschreibung der Bedienblende 5 - Display 1 5 - Display 1 5 - Display 1 visualizza il valore della percentuale di this displays the operating percentage of Zeigt den Prozentwert für den Betrieb funzionamento delle resistenze superiori. - Page 30 12 - Tasto + 12 - Key + 12 - Taste + permette di aumentare la temperatura allows you to increase the cooking sur- Ermöglicht das Erhöhen der Tempera- del piano di cottura, il tempo di interven- face temperature, the time remaining tur der Backplatte, der Temperatur, bei to dell’avvisatore acustico di fine cottura before intervention of the acoustic signal...
-
Page 31: Avvertenze Per L'utilizzatore
Avvertenze per Instructions for Hinweise für l’utilizzatore the user den Nutzer Questa apparecchiatura è stata concepita esclu- This equipment was designed exclusively for Dieses Gerät wurde ausschließlich für das indu- sivamente per la cottura industriale e professio- industrial and professional cooking of pizzas or strielle und professionelle Backen von Pizzen nale di pizze o prodotti alimentari analoghi con similar food products as per the methods indi-... -
Page 32: Accensione
Turning on Einschaltung Accensione When the on/off button (20) is pressed, the Wird die On/Off-Taste (20) gedrückt, schaltet Premendo il tasto on/off (20) la scheda ac- cende tutti i display e incomincia a regolare in card lights up all the displays and starts regu- die Karte alle Displays ein und beginnt mit der base ai dati visualizzati. -
Page 33: Impostazione Parametri
Impostazione parametri Parameter settings Einstellen Parameter Mediante i tasti “+” e “-” è possibile incremen- Using the “+” and “-” keys, it is possible Mithilfe der Tasten “+” und “-” können die tare o decrementare i valori dei display corri- to increase or decrease the display values Werte des jeweiligen Displays erhöht oder ver- spondenti:... -
Page 34: Regolazioni Piano Cottura
Regolazioni piano cottura Baking surface adjustments Einstellungen Kochplatte Agendo sul selettore (2) si può selezionare il Selector (2) is used to select the direction of Durch betätigen des Wahlschalters (2) kann senso di rotazione del piano cottura. rotation of the baking surface. die Drehrichtung der Kochplatte ausgewählt werden. -
Page 35: Illuminazione / Cicalino Di Fine Cottura
Illuminazione Lights Beleuchtung Il tasto luce forno (17) permette di accende- The oven light key (17) allows you to turn Die Taste Licht Ofen (17) ermöglicht das Ein- re e spegnere la luce della camera di cottura the cooking chamber light on and off with the und Ausschalten des Lichts der Backkammer so- sia a forno acceso che spento. -
Page 36: Selezione Programma
Selezione programma Selection mode Programmauswahl Premendo contemporaneamente i tasti luce By pressing the light keys (17) and hood Durch gleichzeitiges Drücken der Tasten Licht (17) e luce cappa (18), si entra nel modo se- light (18) key at the same time, you will enter (17) und Licht Abzugshaube (18) ruft man lezione programma;... -
Page 37: Funzione Countdown / Funzione On/Off Remoto
Funzione countdown Countdown function Funktion Countdown La scheda è dotata di una funzio- The board is equipped with a Die Platte ist mit einer Count- ne countdown per l’accensione countdown function which auto- down-Funktion für das automati- automatica del forno. matically turns on the oven. -
Page 38: Prima Accensione / Spegnimento / Consigli Per La Cottura
Prima accensione Initial operation Erstes Einschalten Nel primo ciclo di avviamento, si When the appliance is turned Beim ersten Einschaltzyklus muss raccomanda di innalzare le tem- on for the first time, it is recom- die Temperatur bis zu einem Wert perature fino ad un valore di 150 von 150 °C erhöht und dann für mended that the temperature is... -
Page 39: Diagnostica
All’accensione del forno, per la cottura della Upon switching on the oven to stone bake Beim Einschalten des Ofens für das Backen pizza, set the temperature of the oven top pizza su pietra, impostare la temperatura del von Pizzen auf Stein die Temperatur cielo a 280°C e quella della platea a 200°C, to 280°C and that of the bed plate to 200°C, der Ofendecke auf 280°C und die der... -
Page 40: Avvertenze Per La Manutenzione
Avvertenze per la manutenzione Maintenance instructions Hinweise zur Wartung The data plate, located on the back of the Das Schild mit den Eigenschaften an der La targhetta caratteristiche, presente sul retro equipment, provides important technical in- Rückseite des Gerätes liefert wichtige techni- dell’apparecchiatura, fornisce importanti in- formation. -
Page 41: Pirolisi / Manutenzione
Pirolisi Cleaning the base bricks Pyrolyse A necessità effettuare la “pirolisi”. Where necessary, clean base bricks. Führen Sie bei Bedarf die Pyrolyse durch. Portare il forno a 400°C. Allow the oven to reach 400°C. Den Ofen auf 400°C erhitzen. Raggiunta la temperatura, spegnere il forno e Once this temperature has been reached, Bei Erreichen der Temperatur den Ofen ab- lasciare raffreddare con la porta chiusa. -
Page 42: Posizionamento Comandi Principali / Sostituzione Lampada Illuminazione
Posizionamento comandi Positioning of main Position der wichtigsten principali controls Bedienelemente Tutti i componenti elettrici si trovano all’inter- All electrical components can be found inside Alle elektrischen Komponenten befinden no della scatola comandi posta nel cassetto the control box in the pull-out drawer at the sich im Schaltkasten in dem ausziehbaren estraibile nella parte frontale del forno. -
Page 43: Sostituzione Vetro Porta / Sostituzione Mattoni Refrattari
Sostituzione vetro STOP porta Replacing the glass door Austausch Glastür Spegnere il forno e aspettare che la camera di cottura si raffreddi. Switch off the oven and wait until the cooking chamber cools down. Den Ofen abschalten und warten, bis sich die Backkammer abgekühlt hat. -
Page 44: Schaltplan
Schema elettrico AC 3 N 400 50/60 Hz Wiring diagram Cavo a carico del cliente GT140 5x4mmq Cable at the expense of the Client Schaltplan GT110 5x2,5mmq IEC1 IEC2 Kabel zu Lasten des Kunden SCATOLA Protezione a carico del cliente GT140 MTD: 4x32A Protection at the expense of the Client GT110 MTD: 4x25A KASTEN CTRL.B.1 Schutz zu Lasten des Kunden FU-LK1 F1AL250V F1AL... -
Page 45: Schemi Elettrici
Schema elettrico AC 3 230/3 N 400 50/60 Hz Wiring diagram Cavo a carico del cliente GT140 4x10mmq o 5x4mmq Schaltplan Cable at the expense of the Client GT110 4x6mmq o 5x2,5mmq Kabel zu Lasten des Kunden IEC1 IEC2 Protezione a carico del cliente GT140 MTD: 3x50A o 4x32A Protection at the expense of the Client GT110 MTD: 3x40A o 4x25A Schutz zu Lasten des Kunden SCATOLA... - Page 46 Schema elettrico AC 3 208 60Hz Cavo a carico del cliente Wiring diagram GT140 4xAWG8 Cable at the expense of the Client GT110 4xAWG8 Schaltplan IEC2 IEC1 Kabel zu Lasten des Kunden Protezione a carico del cliente GT140 MTD: 3x63A Protection at the expense of the Client GT110 MTD: 3x50A CTRL.B.1 Schutz zu Lasten des Kunden FU-LK1 FU-LK2 FU-K1...
- Page 47 Giotto mantellatura casing Verkleidung GT140 - GT110 Parti di ricambio Spare parts Ersatzteile Giotto IT - UK - DE 01-13...
- Page 48 Giotto mantellatura casing Verkleidung Parti di ricambio GT140 - GT110 Spare parts Ersatzteile Codice Descrizione Description Beschreibung Code 91410050 Argano completo Full winch Hebewinde komplett 91410212 Ruota girevole Ø80 UL Rotating wheel Ø80 UL Lenkrolle Ø80 UL 91410232 Ruota girevole Ø125 UL Rotating wheel Ø125 UL Lenkrolle Ø125 UL 91410236...
- Page 49 Giotto elementi interni internal components Innere Elemente GT140 - GT110 Parti di ricambio Spare parts Ersatzteile Giotto IT - UK - DE 01-13...
- Page 50 Giotto elementi interni internal components Innere Elemente Parti di ricambio GT140 - GT110 Spare parts Ersatzteile Codice Descrizione Description Beschreibung Code 91310050 Termostato sicurezza monofase Single-phase safety thermostat Einphasiger Sicherheitsthermostat 91310145 Contattore BF26.00 Contactor BF26.00 Schütz BF26.00 91610030 Vetro 220x93 GT 140 GT 140 glass 220x93 Scheibe 220x93 GT 140 91610031 Vetro 192x93 GT 110 GT 110 glass 192x93 Scheibe 192x93 GT 110...
-
Page 51: Parti Di Ricambio Forno
Giotto elementi interni internal components Innere Elemente Parti di ricambio GT140 - GT110 Spare parts Ersatzteile Giotto IT - UK - DE 01-13... - Page 52 Giotto elementi interni internal components Innere Elemente Parti di ricambio GT140 - GT110 Spare parts Ersatzteile Codice Descrizione Description Beschreibung Code 92615000 Catena forno GT140 Oven line GT140 Kette Ofen GT140 92615001 Catena forno GT110 Oven line GT110 Kette Ofen GT110 91410104 Cuscinetto 6207 - 2RS Bearing 6207 - 2RS Lager 6207 - 2RS 91410110 Cuscinetto reggispinta 32207A...
-
Page 53: Parti Di Ricambio Cappa
Giotto cappa hood Abzugshaube Parti di ricambio GT140 - GT110 Spare parts Ersatzteile Codice Descrizione Description Beschreibung Code 91310184 Portalampada G9 25W Lamp holder G9 25W Glühbirnenfassung G9 25W 91310207 Lampada alogena 25W - G9 Baionetta Halogen lamp 25W - G9 Bayonet lamp Halogenlampe 25W - G9 Bajonett 91310330 Aspiratore centrifugo VT150... -
Page 54: Condizioni Di Garanzia / Limiti Ed Esclusioni
Condizioni di garanzia Warranty conditions Garantiebedingungen La ditta “Cuppone F.lli s.r.l.” garantisce que- “Cuppone F.lli s.r.l.” guarantees this product Die Firma “Cuppone F.lli s.r.l.” übernimmt sto prodotto per 1 anno dalla data di acqui- for 1 year from its date of purchase for man- die Garantie für dieses Produkt für 1 Jahr ab sto per i difetti di fabbricazione e dei mate- ufacturing and material defects. - Page 55 ne, modifiche o manomissioni del prodotto, ing with the product, an ineffective and/or Änderungen am Produkt oder Öffnen des inefficacia e/o inadeguatezza della canna unsuitable flue and/or other causes inde- Produkts, unwirksamer und/oder nicht an- fumaria e/o altre cause non dipendenti dal pendent of the product.
- Page 56 note: notes: Anmerkungen: Giotto IT - UK - DE 01-13...
Need help?
Do you have a question about the Giotto GT110/1D and is the answer not in the manual?
Questions and answers