Table of Contents
Advertisement
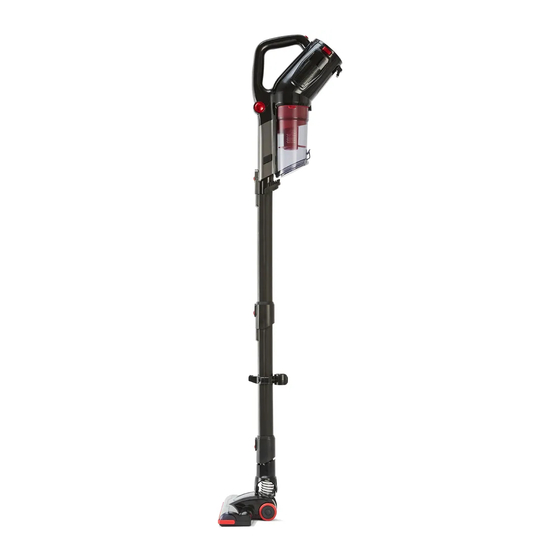
Rechargeable Hand - Stick Vac
Model No.: SL593C
Rev 2
Note: The specifications and/or components of this appliance are subject to change without prior notice.
If any Accessories should fail during use, please call 1300 105 888 (Australia) or 09 8870 447 (New Zealand)
for an immediate replacement. This will save you from returning the product to the store.
If we can assist you in any other way, please feel free to contact us
For Household Use Only
Advertisement
Table of Contents

Related Manuals for anko SL593C


Summary of Contents for anko SL593C
- Page 1 Rechargeable Hand - Stick Vac For Household Use Only Model No.: SL593C Rev 2 Note: The specifications and/or components of this appliance are subject to change without prior notice. If any Accessories should fail during use, please call 1300 105 888 (Australia) or 09 8870 447 (New Zealand) for an immediate replacement.
-
Page 2: Table Of Contents
Warnings .................. 3 Safety Directions ..............3 Transporting your Vacuum ............ 6 Components ................6 Assembly Method ..............7 Assembling the Extension Tubes ..........7 Removing the Extension Tube............ 8 Attaching the Motorised Floor Head .......... 8 Removing the Motorised Floor Head.......... 8 Using Without the Extension Tube. -
Page 3: Warnings
Warnings Before using this appliance, read and follow all warnings and instructions in this manual, even if you are familiar with this product. This appliance is not intended for use by persons (including children) with reduced physical, sensory or mental capabilities, or lack of experience and knowledge, unless they have been given supervision or instruction concerning use of the appliance by a person responsible for their safety. - Page 4 DO NOT misuse the Charger Cable. Never pull the appliance by the cable or pull to disconnect it from the outlet. Instead, grasp the charger body and pull to disconnect. DO NOT use the vacuum cleaner to pick up large objects, hard or sharp objects such as glass, nails, screws, coins, etc.
- Page 5 Only use the Battery Charger which was supplied with this appliance. Model No. ZD12D260050AU 100–240V~ 50/60Hz 0.5A Output: 26.0V 500mA Battery Pack Specification: SL593C Type: Li-ion, 22.2Vd.c., 2200mAh Consumers are cautioned against using and/or purchasing counterfeit and/or inferior quality batteries. These batteries have the potential to cause fire, personal injury, and/or damage to property.
-
Page 6: Transporting Your Vacuum
Read and Save These Instructions Transporting your Vacuum To move your vacuum cleaner from room to room, unplug the unit and carry using the carry handle. Never pull or carry the vacuum cleaner by its Charger cable. Never carry the vacuum cleaner by the accessories / Tools. Components Stick Vac Body / Handle Battery Charger... -
Page 7: Assembly Method
Assembly Method Please Note: Always remove the Battery Charger from the power socket before assembly. 5.1 Assembling the Extension Tubes There are two sections of Extension tube. These need to be assembled in a specific order so that the tube with the tool holder is the lower section. With the Tube ends aligned, push the two tubes together until they lock together. -
Page 8: Removing The Extension Tube
5.2 Removing the Extension Tube To remove the Extension Tube, grasp the Tube, press the locking button down to release then pull the tube straight out. 5.3 Attaching the Motorised Floor Head To attach the motorised floor head to the other end of the extension tube, insert the end of the Extension Tube into the end of the Floor Head, ensuring the locking tab is aligned, then push inward until it locks into place. -
Page 9: Using Without The Extension Tube
5.5 Using Without the Extension Tube. The vacuum cleaner can be used without the extension tube by attaching the Accessories and Motorised Floor Head directly to the vacuum cleaner. To attach and remove, follow the same steps as if using the Extension tube. 5.6 Tools and Tool Storage Crevice / Brush Tool Crevice / Brush tool is for cleaning furniture and into corners etc. - Page 10 To remove, press the locking button down to release and then pull the tool straight out. There is also a flip up brush on the inlet section of the vacuum cleaner body. To use this brush, grasp and rotate it upward until it latches in place as shown.
-
Page 11: Charging
5.7 Charging Note: Charge the Vacuum Cleaner for at least 5 hours prior to use. Only use the Battery Charger which was supplied with this appliance. Insert the battery into the back of the vacuum Cleaner body and push all the way in until it locks in place. -
Page 12: Using The Vacuum Cleaner
During Charging, the indicator light bars on the handle will illuminate in order of charge state and will blink indicating the battery is charging. All the bars will be OFF when fully charged. When the battery is fully charged, switch off and unplug the battery charger from the power supply. -
Page 13: Speed Control
6.2 Speed Control Whilst the vacuum cleaner is running, press the “Max” button on the handle once. The vacuum cleaner will change to high power mode. Press the same button again and it will change back to low power mode. Press the On / Off button to turn Off. -
Page 14: Carry Handle
7.3 Carry Handle The vacuum cleaner has an adjustable carry handle which can be adjusted to make it easier to reach under low items such as tables and chairs. This helps prevent the amount of bending over you need to do. In the “Normal”... -
Page 15: Emptying The Dust Canister
Emptying the Dust Canister To empty the dust canister, first remove the Dust Canister from the vacuum cleaner. Whilst holding the dust canister with one hand, press the button on the side of the vacuum cleaner and the dust canister will swing down then lift out. Take the dust canister to a dustbin. -
Page 16: User Maintenance
Note: At the same time, you can brush the inside of the dust canister with a small brush or use water to wash Refer to section “Cleaning the Filter”. To refit the Dust Canister into the vacuum cleaner, ensure the trap door is latched shut. - Page 17 NOTE: Never use the vacuum cleaner with a wet or damp filter or without the filter fitted. Using a wet or damp filter will damage the filter, may cause serious damage to the vacuum cleaner and will void your warranty. Only wash the white filter if it is very dirty, otherwise just tap the edge of the filter on a hard surface to dislodge any dust and debris.
- Page 18 Wash the filter in warm mild soapy water, rinse in clean fresh cold water and let completely dry. DO NOT scrub the filter or place in a dishwasher. DO NOT use a hair dryer to dry the filter. Refit the Filter (or replace with a new one) in the reverse method used for disassembly.
-
Page 19: Cleaning Dust Canister
9.2 Cleaning Dust Canister Remove the dust canister as described previously and remove the Filter assembly as described previously. Wash the dust canister in warm mild soapy water, rinse in clean fresh cold water and let completely dry. DO NOT scrub the dust canister or place in a dishwasher. DO NOT use a hair dryer to dry the dust canister. -
Page 20: Cleaning The Motorised Floor Head
9.4 Cleaning the Motorised Floor Head The Rotary Brush in the floor head can be removed for easy cleaning and removable of hair etc. Ensure the Floor Head is removed from the extension tube or vacuum cleaner. Turn over so that the bottom face is facing up. There is a small locking screw on the right side which needs to be rotated 1/8 of a turn clockwise to unlock. - Page 21 Grasp the rotary brush and slide to the right and lift up and out. Remove any hair, thread and debris etc. that may have caught around the brush, end bearings, wheels or stuck in the openings. After cleaning, refit the brush in reverse order to disassembling. Align the end of the brush onto its drive spindle and rotate the brush until it slides down onto the spindle, then push down on the brush until it is located in position.
-
Page 22: Storage
10 Storage When finished using the vacuum cleaner, empty the dust canister and clean the filters. You can either recharge the battery first, or store it away in a dry cool place. Switch of and unplug the battery charger when not in use. The Vacuum Cleaner can be removed from the extension tube and then hooked onto the lower tube. -
Page 23: Troubleshooting
11 Troubleshooting Will Not Switch On Check that the Battery is fully charged. Only 1, 2 or 3 Indicator This is correct. 3 lights when fully charged, 2 lights when 1/3 Lights are lit on the handle power used, 1 light on when 2/3 power used and battery is when in use. -
Page 24: Warranty Against Defect
13 Warranty Against Defect 12 Month Warranty Thank you for your purchase from Kmart. Kmart Australia Ltd warrants your new product to be free from defects in materials and workmanship for the period stated above, from the date of purchase, provided that the product is used in accordance with accompanying recommendations or instructions where...
Need help?
Do you have a question about the SL593C and is the answer not in the manual?
Questions and answers
My cleaner won't switch on after charging for a full day. Three lights flash for a few seconds then go off. Everything is clean.
The anko SL593C vacuum cleaner will not switch on while it is still charging. Ensure that the battery charger is unplugged from the power supply before attempting to turn it on. Additionally, check that the battery is properly charged and securely connected.
This answer is automatically generated