
Related Manuals for FLIR Si124


Summary of Contents for FLIR Si124
- Page 1 User’s manual FLIR Si124 Test Equipment Depot - 800.517.8431 - 99 Washington Street Melrose, MA 02176 TestEquipmentDepot.com...
-
Page 2: Table Of Contents
Table of contents Disclaimers ................1 Legal disclaimer ............1 Third-party licenses............. 1 U.S. Government Regulations ........1 Copyright ..............1 Patents..............1 Usage statistics............1 Safety information ...............2 Notice to user ..............3 Thank you! ..............3 List of contents............3 Read the manual before use ......... - Page 3 Remote update ............20 8.15 USB update............. 20 Usage techniques ............. 21 General usage ............21 Locating sound sources and taking snapshots ....21 FLIR Acoustic Camera Viewer ..........24 10.1 Browse through snapshots ......... 24 10.2 Snapshot view ............25 10.3 Color mode .............
-
Page 4: Disclaimers
This product may be subject to U.S. Export Regulations. Send any inquiries to exportquestions@flir.com. 1.4 Copyright © 2020, FLIR Systems, Inc. All rights reserved worldwide. No parts of the software including source code may be reproduced, transmitted, transcribed or translated into any language or computer language in any form or by any means, electronic, magnetic, optical, manual or otherwise, without the prior written permission of FLIR Systems. -
Page 5: Safety Information
CAUTION Only use the accessories that are provided with the camera. CAUTION Only use spare parts provided by FLIR Systems. CAUTION Do not use any damaged camera, battery, or accessories. Note For safety information related to the battery, refer to the supplied printed documentation for the battery. -
Page 6: Notice To User
Notice to user 3.1 Thank you! Thank you for choosing a product from FLIR Systems. We hope that the prod- uct will meet your expectations and that you will consider us again for your fu- ture needs. 3.2 List of contents •... -
Page 7: Register Your Product
By registering your product you gain easy access to updates, product notifica- tions, the status of any pending service cases, and more. To register your product, go to http://support.flir.com/camreg/. 3.5 Customer help Do not hesitate to contact our Customer Support Center if you experience problems or have any questions about your product. -
Page 8: Introduction
FLIR Acoustic Camera Viewer service. The FLIR Si124 is a lot more sensitive and accurate than the human ear, which means that it can locate both sound sources that are inaudible to the human ear, as well as sound sources that the human ear cannot reliably lo- cate. -
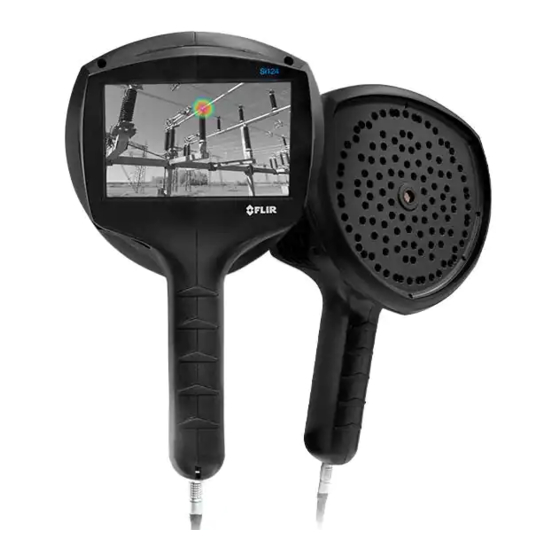
Page 9: Camera Parts
Camera parts 1. Video camera 2. Microphone array 3. LCD screen 4. Power connector 5. Battery cable 6. Power LED 7. USB port 8. Top heatsink 9. Right side heatsink 10. Left side heatsink 11. Lanyard attachment point CAUTION Do not touch the heatsinks when the camera is powered on. The three heatsinks (8, 9, and 10) become hot while the power is on. - Page 10 There are two ways to export the results from the camera - using the included FLIR Acoustic Camera Viewer service which requires a secure wifi connec- tion, or through USB export (if available on your unit). The USB port is located under the cover on top of the device (7).
-
Page 11: Battery Parts
Battery parts 1. Connector for the battery cable 2. Fuel gauge 3. Charging connector 4. Battery cable connector #T810536; r. AB/63437/63437; en-US... -
Page 12: Getting Started
Getting started 7.1 Charging The main power source of the camera is the battery. It should be charged fully before usage - also make sure the battery is charged before prolonged stor- age. To charge an empty battery fully usually takes 4-6 hours. Please note that the battery should be charged at temperatures between 0°C and +40°C (+32°... -
Page 13: Startup
Getting started Nominally the battery yields 7-8 hours of usage. Though the battery usage de- pends on multiple variables which may decrease the usage time. These are the cell temperatures, the load and the age (cycles) of the battery. 7.3 Startup The camera will start automatically when the power supply is connected. -
Page 14: Shutdown
The locking ring will slide until it releases the connection. Alternatively dis- connect the cable from the battery. 2. The FLIR logo will appear and the system will safely perform a shutdown. 3. The red Power LED will turn off when the shutdown is complete. -
Page 15: User Interface
User interface The camera supports the following application modes: • Air mode is used for localization of pressurized air leaks. • Power mode is used for localization and classification of high-voltage parti- al discharges. The available functions, settings, and real-time analysis information in the user interface depend on the selected application mode. -
Page 16: Take Snapshot
User interface Location color mode Strength color mode The location color mode shows each sound source with several different col- ors, ranging from blue to red. The center of the sound sources is shown with red color, while the color gradually changes via yellow, green, and cyan to blue outwards from the center of the sound source. -
Page 17: Snapshot Browser
When you press a thumbnail, the snapshot will be shown together with additional information. Note Note that snapshots are not available in the snapshot browser after they have been uploaded to the FLIR Acoustic Camera Viewer service or ex- ported to a USB memory stick. #T810536; r. AB/63437/63437; en-US... -
Page 18: Zoom
User interface 8.4 Zoom The camera is equipped with a 2x digital zoom, which can be used for close- up snapshots. Press the zoom button to zoom in or zoom out. 8.5 Single-source / multi-source mode Press the single-source / multi-source button to toggle between the two modes. -
Page 19: Settings
8.7.1 Network settings Press the Upload snapshots button to enable/disable automatic upload of snapshots to the FLIR Acoustic Camera Viewer cloud service. For more infor- mation, see section 8.12 Cloud upload. Press the Enable wifi button to show the available wifi settings. -
Page 20: Change Modes
User interface Poor wifi connection strength. No wifi connection. 8.7.2 Change modes Press the Change mode button to select the application mode; Air or Power. 8.7.3 Advanced settings Press the Advanced settings button to access parameter settings for real-time analysis calculations, such as leak size and cost estimation. 8.8 Filter Press the filter button to switch between different filters. -
Page 21: Distance
User interface 8.9 Distance In Air application mode, you can use the + and - buttons to select the distance that you think is closest to the real distance of the sound source. The distance is used to compensate for the fact that the intensity of sound is reduced over distance. -
Page 22: Real-Time Analysis
8.12 Cloud upload When connected to the Internet via wifi, the camera will automatically upload any snapshots on the device to the FLIR Acoustic Camera Viewer cloud serv- ice. Next to the snapshot browser button, the number of snapshots currently on the device is shown. -
Page 23: Remote Update
USB memory stick. Place the software update file provided by FLIR Systems in the root directory of the the memory stick (i.e., not in any folder). Open the USB port cover on top of the camera and insert the memory stick in the USB port. -
Page 24: Usage Techniques
Usage techniques 9.1 General usage Keep the battery inside of the carrying bag and carry the bag with the strap over your shoulder to free your hands for using the camera. When you are not carrying the camera in your hand, always put it securely in- side the carrying bag to prevent it from falling. - Page 25 Usage techniques In the multi-source mode, the camera will show not only the strongest sound source, but also weaker sound sources. Note that sound sources consider- ably weaker than the strongest source will not be shown. The multi-source model is useful in finding weaker sound sources. If you want to examine these sources closer, you can move and rotate the camera as well as use the zoom button.
- Page 26 In this case, taking a snapshot and viewing it in the FLIR Acoustic Camera Viewer might help. In the FLIR Acoustic Camera Viewer, it is possible to adjust the dynamic range of the heatmap with the slider below the image.
-
Page 27: Flir Acoustic Camera Viewer
Center. 10.1 Browse through snapshots Once logged in to the FLIR Acoustic Camera Viewer, the main view lists the snapshots taken with the currently selected camera or cameras. The snap- shots are ordered by date, from newest to oldest. Each page shows a limited number of snapshots, and you can navigate back and forth through the pages using the number and arrow links at the bottom of the page. -
Page 28: Snapshot View
FLIR Acoustic Camera Viewer 10.2 Snapshot view When clicking on a snapshot in the main view of the FLIR Acoustic Camera Viewer, a view of that snapshot will be opened. On the upper left you can see the camera image and the acoustic heatmap overlayed on top of it. Above the image, the comments entered when taking the snapshot are shown. -
Page 29: Color Mode
10.4 Offline file upload To upload snapshots from a USB memory stick to the FLIR Acoustic Camera Viewer for storage and further analysis, click on the Offline files button on top of the screen. Either drag and drop the files into the designated area or select the files to upload by first clicking the link. -
Page 30: Report Generation
FLIR Acoustic Camera Viewer Once you have selected the files you want to upload, click on the Upload Files button to start the upload. Once the upload is done, it might take a few mi- nutes until the new snapshots are visible in the snapshot list. - Page 32 Disclaimer Specifications subject to change without further notice. Models and accessories subject to regional market considerations. License procedures may apply. Products described herein may be subject to US Export Regulations. Please refer to exportquestions@flir.com with any questions. Publ. No.: T810536...
Need help?
Do you have a question about the Si124 and is the answer not in the manual?
Questions and answers