Table of Contents
Advertisement
Advertisement
Table of Contents

Related Manuals for FLIR MR176


Summary of Contents for FLIR MR176
- Page 1 USER MANUAL FLIR MODEL MR176 IMAGING MOISTURE METER PLUS with IGM...
-
Page 2: Table Of Contents
5.2.5 Internal Moisture Sensor Measurements (Pinless) 5.2.6 External Pin Probe Moisture Measurements 5.2.7 Reference Mode Moisture Measurements 5.3 Thermal Imager (IR) 5.4 Lock/Unlock Palette Auto-Scale Mode 5.5 Screen Capture and Hold 5.6 Progressive Environmental Stability Indicator FLIR MR176 USER MANUAL Document Identifier: MR176-en-GB_AB... - Page 3 6.3 Updating the MR176 firmware SPECIFICATIONS TECHNICAL SUPPORT MATERIAL GROUPS 9.1 Common Names of Timbers (BS888/589:1973) with MR176 Group Nos. 9.2 Botanical names of timbers with MR176 program group numbers 9.3 %WME Table (% Wood Moisture Equivalent) 10. WARRANTY 10.1 FLIR Test & Measurement 2 year/10 year Limited Warranty...
-
Page 4: Disclaimers
To access the user manuals, extended warranty registration, firmware updates, and notifications go to the Download tab at: http://support.flir.com. In the download area you will also find the latest releases of manuals for our other products, as well as manuals for our historical and obsolete products. -
Page 5: Safety
Before operating the device, you must read, understand, and follow all instructions, dangers, warnings, cautions, and notes. FLIR Systems reserves the right to discontinue models, parts or accessories, and other items, or to change specifications at any time without prior notice. -
Page 6: Introduction
The MR176 can save measurements and images for later transfer to a PC; reports can be generated with FLIR Tools PC software. Please www.flir.com/test for additional accessories available for this device. -
Page 7: Meter And Menu Icon Descriptions
10. Laser pointer lens (back) 11. Thermal imaging lens (back) 12. Internal Pinless Moisture sensor (back) 13. Micro USB Port (bottom) 14. External Probe Jack (bottom) 15. Battery Charging LED status lamp (bottom) Fig. 4-1 Meter Description FLIR MR176 USER MANUAL Document Identifier: MR176-en-GB_AB... -
Page 8: Control Buttons
OFF. Press the Select button (center) to access the Main Menu. Use this button to select items from within the menu structure. Use the four outer navigation (rim) buttons to move up-down-left- right. FLIR MR176 USER MANUAL Document Identifier: MR176-en-GB_AB... -
Page 9: Menu Map And Overview
Moisture readings) 13. Moisture + Psychrometrics (Air Temperature, RH%, Dew point, Mixing ratio, Vapor pressure views) 14. Moisture (Digital + Bargraph reading with Alarm, Material Group, & Relative values) Fig. 4-2 Menu Icons FLIR MR176 USER MANUAL Document Identifier: MR176-en-GB_AB... -
Page 10: Operation
Moisture measurements can be performed using either the internal pinless moisture sensor (rear) or by connecting an external probe. A standard external pin probe is included which connects to the MR176 via the jack at the bottom of the meter. Other external probes are available; please visit www.flir.com/test... -
Page 11: Moisture Displays Overview
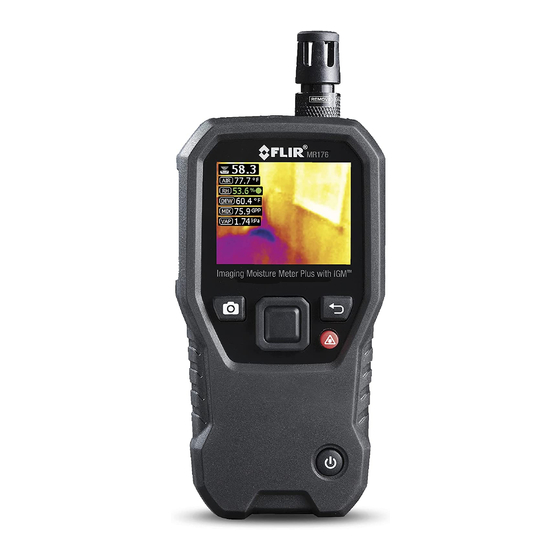
Fig. 5-1(b) IGM Custom Image Mode Thermal image Mixing ratio Dew point temperature Relative Humidity (solid green dot & green reading when stabilized) Air Temperature reading Mode icon (pinless mode selected) Moisture reading Alarm icon Relative mode icon FLIR MR176 USER MANUAL Document Identifier: MR176-en-GB_AB... -
Page 12: Image Modes
In the IGM Moisture mode the meter displays the IR Thermal Camera Image and the moisture reading text (upper left hand corner) and the pin or pinless mode icon (depending on which is currently selected). See Fig. 5-1(a). FLIR MR176 USER MANUAL Document Identifier: MR176-en-GB_AB... -
Page 13: Moisture Modes
5. SET REFERENCE MODE SET REFERENCE is used to compare the displayed readings against a stored reference measurement (see Section 5.2.7 Reference Mode). This mode applies only to readings taken with the pinless internal sensor. FLIR MR176 USER MANUAL Document Identifier: MR176-en-GB_AB... -
Page 14: Internal Moisture Sensor Measurements (Pinless)
(Moisture-only mode). Refer to example screens shown in Fig. 5-1. Notes on External Pin Probe Moisture measurements The MR176 will display accurate external pin probe readings in the 7% to 30% range, depending on the tested material. Moisture Content readings below 6% will display as 0% for all materials and the maximum specified range is dependent on the fiber saturation point for specific species. -
Page 15: Reference Mode Moisture Measurements
See the color palette example below in figure 5-5(c). For the ICE palette, the right side of the scale shows the hotter pixels in the frame, and the left side of the scale shows the coldest pixels. FLIR MR176 USER MANUAL Document Identifier: MR176-en-GB_AB... - Page 16 1. Laser icon (Press and hold Laser button to activate) 2. Crosshairs (Press and hold Laser button to activate) 3. IR Thermal Image Fig. 5-6 Thermal IR Image FLIR MR176 USER MANUAL Document Identifier: MR176-en-GB_AB...
-
Page 17: Lock/Unlock Palette Auto-Scale Mode
Select button to access the Main Menu, scroll to the Lock icon, and press Select again to toggle unlock/lock. Some experimentation and fine-tuning may be required to get the best possible contrast for the application. FLIR MR176 USER MANUAL Document Identifier: MR176-en-GB_AB... -
Page 18: Screen Capture And Hold
During the seven second ‘hold’ period, the user can simply examine the image and press the Back button to discard or press Select/Capture to save the image. Images are saved in bitmap (.bmp) format. Images can be accessed on the MR176 screen using the Image Review icon available in the Main Menu. - Page 19 Back to cancel the image capture, or Select/Capture to save the image. Fig. 5-9(a) Laser and Crosshairs visible; Aim the Laser at the test surface Fig. 5-9(b) Saved image with Target area and Moisture reading FLIR MR176 USER MANUAL Document Identifier: MR176-en-GB_AB...
-
Page 20: High Moisture Alarm
5.8 High Moisture Alarm The MR176 offers a High Moisture Alarm where an audible and visual alert activates when the moisture reading exceeds the programmed high limit. Press the Select button to access the Main Menu Select the SETTINGS mode... - Page 21 METER INFORMATION. From the SETTINGS menu, scroll to Meter Information and press the Select button to view the Model, Software Version, and Last Calibration Date information. Press the back button to return to the Settings menu. FLIR MR176 USER MANUAL Document Identifier: MR176-en-GB_AB...
-
Page 22: Maintenance
As with most electronic products, this equipment must be disposed of in an environmentally friendly way, and in accordance with existing regulations for electronic waste. Please contact your local FLIR Systems representative for more details. FLIR MR176 USER MANUAL Document Identifier: MR176-en-GB_AB... -
Page 23: Updating The Mr176 Firmware
6.3 Updating the MR176 firmware The MR176 firmware can be updated in the field by the user, without the need for sending the unit in for service. If assistance is required, the user can contact a FLIR technical specialist (see Section 8). -
Page 24: Specifications
Language options Meter display text can be shown in any of fourteen (14) languages Imaging Specifications Thermal imaging camera FLIR Lepton® module, microbolometer FPA (focal plane array) Image calibration Automatic (with manual lock scale option) Thermal image resolution 80(W) x 60(H) pixels (4800 pixels) Spectral response 8~14µm... - Page 25 The meter should be stored in an environment with a relative humidity similar to the area to be tested. If the storage humidity differs by more than 50% RH from the area under test, an acclimation period of up to 24 hours may be required to meet the specified RH accuracy. FLIR MR176 USER MANUAL Document Identifier: MR176-en-GB_AB...
-
Page 26: Technical Support
Technical support Email TMSupport@flir.com Service/Repair Support Email Repair@flir.com Support Telephone number +1 855-499-3662 option 3 (toll-free) Firmware Updates To check for MR176 firmware updates please visit the technical support website (above) for complete installation instructions. FLIR MR176 USER MANUAL Document Identifier: MR176-en-GB_AB... -
Page 27: Material Groups
9. Material Groups 9.1 Common Names of Timbers (BS888/589:1973) with MR176 Group Nos. Note: GROUP 9 is for Building materials: Plywood, drywall, Oriented strand board (OSB), etc. Abura Gurjun Pine, American Long Leaf Afara Hemlock, Western Pine, American Pitch Aformosa... - Page 28 Guarea, Black Opepe Walnut, American Guarea, White Padang Walnut, European Gum, American Red Padauk, African Walnut, New Guinea Gum, Saligna Panga Panga Walnut, Queensland Gum, Southern Persimmon Wandoo Gum, Spotted Pillarwood Wawa Whitewood FLIR MR176 USER MANUAL Document Identifier: MR176-en-GB_AB...
-
Page 29: Botanical Names Of Timbers With Mr176 Program Group Numbers
9.2 Botanical names of timbers with MR176 program group numbers Picea jezoensis (8- Abies alba Eucalyptus acmenicides 18%mc) Abies grandis Eucalyptus crebra Picea sitchensis Abies procera Eucalyptus diversicolor Pinus caribaea Acanthopanex ricinifolius Eucalyptus globulus Pinus contorta Acer macrophyllum Eucalyptus maculate... - Page 30 Tsuga heterophylia Endiandra palmerstoni Paulownia tomentosa Ulmus americana Entandrophragma angolense Pericopsis elata Ulmus procera Entandrophragma cylindricum Picaenia excelsa Ulmus thomasii Entandrophragma utile Picea abies Xylia dolabriformis Erythrophleum spp Picea jezoensis (18-28%mc) Zelkova serrata FLIR MR176 USER MANUAL Document Identifier: MR176-en-GB_AB...
-
Page 31: Wme Table (% Wood Moisture Equivalent)
27.4 20.8 20.4 25.8 20.5 24.2 27.8 21.2 19.4 22.7 26.3 ≈23 25.3 22.4 22.3 20.1 23.9 27.3 26.5 23.3 23.4 20.8 24.7 28.1 24.4 24.8 21.7 25.9 29.6 25.6 26.3 22.9 27.1 FLIR MR176 USER MANUAL Document Identifier: MR176-en-GB_AB... -
Page 32: Warranty
Any Product that is repaired or replaced under warranty is covered under this 2-10 Limited Warranty for one hundred eighty days (180) days from the date of return shipment by FLIR or for the remaining duration of the applicable Warranty Period, whichever is longer. - Page 33 RMA instructions provided by FLIR including but not limited to adequately packaging the Product for shipment to FLIR and for all packaging and shipping costs. FLIR will pay for returning to Purchaser any Product that FLIR repairs or replaces under warranty.
- Page 34 Service and Repair Email Repair@flir.com Customer Support Telephone +1 855-499-3662 option 3 (toll free) Firmware Updates To check for MR176 firmware updates please visit the technical support website (above) for complete installation instructions. Publication Identification No.: MR176-en-GB Release Version: Release Date:...
Need help?
Do you have a question about the MR176 and is the answer not in the manual?
Questions and answers
how far to the pins need to be pressed into the wood being tested?
The FLIR MR176 has a maximum pin measurement depth of 1.9 cm (0.75 inches). Therefore, the pins should be pressed into the wood up to this depth.
This answer is automatically generated