
Related Manuals for Neve 1073 OPX


Summary of Contents for Neve 1073 OPX
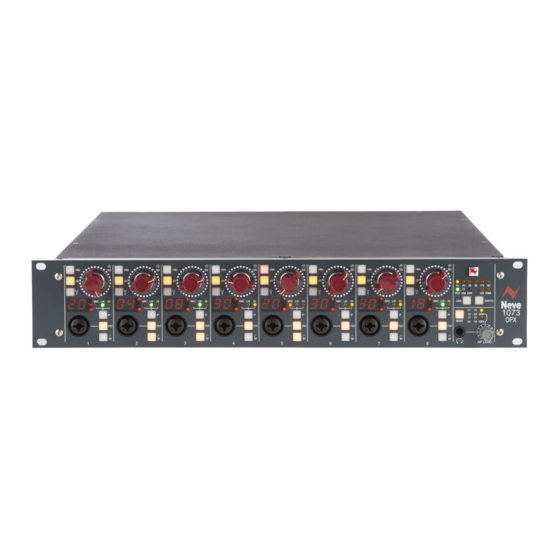
- Page 1 ® 1073 OPX ® 8 channel Microphone, Line and Instrument Preamplifier User Manual Issue 1...
-
Page 2: Health & Safety Notice (English)
Health & Safety Notice FOR YOUR OWN SAFETY AND FOR THE PROTECTION OF OTHERS PLEASE OBSERVE THE FOLLOWING HEALTH AND SAFETY INSTRUCTIONS READ THESE INSTRUCTIONS AND KEEP THEM HANDY • HEED ALL SAFETY WARNINGS • DO NOT USE NEAR WATER •... -
Page 3: Health & Safety Notice (French)
Avertissements de Santé & Sécurité POUR VOTRE SECURITE ET CELLE DES AUTRES MERCI DE RESPECTER LES INSTRUCTIONS DE SANTE ET SECURITE SUIVANTES LISEZ CES INSTRUCTIONS ET GARDEZ-LES À PORTÉE DE MAIN • TENEZ COMPTE DE TOUS LES AVERTISSEMENTS DE SÉCURITÉ •... -
Page 4: Important Safety Instructions (English)
© ® 2005 - 2020 AMS Neve Ltd own the copyright of all information and figures contained in this manual which are not to be copied or reproduced by any means or disclosed in part or whole to any third party without written permission. As part of our policy of continual product improvement, we reserve the right to alter specifications without notice but with due regard to all current legislation. -
Page 5: Important Safety Instructions (French)
Instructions Importantes sur la Sécurité : Pour votre sécurite et celle des autres merci de respecter les instructions de santé et sécurité suivantes : 1) Lisez ces instructions. 2) Gardez ces instructions. 3) Tenez compte de tous les avertissements. 4) Suivez toutes les instructions. 5) ATTENTION: afin de réduire les risques d'incendie ou de choc électrique, n'exposez pas cet appareil à... -
Page 6: Table Of Contents
25-Way D-Type Pin outs ..................33 Circuit Flow Diagram ....................34 Neve®, 1073® and Marinair® are registered trademarks. AMS Neve Limited pursues a policy of continual improvement therefore all specifications are subject to change without notice. All trademarks are property of their respective owners E & O E ©2020 AMS Neve Ltd. -
Page 7: 1073 Opx Introduction
Control software. This provides a simple and elegant solution for users of DAW, broadcast or live sound reinforcement systems. Up to 8 1073 OPX units can be connected to the remote -control computer, giving up to 64 Mic Pre-amps or Line Level inputs, all controlled from a single point. -
Page 8: Rack Mount Instructions (English)
Rack Mount Instructions Elevated Operating Ambient- If installed in a closed or multi- unit rack assembly, the operating ambient temperature of the rack environment may be greater than room ambient. Therefore, consideration should be given to installing the equipment in an environment compatible with the maximum ambient temperature (30°C) specified by the manufacturer. -
Page 9: Configuring The 1073Opx
180 phase flip. The D.I circuit within the 1073 OPX is a transformer-less class-A design. This uses an FET transistor to reduce the impedance to 680Kohms, perfect for guitars, basses and keyboards. When connecting an instrument directly to the unit using the D.I, set the level at +40db gain and adjust gain levels from... -
Page 10: Front Panel
Front Panel POWER: Switches the unit on or off. The button will light when the unit is ON HP LEVEL: Controls the volume of the headphones and rear monitor outputs. Pressing the HP LEVEL control knob will cycle through the monitor sources indicated by the adjacent LEDs: Off/cut;... - Page 11 GAIN: Adjusts the sensitivity (gain) of the selected input in 1dB increments. The sensitivity is indicated on the dual 7-segment display. +48V: Applies 48V phantom power to the microphone input (front or rear, whichever is selected). The button will light when phantom power is active.
-
Page 12: Rear Panel
AD/DA USB/Dante card (Optional) The 1073 OPX expansion board provides a digital interface for the 1073 OPX and has 8 A/D preamp converters and 2 D/A monitor converters. By default, the Post-gain amplified signal from the Mic/Line input will also be routed to the A/D inputs. If this digital board is not fitted, then the Sample Rate and Sync Source LEDs on the front of the unit will not light or function. -
Page 13: Monitoring
Loudspeaker set. Latency Free Monitoring The 1073 OPX monitor path can be fed from a combination of preamp or monitor inputs signal sources. This makes the unit capable of latency free monitoring, allowing operators to record overdubs by listening to the input source directly pre-DAW. - Page 14 To add preamp signals into the monitor path- Press and hold the HP Level control Then press GAIN POT of the preamp channel you with to monitor. Add additional signals by repeating the process. Multiple monitor indicator LEDs will display which signals are being fed to the monitor path.
-
Page 15: Summing
Summing The Monitor output XLR connectors at the rear of the unit follow the front HP LEVEL monitor signal selection. This function gives users the ability to use the unit as a 4x stereo analogue input summing mixer. Users can pass audio signals through the 1073 line-level transformer- coupled preamplifiers, combining them into the monitor path through the Left and Right Monitor output XLRs on the rear of the unit. -
Page 16: 1073Opx Remote Control Software
The Comms connector light on the unit front panel indicates two-way communication between the software plugin and the 1073 OPX unit. Up to 8 1073 OPX racks can be connected to the remote computer. When using multiple OPX units, each rack must be selected by clicking... -
Page 17: Ip Address Setup
IP address setup To access IP Config mode Press and hold preamp Gain Controller 1 Press preamp Gain Controller 8 at the same time Press and hold both together Preamp gain indicators 1 & 2 will now display DHCP which indicates an automatic IP address assignment. - Page 18 Manual IP address setup - Windows PC Open control panel>Network&Internet>Network and Sharing Centre Click Change Adapter Settings Highlight the Ethernet connection and click Properties Click Internet Protocol version 4 (TCP/IPv4) Click Properties Click use the following IP address ...
- Page 19 The units manual IP address is now set. For accurate communications, the IP Addresses of remote computer and 1073 OPX must be set within the same range. Once the IP address is set, allow 7 seconds for the unit to update settings.
-
Page 20: Setup Menu
Once the units IP address has been assigned, the remote software will scan for connected devices and automatically connect. If a unit is not found, or if several 1073 OPX units are connected, click the SETUP button in the plugin software window. - Page 21 Select racks to control Once available racks are found and ready to connect, the plugin can be assigned to control up to 8 1073 OPX racks. As a safety feature, the software will not automatically connect, the user must tick the racks you wish to control.
-
Page 22: Using The Remote-Control Software
Controlling multiple 1073 OPX units The top bar of the plugin window displays the available connected 1073 OPX racks. Up to 8 racks can be connected and controlled at the same time. Select units to control by clicking the unit name at the top of the plugin window. -
Page 23: Usb Audio Interface Mode
This mode enables the 1073OPX to function as an audio interface for your MAC or PC. In USB audio mode, only one 1073 OPX rack unit can be used as a primary audio interface. When connected via USB, the USB light will illuminate Blue to indicate a valid USB connection. - Page 24 Sound>Manage Audio Device and can be selected as the computers default recording and playback device. The 1073 OPX will now function as an ASIO/core audio device and is compatible with sample rates up to 192kHz and bit depths of 16/24Bit.
- Page 25 MAC Core audio device The Neve 1073 OPX will appear as a core audio device as soon as the hardware is connected to the Mac. Adjustments can be made through the Audio Devices menu. As a general rule, any flashing LED on the digital panel indicates that the unit is not locked to the selected sample rate or source.
-
Page 26: Dante Networked Audio Mode
The ETHERNET AUDIO DANTE PRI or ETHERNET AUDIO DANTE SEC must be connected via a CAT5 or CAT6 cable to the Dante network in order to use the 1073 OPX as a Dante enabled audio device. The Units IP address is set automatically by the Dante network. Once the connection is made, the DANTE light will illuminate RED to indicate a valid Dante connection. -
Page 27: Dante Network Connections
Dante Network Connections The 1073 OPX optional digital card has both a primary Dante network port DANTE PRI and a redundant secondary Dante network Port DANTE SEC. The Primary network port connects to the primary Dante network along with your Dante Controller enabled MAC/PC. -
Page 28: Firmware Update Software
Run the installer package on your PC/MAC and follow the on-screen steps. Once installed the software is ready to be connected to your 1073 OPX unit. Once connected and scanned the software will prompt the user to begin firmware update if required. - Page 29 Identify will send signal to the connected unit and the MONO button will flash on the selected unit. Advanced is reserved for the use of AMS Neve engineers when manually uploading firmware. It is not recommended for end-users to enter this mode.
-
Page 30: Troubleshooting
Check that DANTE LED is lit on the front of the unit. No USB Connection If using PC, ensure the correct drivers are installed. Drivers can be found at www.AMS- Neve.com >1073OPXproductpage >supporting documentation. Check the USB cable connection. Open an audio application on the connected computer. -
Page 31: Dimensions & Power Requirements
Dimensions & power Requirements Height 89mm/3.5 inches 484mm/19.05 inches Width Depth 360mm/14.17 inches Weight 7.8kg Heat Dissipation 40 watts Power factor >0.90 Voltage Input Voltage Range 90-240v AC Only Current 0.135A Amps RMS 240v Current 0.330A Amps RMS 90v Switch-On surge current – Current 65A Peak @ 240v Audio Specification... -
Page 32: Unit Connection Tables
Unit Connection Tables External PSU Mains, fused @ 4 amps IEC male Preamp Microphone Inputs (Front) XLR 3-pin plug female Preamp Microphone Inputs (Rear) 25-way D-Type, Tascam convention Preamp Line Inputs (Front) ¼" TRS Jack sockets Preamp Line Inputs (Rear) 25-way D-Type, Tascam convention Preamp D.I inputs ¼"... -
Page 33: 25-Way D-Type Pin Outs
Preamp Mic Input 1-8 D-Type 25-Way Pin Outs (25-way D-type) Signal Name Screen Microphone Input 1 Microphone Input 2 Microphone Input 3 Microphone Input 4 Microphone Input 5 Microphone Input 6 Microphone Input 7 Microphone Input 8 Preamp Line Input 1-8 D-Type 25-Way Pin Outs (25-way D-type) Signal Name... -
Page 34: Circuit Flow Diagram
Circuit Flow Diagram...
Need help?
Do you have a question about the 1073 OPX and is the answer not in the manual?
Questions and answers