
Related Manuals for Neve 4081


Summary of Contents for Neve 4081
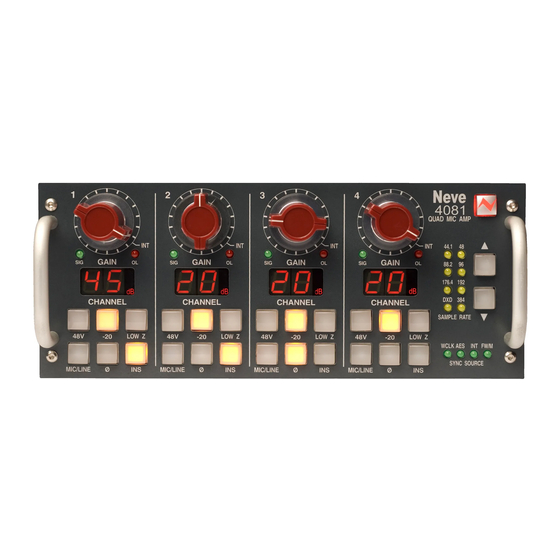
- Page 1 4081 Quad Mic Preamp User Manual Issue 3 Firmware V2.0 or later The 4081 is a quad mic / line pre-amplifier, based on the classic 1081 modules and provides both powerful control and the legendary Neve sound.
-
Page 2: Health & Safety Notice
4081 User Manual Issue 3 Health & Safety Notice FOR YOUR OWN SAFETY AND THE PROTECTION OF OTHERS, PLEASE OBSERVE THE FOLLOWING HEALTH AND SAFETY INSTRUCTIONS Read These Instructions And Keep Them Handy Heed All Safety Warnings Do Not Use Near Water ... -
Page 3: Table Of Contents
Technical / Physical Information........................30 Audio Specification............................30 In the unlikely even that your 4081 should malfunction or develop a fault, please register the fault details on our website by clicking the link below. You will also need the unit's serial number when you do this, so please have this to hand. -
Page 4: Introduction
4081 User Manual Issue 3 Introduction The 4081 Quad Mic Preamp builds on the incredible success of the 1081 and 1081R modules and provides both powerful control and legendary Neve sound. Perfect for vocals, ADR and Foley recording, the 4081 features make it the number one choice for any studio, OB truck or live stage environment. - Page 5 4081 will presume that FireWire will be the digital interface, and not the AES. If a Firewire connection is not detected, then the 4081 will presume the audio is coming in via the AES IN/OUT 25-way D-type connector.
-
Page 6: Channel Controls
By default, the unit powers-up with all functions locally controllable, and with all settings & switch states fully recalled as they were at power-down. The unit is powered by the silver switch with the Neve logo, which will light red once the power is on. -
Page 7: Ad/Da / Firewire Card (Optional)
AD/DA / Firewire Card (optional) The 4081 FireWire expansion board provides a digital interface for the 4081, both to FireWire and AES/EBU, and has two modes of operation as described below. If this digital board is not fitted, then the Sample Rate and Sync Source leds on the front of the unit will not light or function. -
Page 8: Internal Lock In Standalone Mode
If the green WCLK led is flashing, it means that the word clock source is running at a different sample rate to the 4081. Change the sample rate of the 4081 using the and buttons on the front panel buttons until the green led is solid, or the sample frequency of the word clock source matches that of the 4081. -
Page 9: Firewire Mode (With Firewire Connected)
Issue 3 FireWire mode (with FireWire connected) FireWire mode allows the 4081 to be directly connected to a DAW which is FireWire capable (for example Logic or Reaper) and provides four mono ADC to FireWire, and four mono FireWire to DAC channels directly from the DAW. -
Page 10: Word Clock Lock In Firewire Mode
If the WCLK led is flashing, it means that the word clock source is running at a different sample rate to that selected on the 4081. Change the sample rate of the 4081 from the DAW application until the green AES/EBU led is solid, or change the sample rate of the sync source to match that of the 4081. -
Page 11: Installing The Software - Pc
This can be downloaded from: http://www.ams- neve.com/Sites/8/Files/Documents/Outboard/4081_USB_Driver.exe Before installing the driver, please connect the 4081 by USB to the PC and power it up. Click the link to download the driver. When presented with the option to either Run or Save, click Save and specify a location for the file to be saved to. -
Page 12: Remote Control Software
4081 User Manual Issue 3 Remote Control software The install procedure is the same regardless of whether the software is installed on a standalone PC or on a DAW PC. Double-click the Setup icon and the install will begin. Click Next. - Page 13 The software will start to install, with a bar indicating how far it has progressed. If you wish to launch the programme at this point, select Launch 4081 Remote Mic Pre-Amp Controller option before clicking Finish, and the programme will then open.
-
Page 14: Installing The Software - Mac
4081 User Manual Issue 3 Installing the software – Mac USB Driver The Mac will also need the USB driver installed so it can convert 4081 serial comms to USB. This is available as a download from our website: http://www.ams-neve.com/Products/Outboard/4081/4081.aspx Please install this driver before installing the remote control software. - Page 15 Once installed, a program called Remote Mic Control will be placed in the Applications folder. The programme can either be run from there, or dragged onto the Dock and run from there. Operationally, there is no difference between controlling the 4081 from a Mac or a PC. - 15 -...
-
Page 16: Standalone Control Setup - Pc Version
A red highlight bar will also indicate the rack whose controls are currently being displayed on the upper half of the screen. Once the control software is running, a small Neve icon will appear in the Windows taskbar. This will either be displayed in green if the MIDI is running, or in red if it is not. -
Page 17: Communications Port
The Setup screen allows you to test that the unit IDs are set correctly, and also fully configure the software. As can be seen below, four 4081 units have been detected, as the version of firmware is displayed next to the first four units. -
Page 18: Midi Port Setup
For units that are offline, the large Gain display will be absent. Create Debug File For AMS Neve R&D Dept only and has no operational effect. Auto Load Last Setup File On Startup When ticked, once the control software is opened, the last Store file that was loaded will be reloaded again. - Page 19 4081 User Manual Issue 3 Store Preset When selected, a standard Windows Save dialog will open. This allows you to take a snapshot of the settings of all the racks that are currently connected and save it to a desired location.
-
Page 20: Pro Tools Control Setup
Without this driver installed, none of the midi ports will appear as described below. The first 4081 unit needs to have the USB / RS485 switch on the rear of the unit set to USB (plus a USB cable from the unit to the PC / Mac). - Page 21 Stop MIDI before doing this. • On a Mac, options on the MIDI menu allow you to start or stop the midi. • On a PC, right click the Neve logo on the taskbar to start or stop the midi and select Stop Midi.
-
Page 22: Ad/Da / Firewire Expansion Board
M3 allen key Pair of pliers Fitting Instructions Ensure that the 4081 unit is powered down and remove the 48v power cable from the 4081. Remove the expansion blanking panel from the back of the 4081 and also the lid. - Page 23 The photograph above shows the 2nd ribbon disconnected to show the orientation of both cables and the contacts. Screw the back panel of the expansion board to the 4081 chassis using the screws which were used to fit the original blanking plate, and re-use the M3 screws which were replaced by the mounting pillars to screw the FireWire board to the posts.
-
Page 24: Updating 4081 Firmware To Version 2.0
2. Upgrade the remote control software on your PC or Mac. The necessary firmware, plus full instructions on how upgrade the 4081 are available here: http://www.ams-neve.info/community/4081-version-2-00-software- update/ Please note that upgrading the 4081 firmware can only be done using a - 24 -... -
Page 25: Rear Connectors / Pin-Out Information
4081 User Manual Issue 3 Rear Connectors / Pin-out information Mic / Line Input XLRs Screen Mic / Line Output XLRs These can either be used as Direct Outputs from the unit, or as Insert Sends. The Output is Post- the Gain control. - Page 26 Male XLR 2 pin: AES TX 2+ AES TX 2- screen AES 1 contains data for channels 1 (L) and 2 (R) from the 4081 • AES 2 contains data for channels 3 (L) and 4 (R) from the 4081 •...
- Page 27 OUT to IN as described above (cabling not supplied). USB cable This cable should be wired pin-to-pin. Please note that when connecting multiple units, each 4081 should have a ID 1 unique ID as shown left. RS485 cable The procedure for setting these IDs is described on page 29.
- Page 28 Insert IN 4 hot Insert IN 4 cold screen On the AES Ins/Outs 25-way connector on the rear of the 4081, a number '1' printed next to the corner of the connector indicates the location of Pin 1. - 28 -...
- Page 29 Switch 2 Switch 3 If a unit's ID is changed, the 4081 must be switched off and on again for the remote control software to be aware of the new ID number. If the ID number is set incorrectly, a unit will either fail to respond or multiple units will respond to a single command.
-
Page 30: Technical / Physical Information
External Power supply Rated Voltage 100 – 240V AC External Power supply Rated Frequency 50 - 60 Hz External Power supply Rated Current 1.9A Max Fuse (inside the 4081): Input voltage 48V DC Fuse rating / type (20mm x 5mm) Location... - Page 31 4081 User Manual Issue 3 Dimensions: single unit - 31 -...
- Page 32 4081 User Manual Issue 3 Dimensions: 2 units for rack-mounting © ® 2007‐2011 AMS Neve Ltd own the copyright of all information and figures contained in this manual which are not to be copied or reproduced by any means or disclosed in part or whole to any third party without written permission. As part of our policy of continual product improvement, we reserve the right to alter specifications without notice but with due regard to all current legislation. Disclaimer: The information in this manual has been carefully checked and is believed to be accurate at the time of publication. However, no responsibility is taken by AMS‐Neve for inaccuracies, errors or omissions nor any liability assumed for any loss or damage resulting either directly or indirectly from use of the information contained within. Trademarks: All trademarks are the property of their respective owners and are hereby acknowledged. - 32 -...
Need help?
Do you have a question about the 4081 and is the answer not in the manual?
Questions and answers