Advertisement
Quick Links
Advertisement

Related Manuals for Salicru SLC ADAPT Series


Summary of Contents for Salicru SLC ADAPT Series
- Page 1 USER'S MANUAL UNINTERRUPTIBLE POWER SUPPLY (UPS) SLC serie ADAPT 180, 300 y 500 kVA...
- Page 2 6.3.2. Transfer from Normal mode to Bypass mode. 6.3.3. Transfer from Bypass mode to Normal mode. 6.3.4. Transfer from Normal mode to maintenance Bypass mode. 6.3.5. Transfer from maintenance Bypass mode to Normal mode. 6.4. BATTERY MAINTENANCE. 6.5. EPO. SALICRU...
- Page 3 6.6. INSTALLATION OF THE PARALLEL SYSTEM. 8.6. WARRANTY CONDITIONS. 6.6.1. Location of parallel cards. 8.6.1. Terms of the warranty. 6.6.2. Jumper settings for parallel operation. 8.6.2. Exclusions. 6.6.2.1. Case of 2 UPSs in parallel. 8.7. TECHNICAL SERVICES NETWORK. 6.6.2.2. Case of 3 UPSs in parallel. 9.
- Page 4 We remain at your disposal for any additional information or queries that you may wish to make. Yours sincerely SALICRU The device described here is capable of causing sig- •...
- Page 5 ‘Safety Instruc- The documentation for any standard device is available to the tions’ document EK266*08. customer for download on our website (www.salicru.com). For devices ‘powered by socket,’ this is the website for • ‘Safety Instructions’ obtaining the user manual and EK266*08.
- Page 6 The disposal of them shall be carried out in accordance with operators AS 62040-1-1 the laws in force. Electromagnetic compatibility EN50091-2 (EMC) requirements for UPSs IEC62040-2 AS 62040-2(C3) Method for specifying the EN50091-3 performance and testing IEC62040-3 requirements of UPSs AS 62040-3(VFI SS 111) SALICRU...
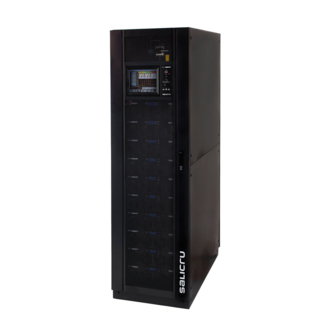
- Page 7 4. PRESENTATION. 4.1. VIEWS. 4.1.1. Views of the device. Fig. 1 to Fig. 13 show the views and dimensions (in mm) of 6-slot (180 kVA) and 10-slot (300 kVA and 500 kVA) devices. Because the product is constantly evolving, however, slight discrepancies or contradictions may arise.
- Page 8 19.8 Fig. 2. Front view of 30 kVA module (20 kVA for 3x208 V AC voltages). Touch display Fig. 3. Front and rear view of 6-slot cabinet - 180 kVA (120 kVA at 3x208 V) with closed doors. SALICRU...
- Page 9 Fig. 4. Rear view of 30 kVA module (20 kVA for 3x208 V AC voltages). Bypass input A B C N Cold Start Batteries + N – Output Input A B C N A B C N Manual bypass marking (option) Free slot for Bypass module...
- Page 10 Fig. 6. Front and rear view of 10-slot cabinet - 300 kVA (200 kVA at 3x208 V) with closed doors. SALICRU...
- Page 11 Bypass input Input A B C N A B C N Manual bypass marking (option) Free slot Output Batteries Cold Start for Bypass A B C N + N – module Relay interface Communications interface Module display Power module connector 30 kVA power modules Fig.
- Page 12 Fig. 8. Front view of 10-slot cabinet - 500 kVA (300 kVA at 3x208 V) with closed doors. SALICRU...
- Page 13 Fig. 9. Rear view of 10-slot cabinet - 500 kVA (300 kVA at 3x208 V) with closed doors. USER'S MANUAL SLC ADAPT UNINTERRUPTIBLE POWER SUPPLY (UPS)
- Page 14 UPS output disconnector disconnector Manual Bypass Bypass input disconnector disconnector Cold Start SPD (Surge Protection Device) Bypass (Optional) module Communications interface Module display 50 kVA power modules Fig. 11. Front view of 10-slot cabinet - 500 kVA with open doors. SALICRU...
- Page 15 Fig. 12. Rear view of 50 kVA module (30 kVA for 3x208 V AC voltages) Output Bypass input Batteries Input A B C N A B C + N – A B C N Fig. 13. Rear view of 10-slot cabinet - 500 kVA with open doors.
- Page 16 Indication for modules with 2U height. Disregard for ≥3U modules Total power of subrack/cabinet ADAPT UPS series A,B,C Cabinet type Total number of slots in subrack/cabinet Number of redundant modules (disregard if none) Number of modules installed in subrack/cabinet without taking into account redundancy SALICRU...
- Page 17 UPS itself. has them. BATTERY MODULE Fig. 14. Conceptual diagram of the SLC ADAPT series modular UPS. USER'S MANUAL SLC ADAPT UNINTERRUPTIBLE POWER SUPPLY (UPS)
- Page 18 As can be seen in the diagram in Fig. 15, the charger modules are connected in parallel to the power modules. The total cur- The SLC ADAPT series has two different power modules, 30 rent of the system is the sum of the current supplied by the and 50 kVA, as can be seen in Fig.
- Page 19 4.3.3.1. Normal mode. The inverter of each power module is responsible for powering Power module 1 the critical loads at all times. The rectifier/charger of the AC input powers the inverter with DC voltage while simultaneously Input Output charging the associated backup battery, either at float or quick terminal terminal voltage.
- Page 20 50 or 60 Hz, or different input and output. mode (maintenance). When operating in this mode, the static bypass is inhibited and the manual bypass switch should not be operated due to the consequences it could have on the loads connected to the output. SALICRU...
- Page 21 5. INSTALLATION. 5.1.1. Reception, unpacking and contents. Read and respect the Safety Information described Reception. Check that: • • in Chapter 2 of this document. Failure to obey some The data on the label affixed to the packaging ˆ of the instructions described in this manual can result in a corresponds to that specified on the order.
- Page 22 ATTENTION! Be careful not to damage the unit in the unpacking process. Packing waste must be disposed of in an environmen- tally friendly way. Fig. 22. Example of transfer of packed SLC ADAPT with pallet jack. SALICRU...
- Page 23 5.1.3.1. Unpacking the power module. 5.1.4. Siting, immobilising and considerations. (Only for devices with modules packed separately.) The UPS is intended for indoor installation. The default • The steps will be as follows: protection rating is IP20. The device is cooled by forced convection with internal fans.
- Page 24 ≥ 500 ≥ 500 Rear door Back door Anchor bolt. L-shaped plates. Wheels. ≥ 800 Fig. 28. Support structure for 180 kVA and 300 kVA devices (bottom view). Fig. 30. Space reserved for the cabinet (units: mm). SALICRU...
- Page 25 Tighten the anchor bolts with the spanner, turning them clockwise. The cabinet is supported on the anchor bolts. Make sure that all four anchor bolts are at the same height and that the cabinet is securely fastened. Final positioning completed. Back door Rear door Φ12...
- Page 26 6- and 10-slot cabinets is the same as for the power modules. Bypass Bypass module module 10# Power 10# Power module module Power Power module module 2# Power 2# Power module module 1# Power 1# Power module module Mounting holes Zoom area A Fig. 34. Installation of power modules. SALICRU...
- Page 27 5.2.6. Installation of extra charger modules. The procedure for the installation of extra charger modules for 6- and 10-slot cabinets and 30 kVA modules is the same as for the power modules. 5.3. CONNECTIONS. 5.3.1. Cable entry for 180 and 300 kVA devices. Cable entry to the cabinet can be made from the top or bottom.
- Page 28 5.3.2. Cable entry for 500 kVA devices. Cable entry can be made from the top or bottom. Fig. 36. 10-slot cabinet installation with cable entry at the top (rear view). Fig. 37. 10-slot cabinet installation with cable entry at the bottom (rear view). SALICRU...
- Page 29 5.3.3.2. Specifications for power cable terminals. 5.3.3. Connection to the entry. Tab. 3 shows the specifications for power cable connectors. 5.3.3.1. Specifications. Type Port Connection Bolt Tightening Tab. 2 shows the recommended cross sections for power cables torque to the UPS. Crimped cables Input 96 Nm...
- Page 30 Tab. 3 and make sure that the phase rotation is cor- rect. The earth wire and the neutral must be connected as per the requirements of the applicable regulations. The load and the UPS must be connected to the same earth. SALICRU...
- Page 31 5.3.4. Control and communication cables. The front panel of the bypass module provides a relay interface (J2-J11) and communications interface (RS-232, RS-485, SNMP, smart slot and USB port), as shown in Fig. 39 and Fig. 40. Startup from batteries (Cold Start) Parallel interface Smart slot Relay interface...
- Page 32 J10-2 UTI_FAIL_NO Normally open ('NO’) contact, AC MAINS FAILURE relay interface signal J10-3 Common for AC MAINS FAILURE relay interface signal Tab. 7. Functions of the relay interface ports. Fig. 42. Diagram of the relay interface for remote EPO. SALICRU...
- Page 33 Port Name Function Port Name Function J4-1 EPO_NC EPO activation when disconnecting from J6-1 BCB_DRV It provides a pulse signal of +24 V / 20 mA for J4-2 the remote control of the battery circuit breaker through its coil. This signal activates the ‘Off’ J4-2 +24 V +24 V...
- Page 34 When there is a mains failure, the system sends a mains failure warning and an auxiliary relay interface signal is generated. A diagram of the ports is shown in Fig. 47 and a description in Tab. 7. Fig. 47. Diagram of the relay interface of mains failure warnings. SALICRU...
- Page 35 6. OPERATION. Indicator State Indicator State Rectifier Green Inverter Green Battery Green Load Green 6.1. STARTUP PROCEDURE. Bypass State Green 6.1.1. Startup in Normal mode. Tab. 18. Normal mode. Once installation is complete, UPS startup must be carried out by authorised personnel. Follow the steps detailed below: Stored settings are loaded at system startup.
- Page 36 6.3.4. Transfer from Normal mode to maintenance Bypass mode. The following procedure is used to transfer the load from the inverter output of the UPS to maintenance bypass, usually used during repair or maintenance work. Transfer to Bypass mode following the instructions in section 6.3.2. SALICRU...
- Page 37 The inverter and status LED indicators turn off, the alarm 6.4. BATTERY MAINTENANCE. is activated and the inverter stops. The bypass supplies power to the loads. If the batteries have not been used for a long period of time, it Open the external battery circuit breaker and close the is necessary to verify their condition.
- Page 38 DC/DC Battery charger UPS3 Manual bypass Static bypass AC/DC DC/AC rectifier inverter DC/DC Battery charger Fig. 55. Connection diagram of three UPSs in parallel, with independent Bypass line. For 6-slot cabinets, configuration with independent By- pass line is optional. SALICRU...
- Page 39 Circuit breaker protections: MS1, MS2 and MS3 are the main input switches for each UPS; BS1, BS2 and BS3 are the Bypass input protections; OS1, OS2 and OS3 are the output pro- tections; OS is the protection for the main output of the system; and MBS is the protection for the manual maintenance Bypass.
- Page 40 Fig. 60. Jumper setting for the case of three UPSs in parallel. Only jumpers J3 and J4 are in short circuit. The rest are in open circuit. Fig. 58. Location of the parallel card in 500 kVA devices. SALICRU...
- Page 41 6.6.3. Setting the parameters on the display screen. The setting on the display will be the following, Fig. 61: Choose the operating mode: Parallel Enter the number of the UPS in parallel: 2 or 3. Enter the identification of each cabinet: for 2 UPSs, the first will be 0 and the second 1;...
- Page 42 Close all battery switches, one by one. Fig. 66. Retransfer to Inverter screen. Turn the Bypass rotary switches to UPS. After about 90 seconds, all of the UPSs should transfer to normal mode at the same time. SALICRU...
- Page 43 7. CONTROL PANEL OF THE MODULES AND THE UPS. 7.1. CONTROL PANEL OF THE MODULES. 7.1.2. Operation and control buttons. The structure of the LCDs of each module is shown in the The operation and control buttons include FUNC buttons and following Fig.
- Page 44 Overvoltage in DC bus bypass switch failure Overload time exceeded Rectifier soft start failure Blinking red Bypass voltage abnormal Overtemp. in inverter Relay open Bypass normal Inverter inhibited Relay closed Battery low Manual transfer to inverter Tab. 21. Failure and warning codes. SALICRU...
- Page 45 Inverter Fixed green Load supplied by inverter 7.2.3. LCD touch screen. indicator Blinking Inverter on, start, synchronisation or standby green (ECO mode) for one or more modules Users can search for information, control the UPS and adjust the parameters using the LCD touch screen in a simple way. Fixed red System output not supplied by the inverter, inverter failure for one or more modules...
- Page 46 Fig. 72. Cabinet screen. This menu includes the following parts: title, operating status, version information, submenu and information display. Title • Displays information about the selected submenu. Operating status • The boxes shown in the block diagram represent the SALICRU...
- Page 47 Interface of Output option Details of the Cabinet submenu: Submenu name Content Meaning Input Phase voltage Phase current Input frequency Power factor Bypass Phase voltage Phase current Bypass frequency Power factor Output Phase voltage Phase current Output frequency Power factor Interface of Loads option Loads Sout: Apparent power...
- Page 48 Submenu • The submenu includes: Input, Output, Loads, Information and S-Code. Users can enter the interface of each submenu by clicking directly on the icon, as shown in Fig. 74 (Input) and Fig. 75 (other options). SALICRU...
- Page 49 7.3.3.1. Date & Time setting. Interface of S-Code option The user can select the date format and set the date and time. The interface is shown below: Fig. 75. Interfaces of Module submenu. Settings interface Submenu Details of power module submenu: Fig.
- Page 50 V/cell to 0.6C and 1.75 V/cell to 0.15C. (6 * 40) or ± 120 for both + and - signs. For lithium batteries, 2.7 V/cell for both. The setting range for the number of batteries is between 32 and 44 (even number). The available SALICRU...
- Page 51 Current percentage limit setting: Maximum charging current (A) ˆ Current limit This setting is used to limit the charging power, this 30 kVA module 50 kVA module being 20% of the active power of the UPS. If the number of batteries is 40 elements (at 12 V), the maximum current that a module can supply according to the current limitation (as a percentage) is shown in Tab.
- Page 52 Service settings: ˆ The user can select the system’s work mode. If the system is configured in parallel, it is possible to adjust the specific parameters, the number of redundant mod- ules, etc., as can be seen in Fig. 86: SALICRU...
- Page 53 7.3.4. Log. Submenu Content Meaning name Press icon at the bottom of the screen to access the Batteries Battery number Battery number setting (12V) history. The history is displayed in reverse chronological order Battery capacity Battery AH setting (that is, the first one, which appears on the screen as no. 1, Float charging Float charging voltage per battery cell is the most recent) and shows information about events,...
- Page 54 Failure of rectifier in power module no. N. Rectifier has failed resulting in its shutdown and battery to discharge. Inverter failure Failure of rectifier in power module no. N. Rectifier failure has caused it to shut down and battery to discharge. SALICRU...
- Page 55 Rectifier overtemperature Overtemperature of rectifier in power module no. N. Temperature of IGBT rectifier is too high to keep it running. This alarm is triggered by a signal from temperature control device installed in IGBT rectifier. UPS recovers automatically after overtemperature signal disappears.
- Page 56 Bypass fans have reached end of service life. Replacement recommended. New fans must be activated with software. Capacitor replacement Capacitors have reached end of service life. Replacement recommended. New capacitors must be activated with software. Fan replacement Power module fans have reached end of service life. Replacement recommended. New fans must be activated with software. SALICRU...
- Page 57 Inverter IGBT driver lock Inverter IGBTs are turned off. Check: 1. If power modules are installed correctly in cabinet. 2. If fuses between rectifier and inverter are damaged. Battery dead Battery service life expired. Replacement of batteries for new ones recommended. New ones must be activated with software.
- Page 58 The size of the waveforms can be enlarged or reduced. Press to display the three-phase output voltage. Press to display the three-phase output current. Press to display the three-phase bypass voltage. Press to expand the waveform. Press to reduce the waveform. SALICRU...
- Page 59 8. MAINTENANCE, WARRANTY AND SERVICE. This chapter introduces the maintenance of the UPS, including module and the Bypass module are separated, remove the maintenance instructions for the power modules, moni- them directly one after another after removing the toring of the Bypass module and method used to replace the screws that secure them to the cabinet structure.
- Page 60 Nor shall it cover any compensation for loss or damage. 8.7. TECHNICAL SERVICES NETWORK. Information about our national and international Technical Ser- vice and Support (T.S.S.) centres can be found on our website. SALICRU...
- Page 61 9. ANNEXES. 9.1. GENERAL TECHNICAL SPECIFICATIONS. MODEL SLC ADAPT TECHNOLOGY On-line double conversion, three-level PWM, DSP control INPUT 3 x 380 / 400 / 415 V AC 3 x 208 / 220 V AC MODULES AVAILABLE (kVA / kW) 30 / 27 50 / 45 20 / 18 30 / 27...
- Page 62 SALICRU...
- Page 63 Relay. A relay is an electromechanical device that functions • as a switch controlled by an electrical circuit in which, by means of an electromagnet, a set of one or several contacts is activated to enable other independent electrical circuits to be opened or closed.
- Page 64 : ....................................................................................................................................................................................................................................................................................................................................................................................................................................................................................................................................................................................................................................................................................................................................................................................................................................................................................................................................................................................................................................................................................................................................................................................................................................................................................................................................................SALICRU...
- Page 65 : ....................................................................................................................................................................................................................................................................................................................................................................................................................................................................................................................................................................................................................................................................................................................................................................................................................................................................................................................................................................................................................................................................................................................................................................................................................................................................................................................................................USER'S MANUAL SLC ADAPT UNINTERRUPTIBLE POWER SUPPLY (UPS)
- Page 66 Avda. de la Serra 100 08460 Palautordera BARCELONA Tel. +34 93 848 24 00 Fax +34 93 848 22 05 services@salicru.com SALICRU.COM The Technical Service and Support (T.S.S.) network, Com- mercial network and warranty information are available in website: www.salicru.com...
Need help?
Do you have a question about the SLC ADAPT Series and is the answer not in the manual?
Questions and answers